 Local Panel by Nesdzo
Variable Node
You can save the variables you intend to use later using the variable node.
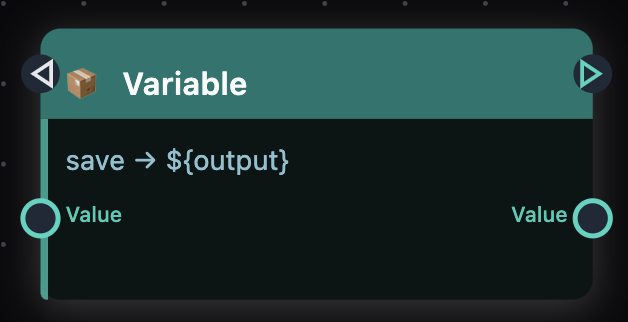
It is a node that takes the value of a variable as input and also returns it as output.
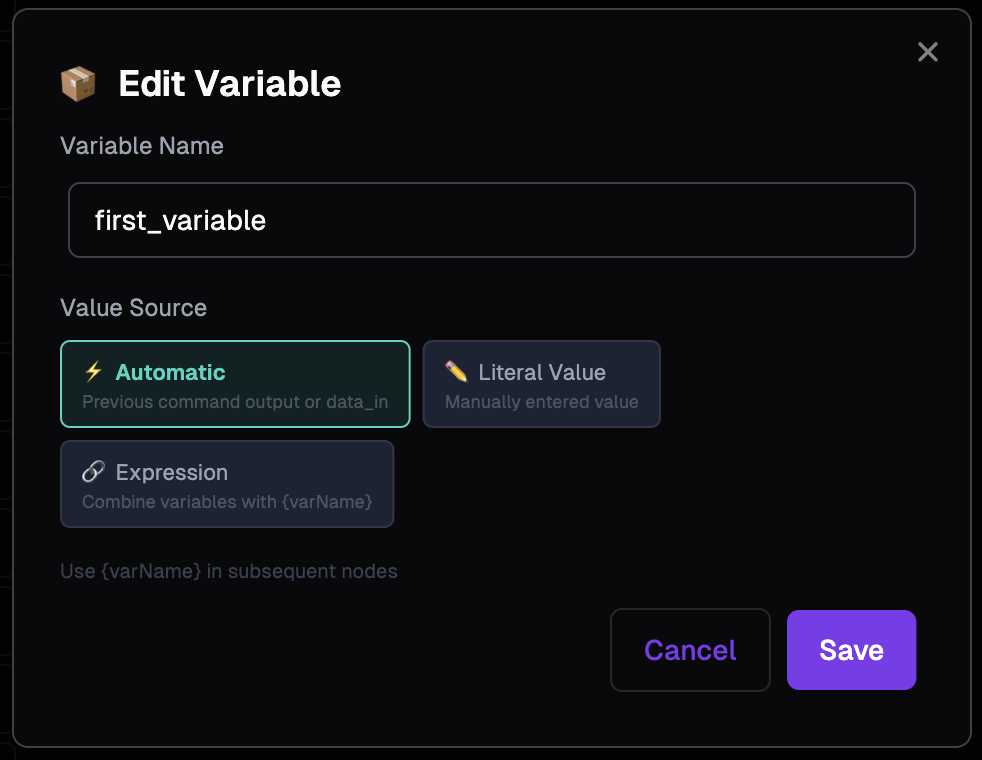
We enter the name of our variable in the first field and select how the value is to be entered from the options below. It is currently selected automatically; when it is selected automatically, the variable’s data comes from the input field and there is no option to enter it manually.
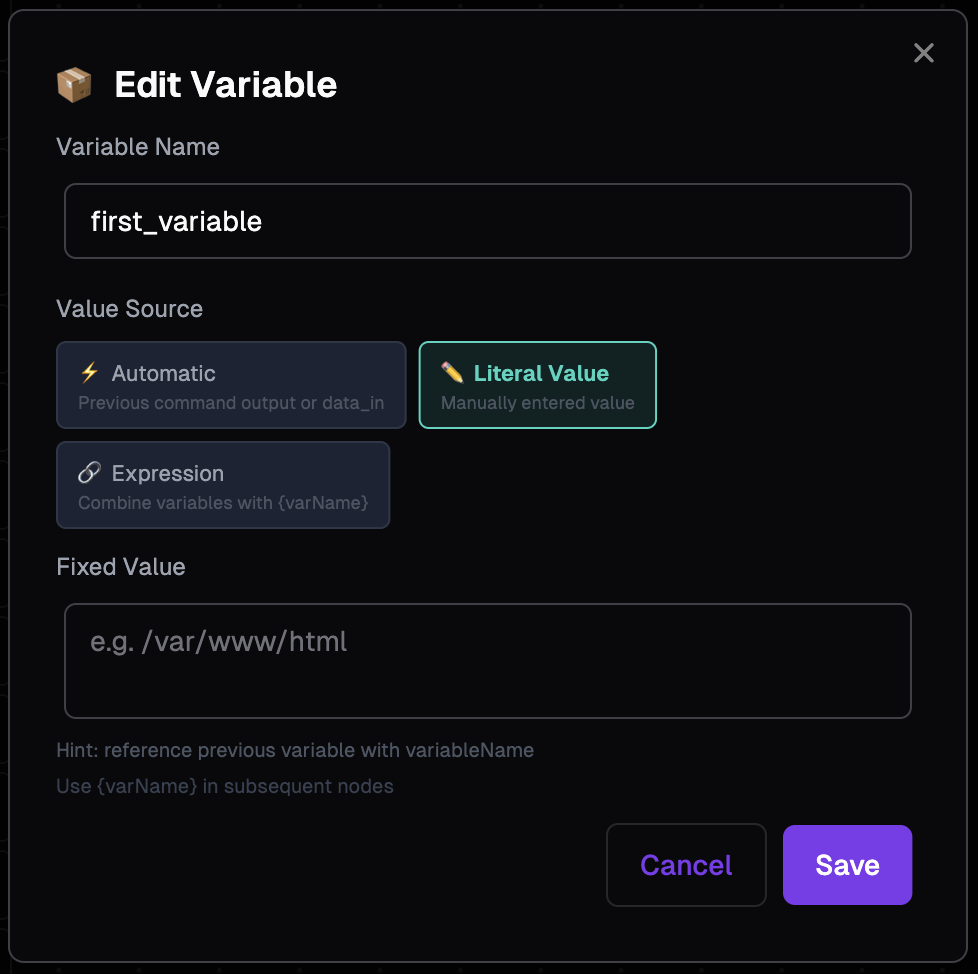
When a literal is selected, a field appears below where you can enter the variable’s value. Whatever you type here becomes the variable’s value.
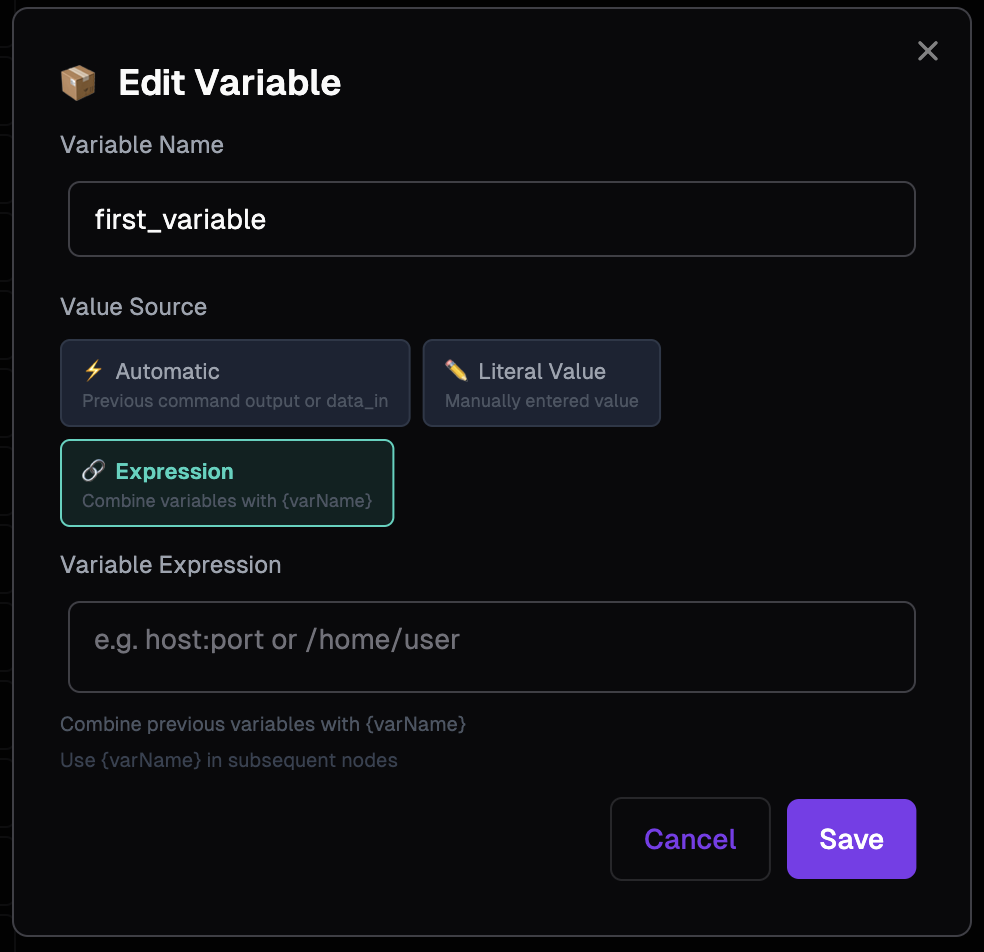
This is the mode you can use when you want to combine it with other variables. You can use another variable by writing its name inside curly brackets. To be clear, there is no technical difference between Expression mode and Literal mode; this is simply a feature added to make grouping and reading easier. You can do everything you do in Expression mode in Literal mode, and everything you can do in Literal mode in Expression mode.
Basic Example
We’ve looked at the command node together before; for our variable node example, let’s create an ‘echo’ example using a variable.
Total Time: 2 minutes
Set the Variable Node
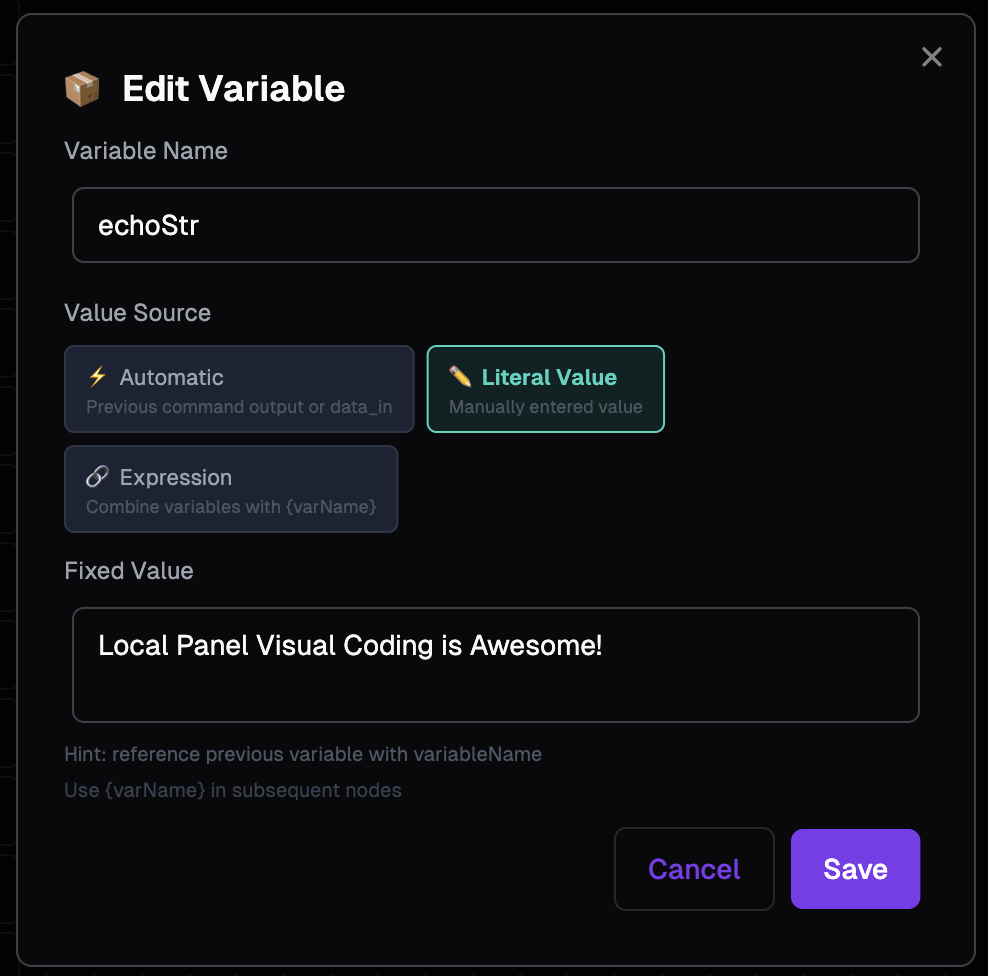
Drag the variable node onto the code screen; after double-clicking it, switch to literal mode and, as you can see in the screenshot, set the variable name to ‘echoStr’ and the value to Local Panel Visual Coding is Awesome!, then save it.
Set the Command Node
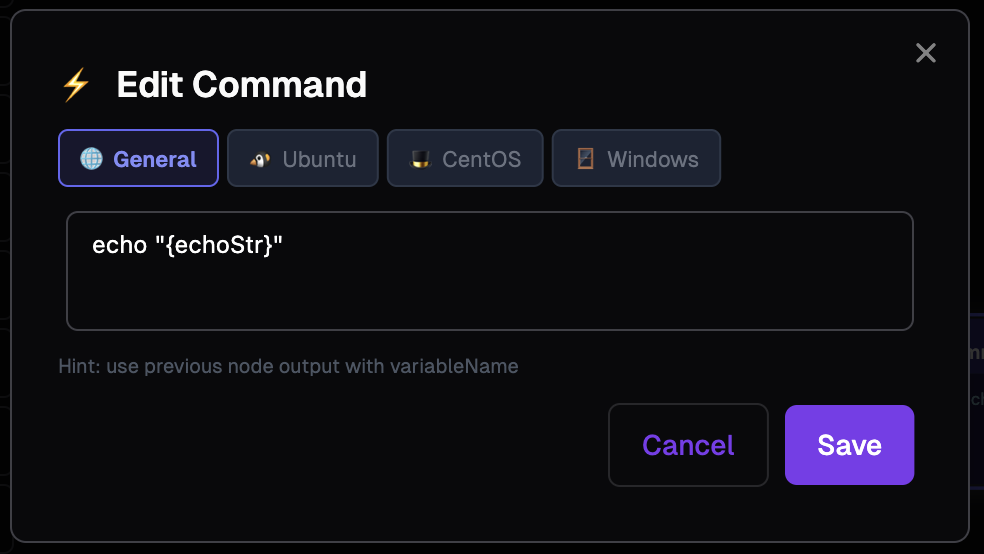
As we are doing this for illustrative purposes, it will be sufficient to complete only the ‘general’ section. Enter the command echo "{echoStr}" – as shown in the image – into the code area. Once you have defined the variables, you can use them anywhere; all you need to do is write the variable name within curly brackets.
Connect the nodes to each other
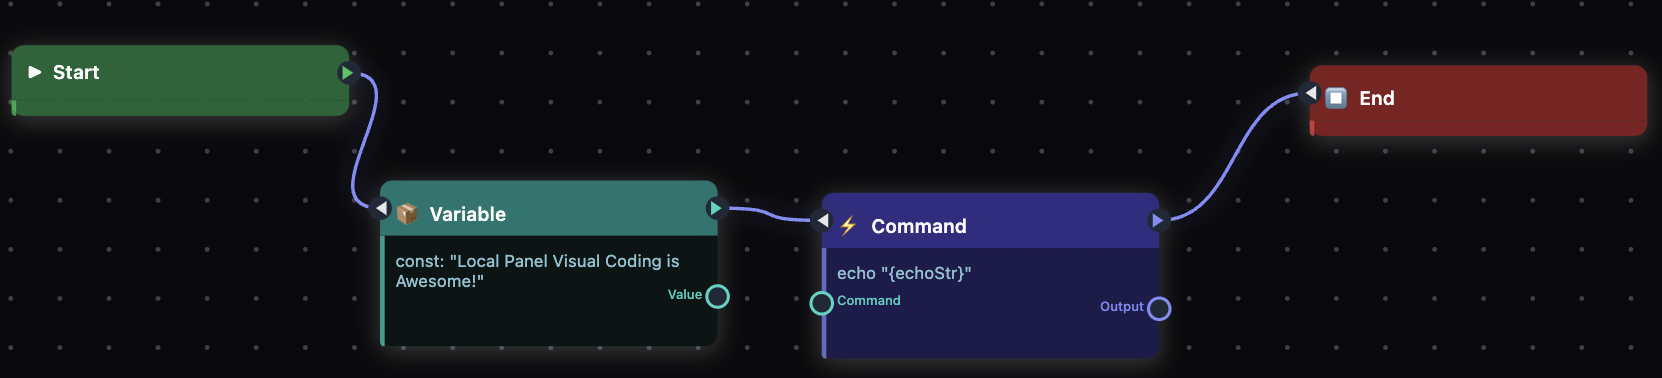
You can connect the nodes to one another in the order shown in the image.
Result
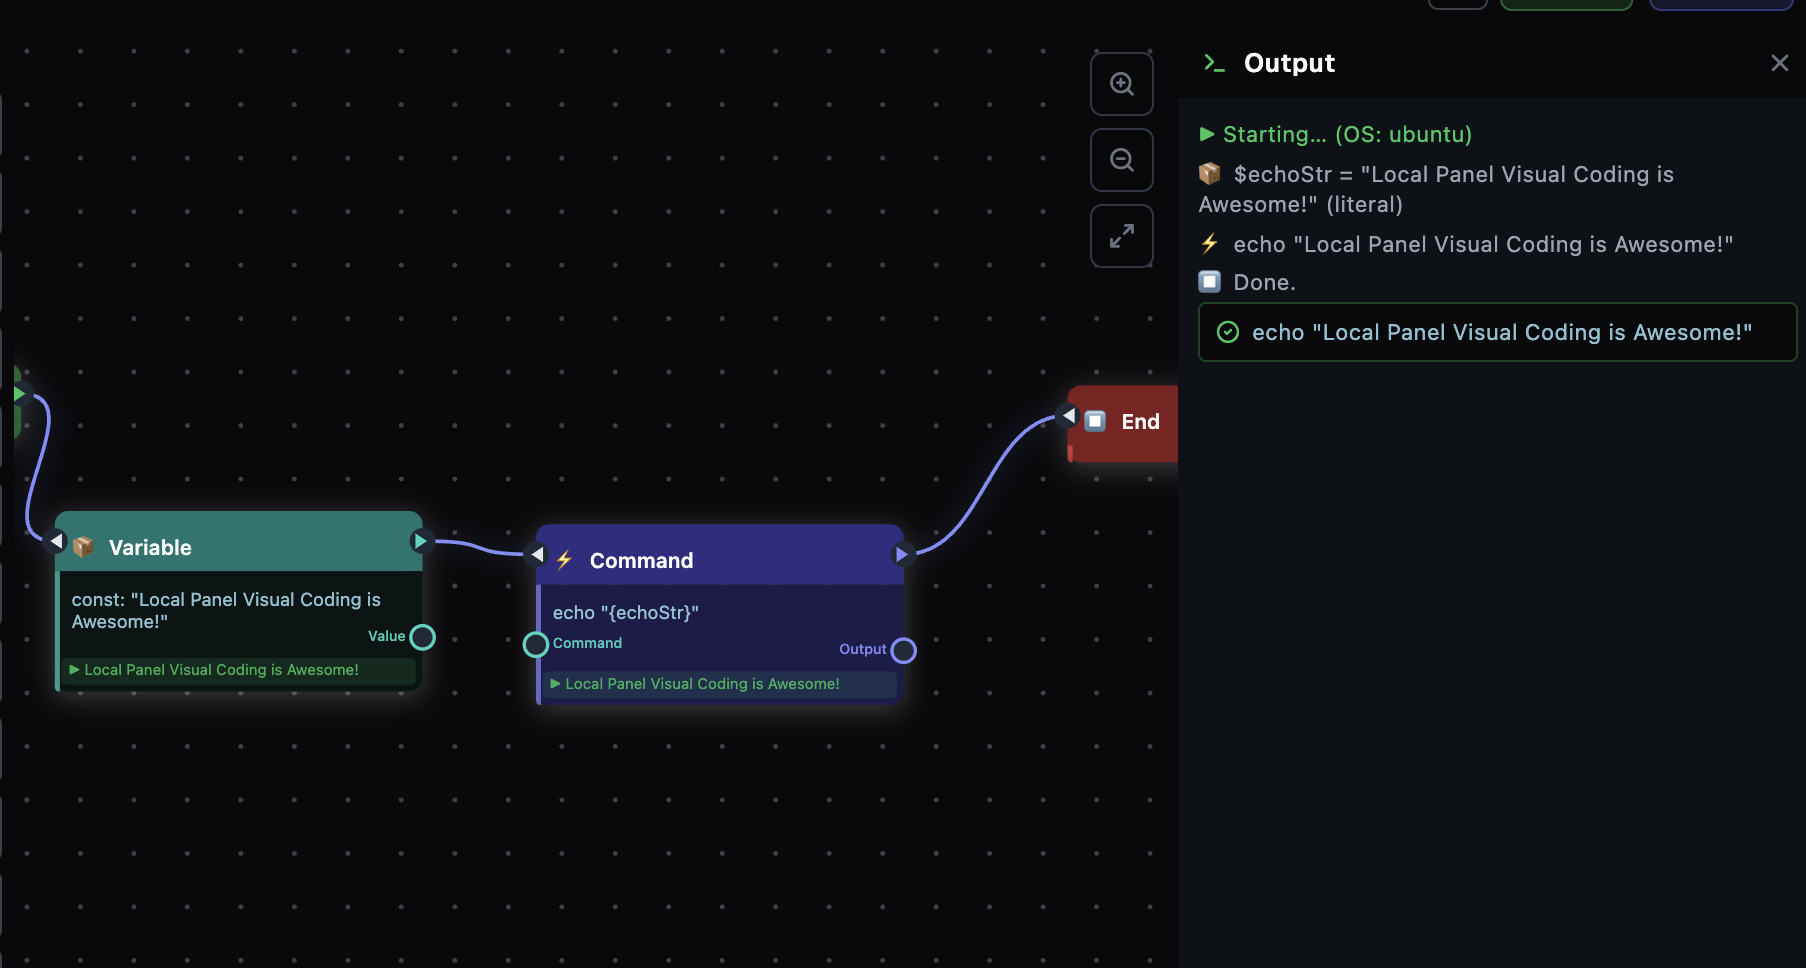
Using the ‘Run’ button at the top right of your screen, you can run the code you have written on the server you are connected to and view the result. If you have done everything correctly, the result should look like the one shown in the image.
Still stuck? Email contact@nesdzo.co.uk — we're happy to help.