 Local Panel by Nesdzo
Write Bash with the Visual Editor
Local Panel features an advanced drag-and-drop Bash visual editor. You can write a Bash script that might otherwise take you hours to complete in just a matter of seconds.
Prerequisites:
- Local Panel
- A Server with SSH
- A Windows or macOS computer
- SMTP server, port, username and password
Now let’s code a system that sends us an email whenever someone connects to our server via SSH, so that we’re notified if someone connects whilst we’re asleep at night or out having fun with friends.
Total Time: 10 minutes
-
Open “Commands” tab
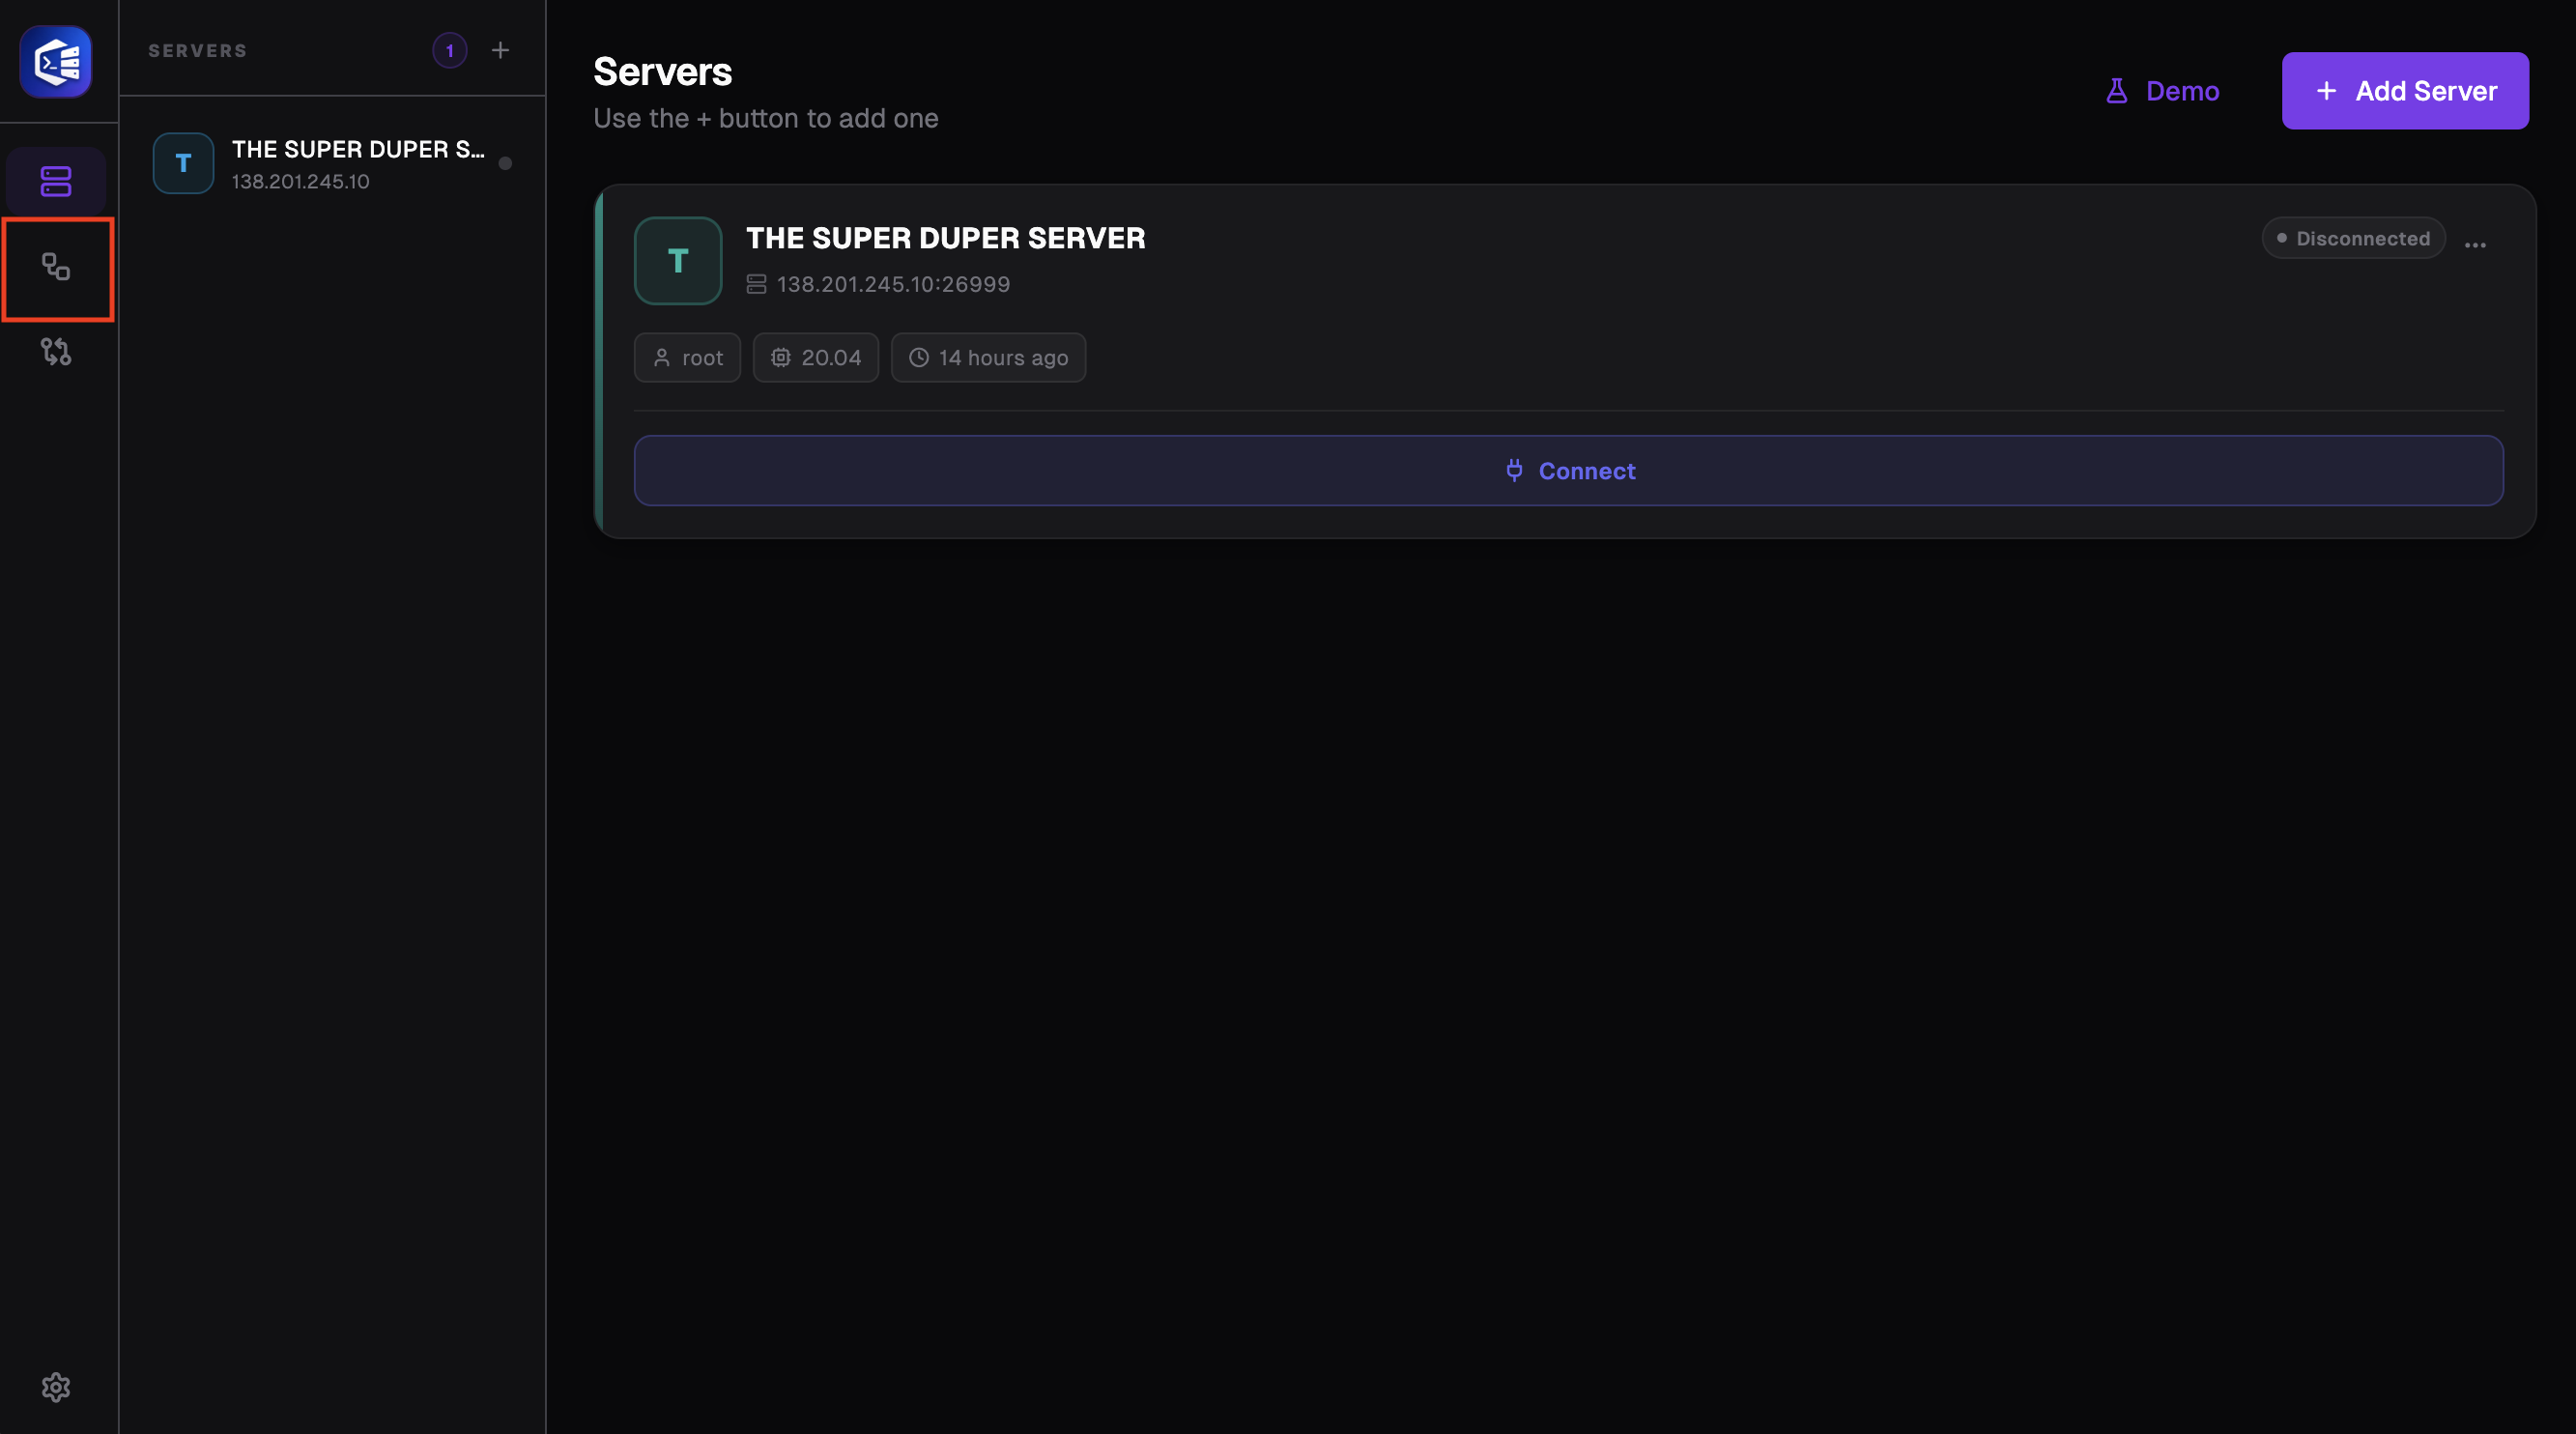
Use the second button from the top in the navigation bar on the far left to go to the “Commands” tab.
-
Add new Visual Command
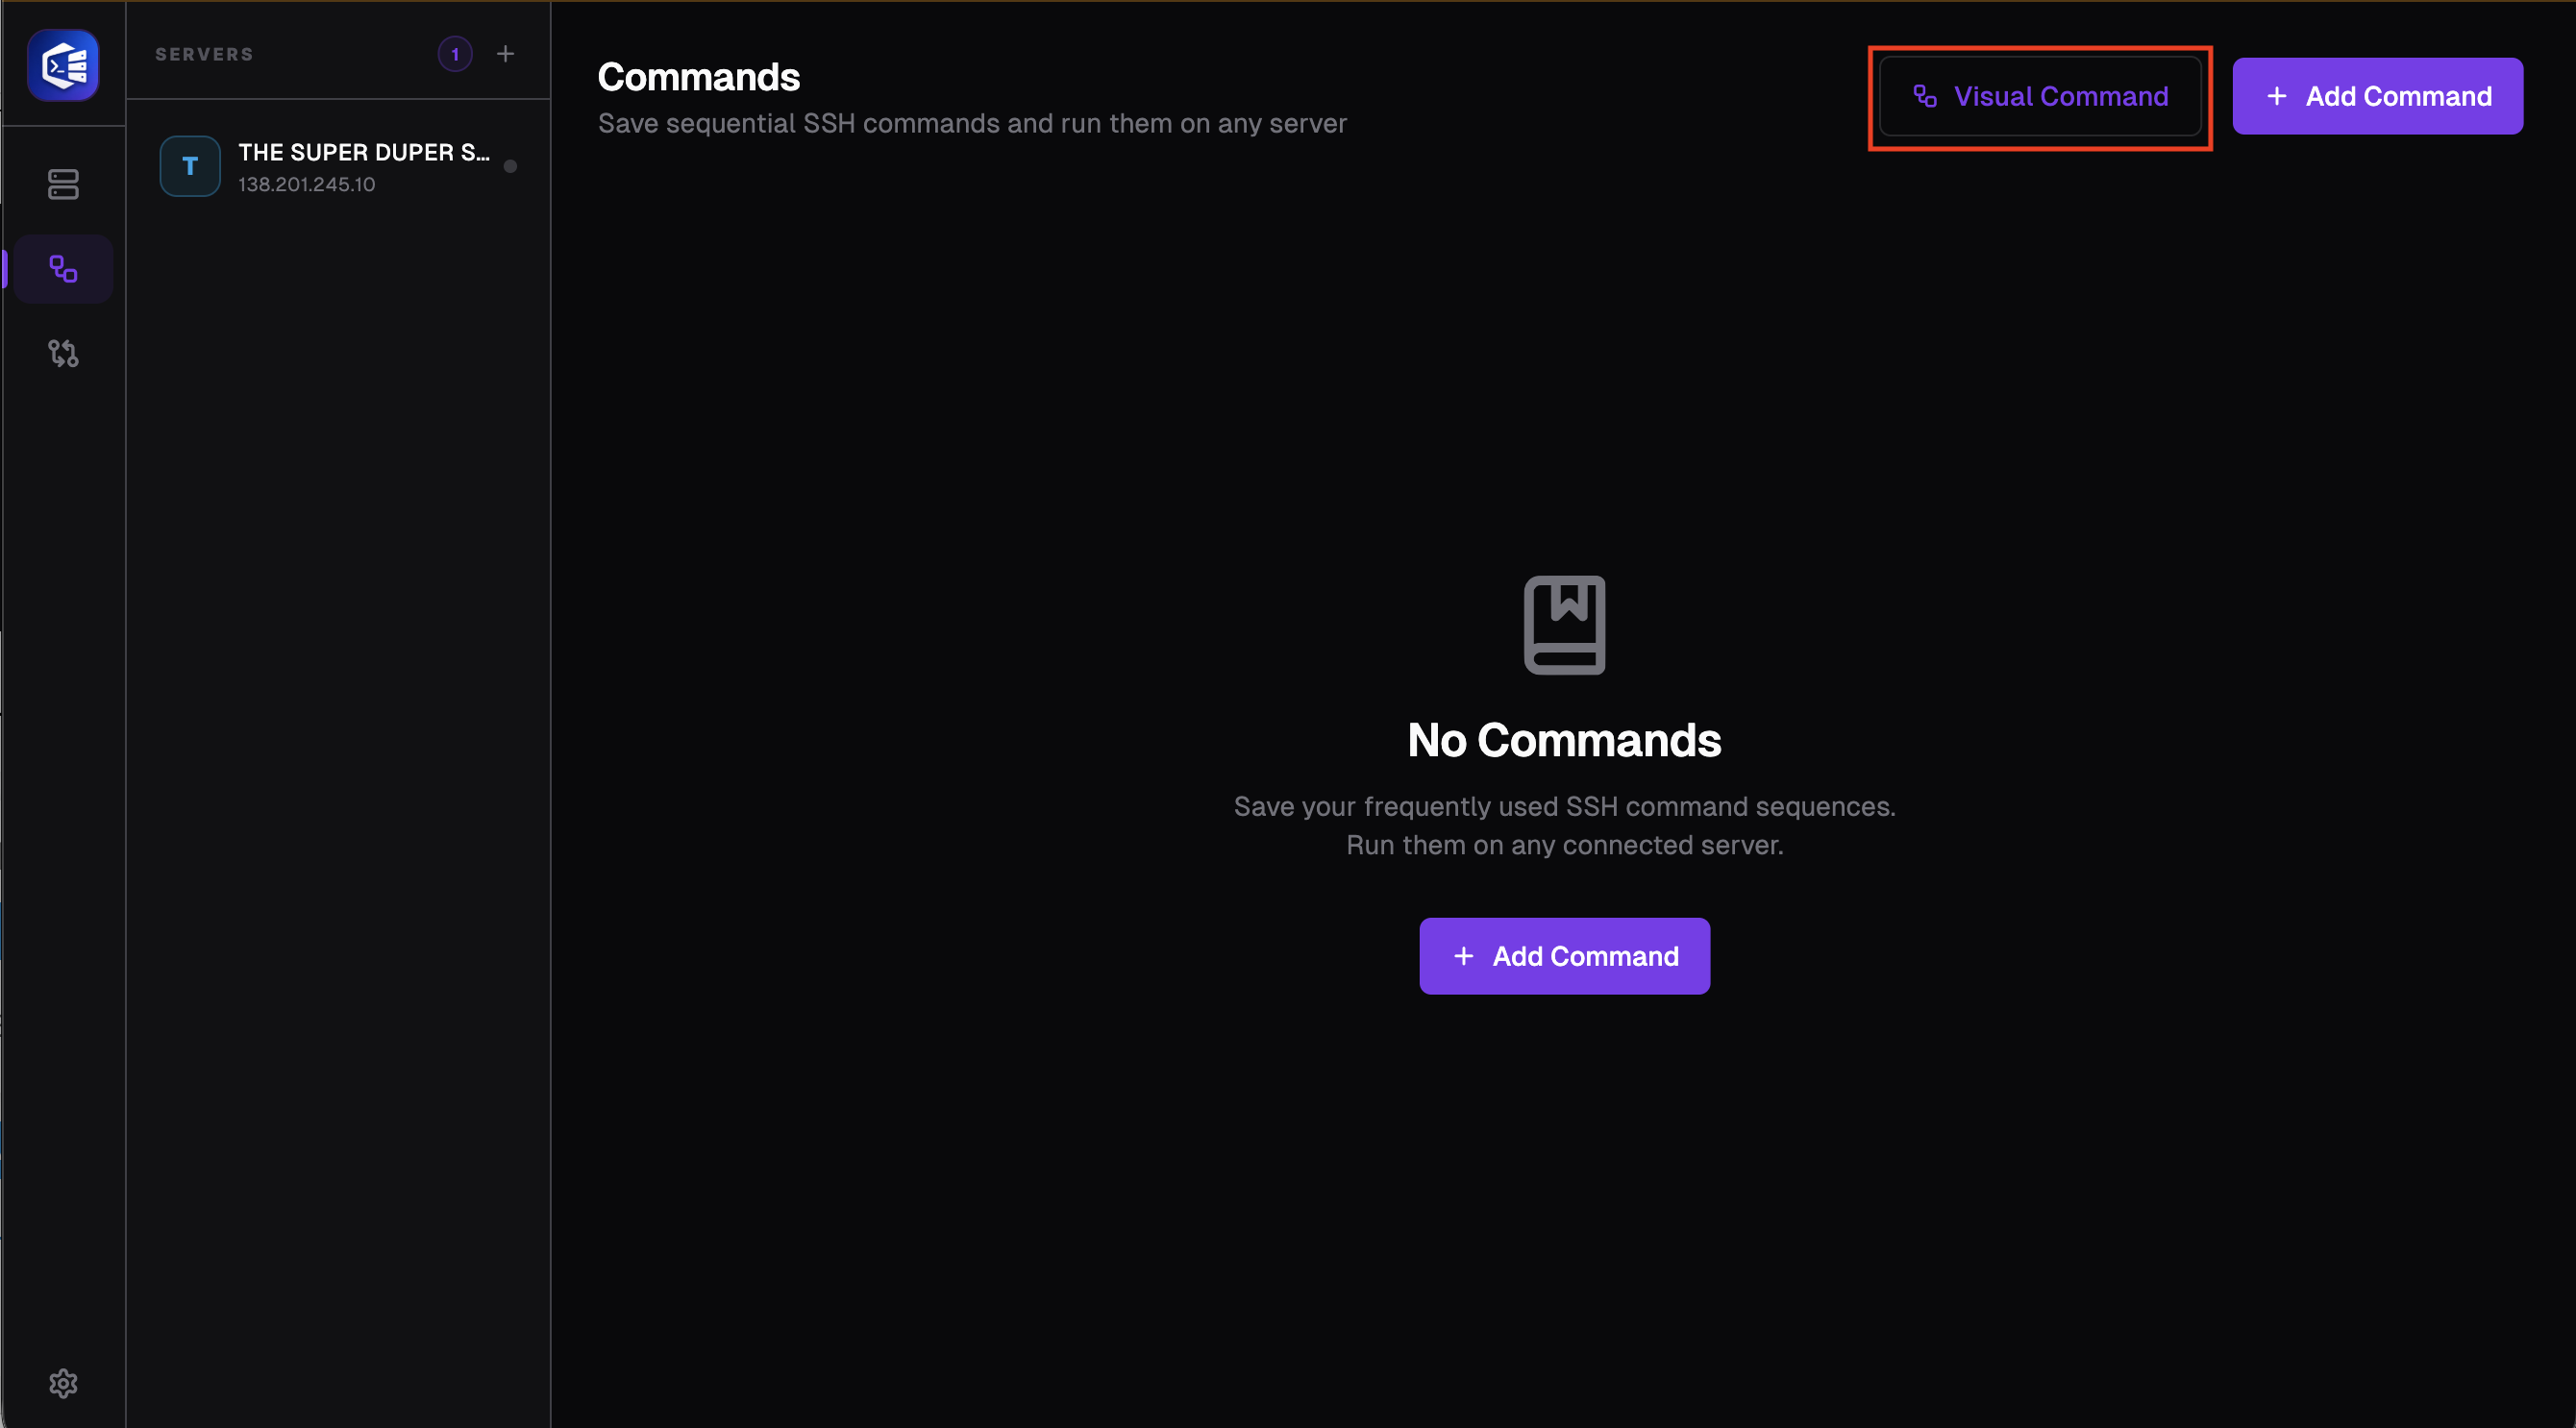
Click the “Visual Command” button in the top-right corner to switch to the visual coding screen. This is where we will do our coding.
-
Add and connect necessary nodes
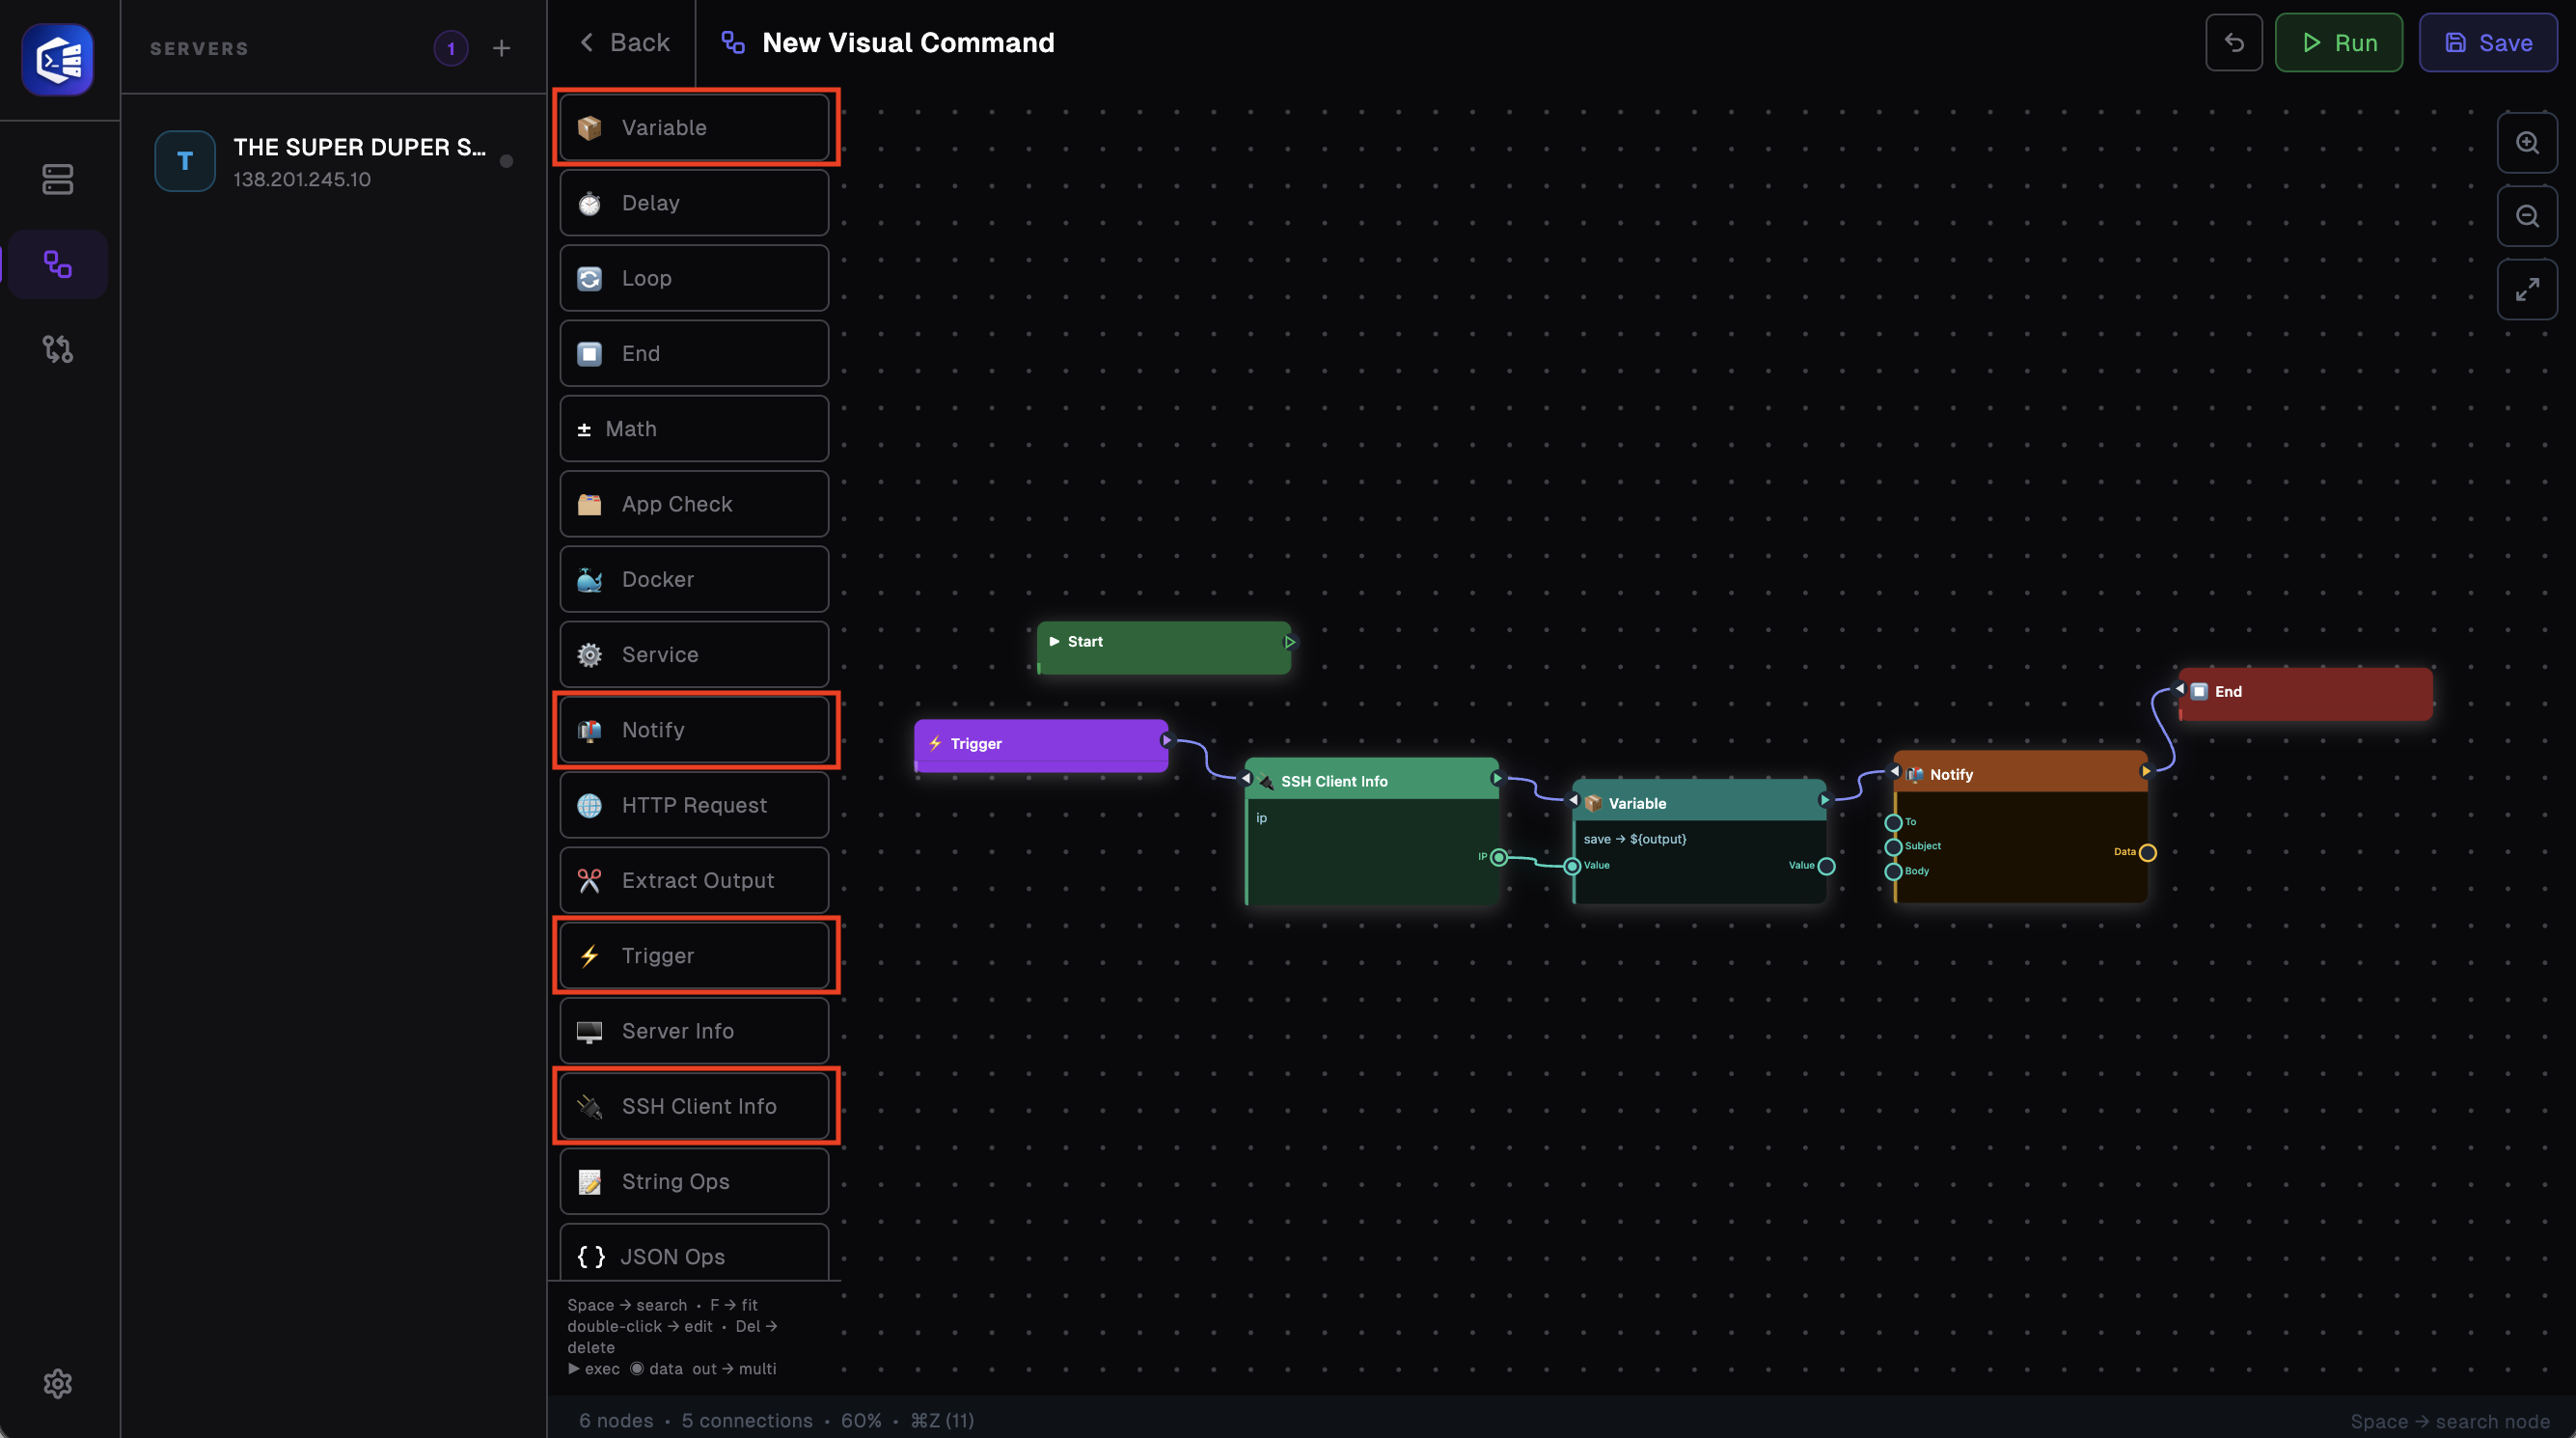
Add the displayed nodes to the node space by dragging and dropping them from the left-hand panel, clicking on them once and then clicking in the node space, or pressing the space bar in the node space to search, and connect them to one another as shown. Please note that the IP parameter of the SSH Client Info node is linked to the Value parameter of Variable node.
-
Setting up “Trigger” Node
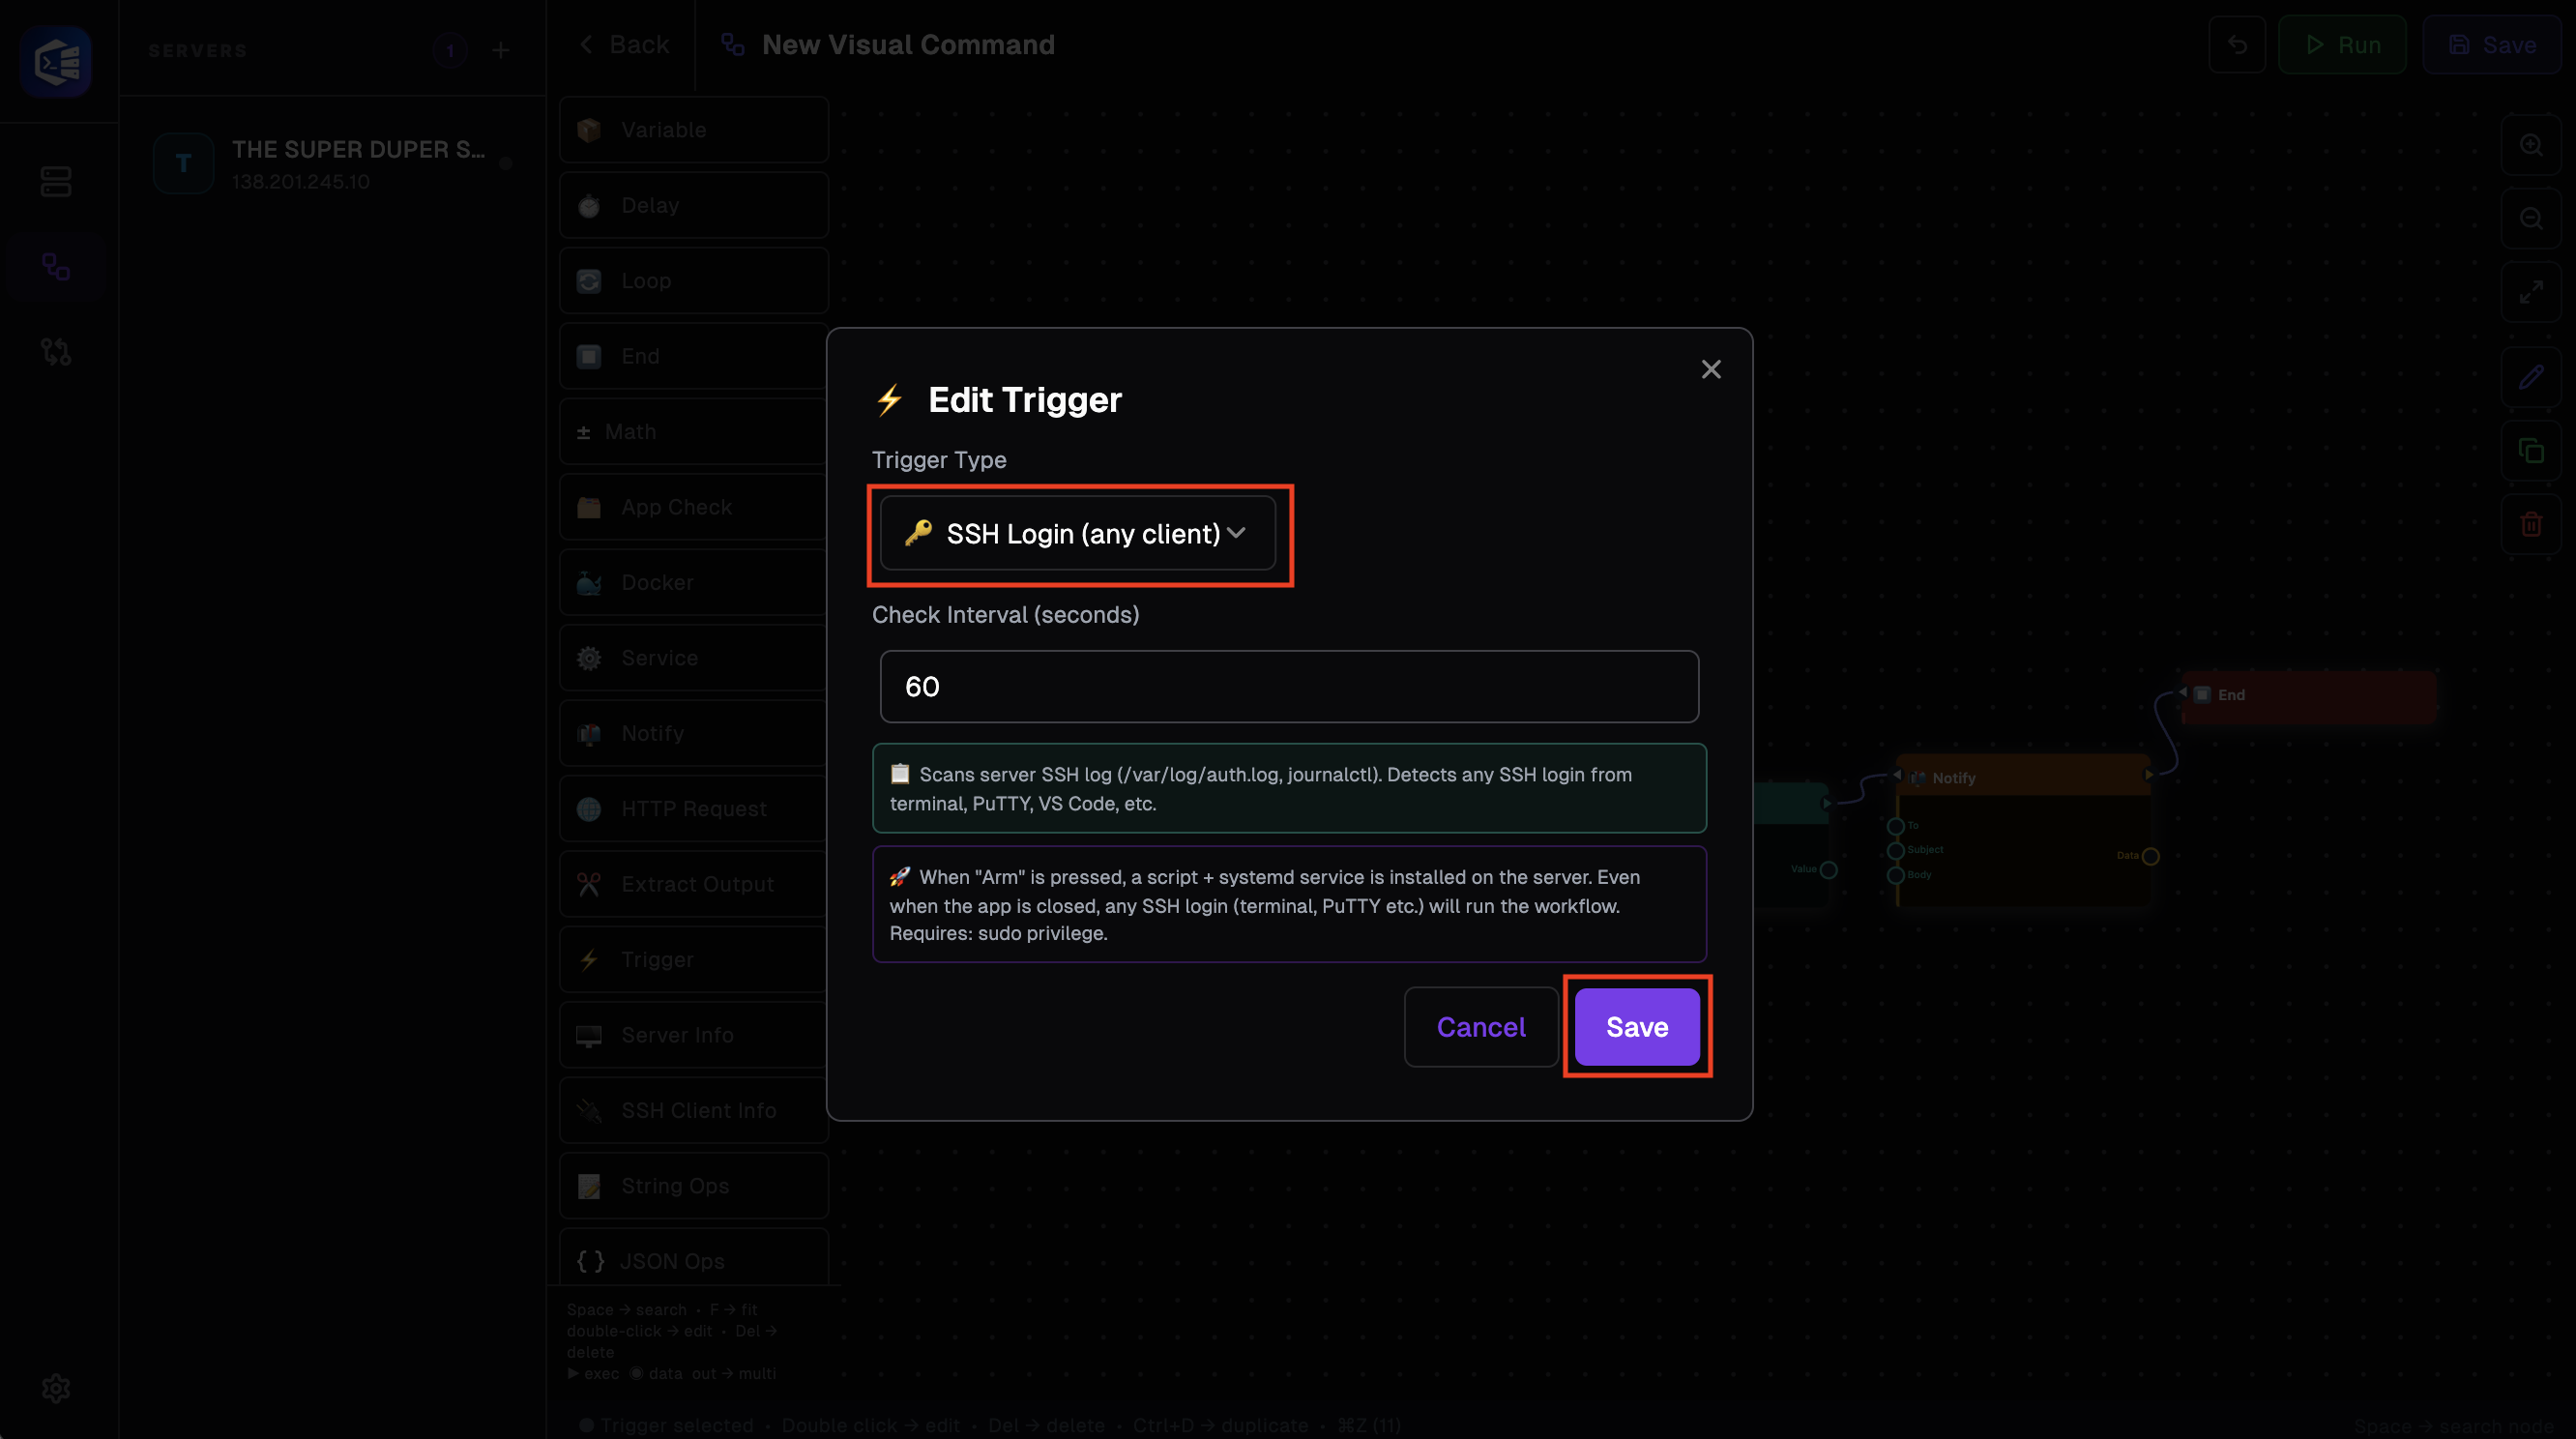
The Trigger Node is set up this way by default, but please ensure that “SSH login” is selected for your Trigger Node.
-
Setting Up “SSH Client Info” Node
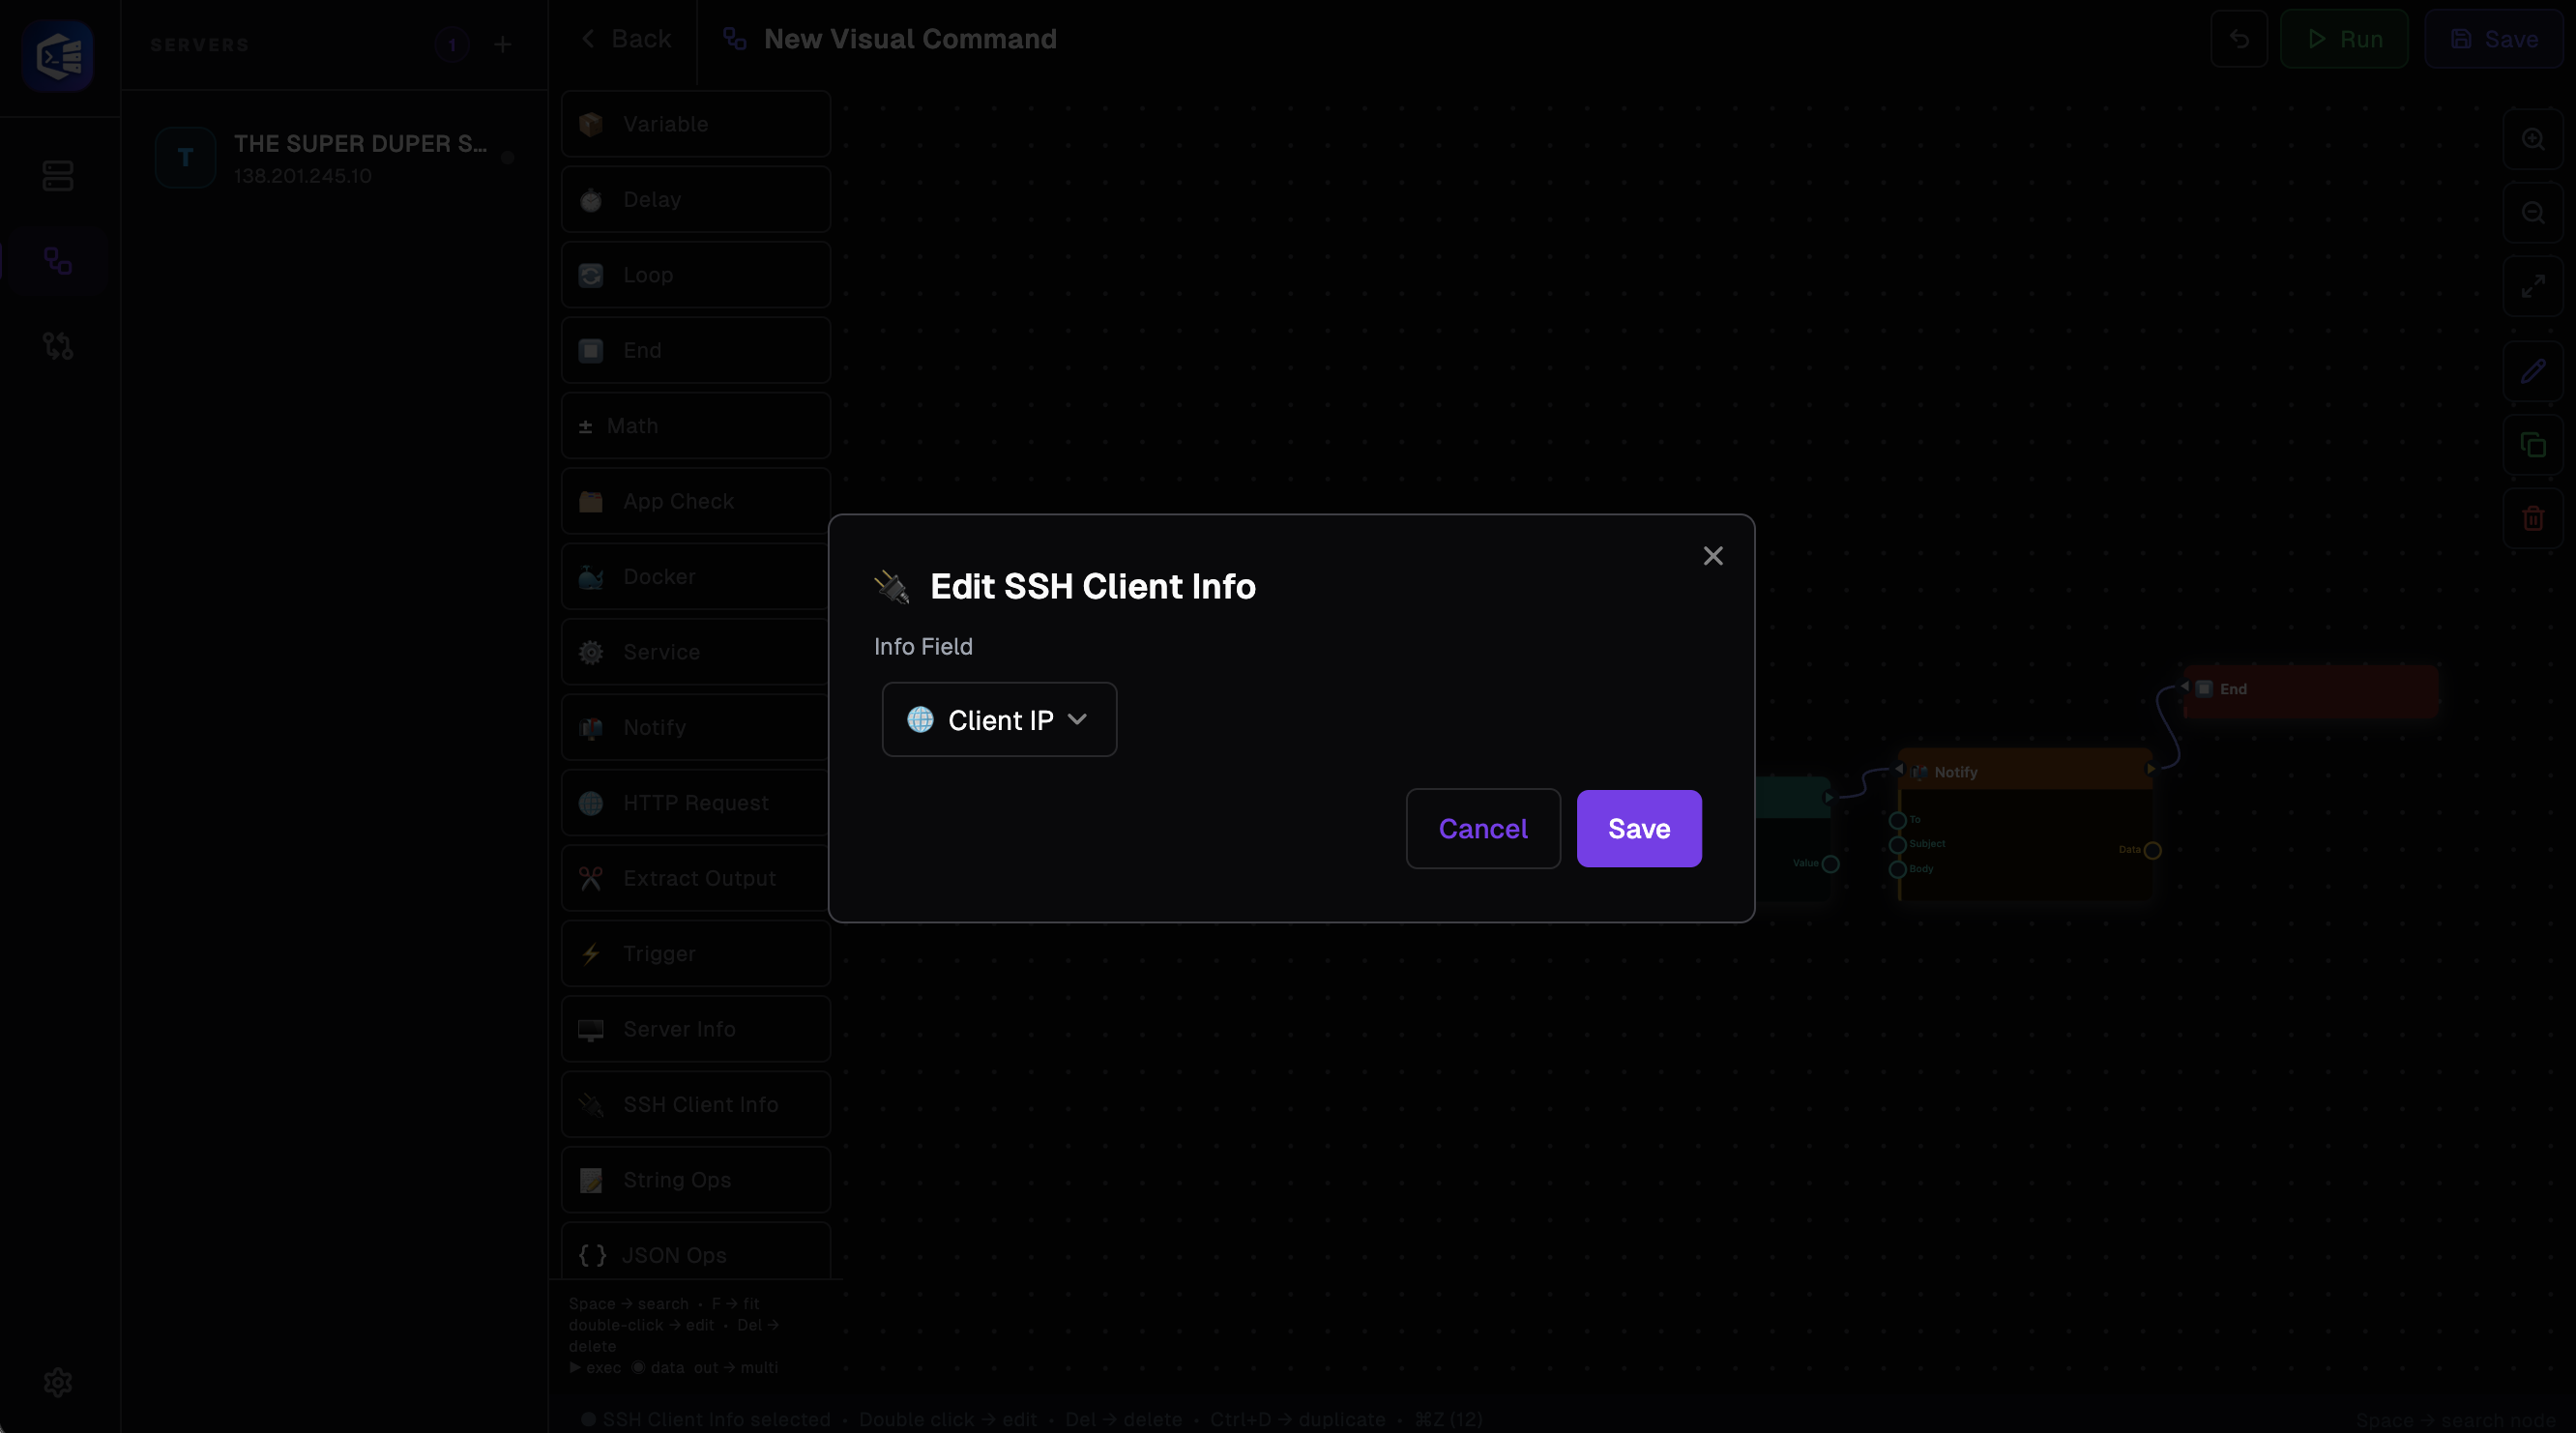
The SSH Client Info node is also set by default to return the client’s IP address, but please check to be sure.
-
Setting Up “Variable” Node
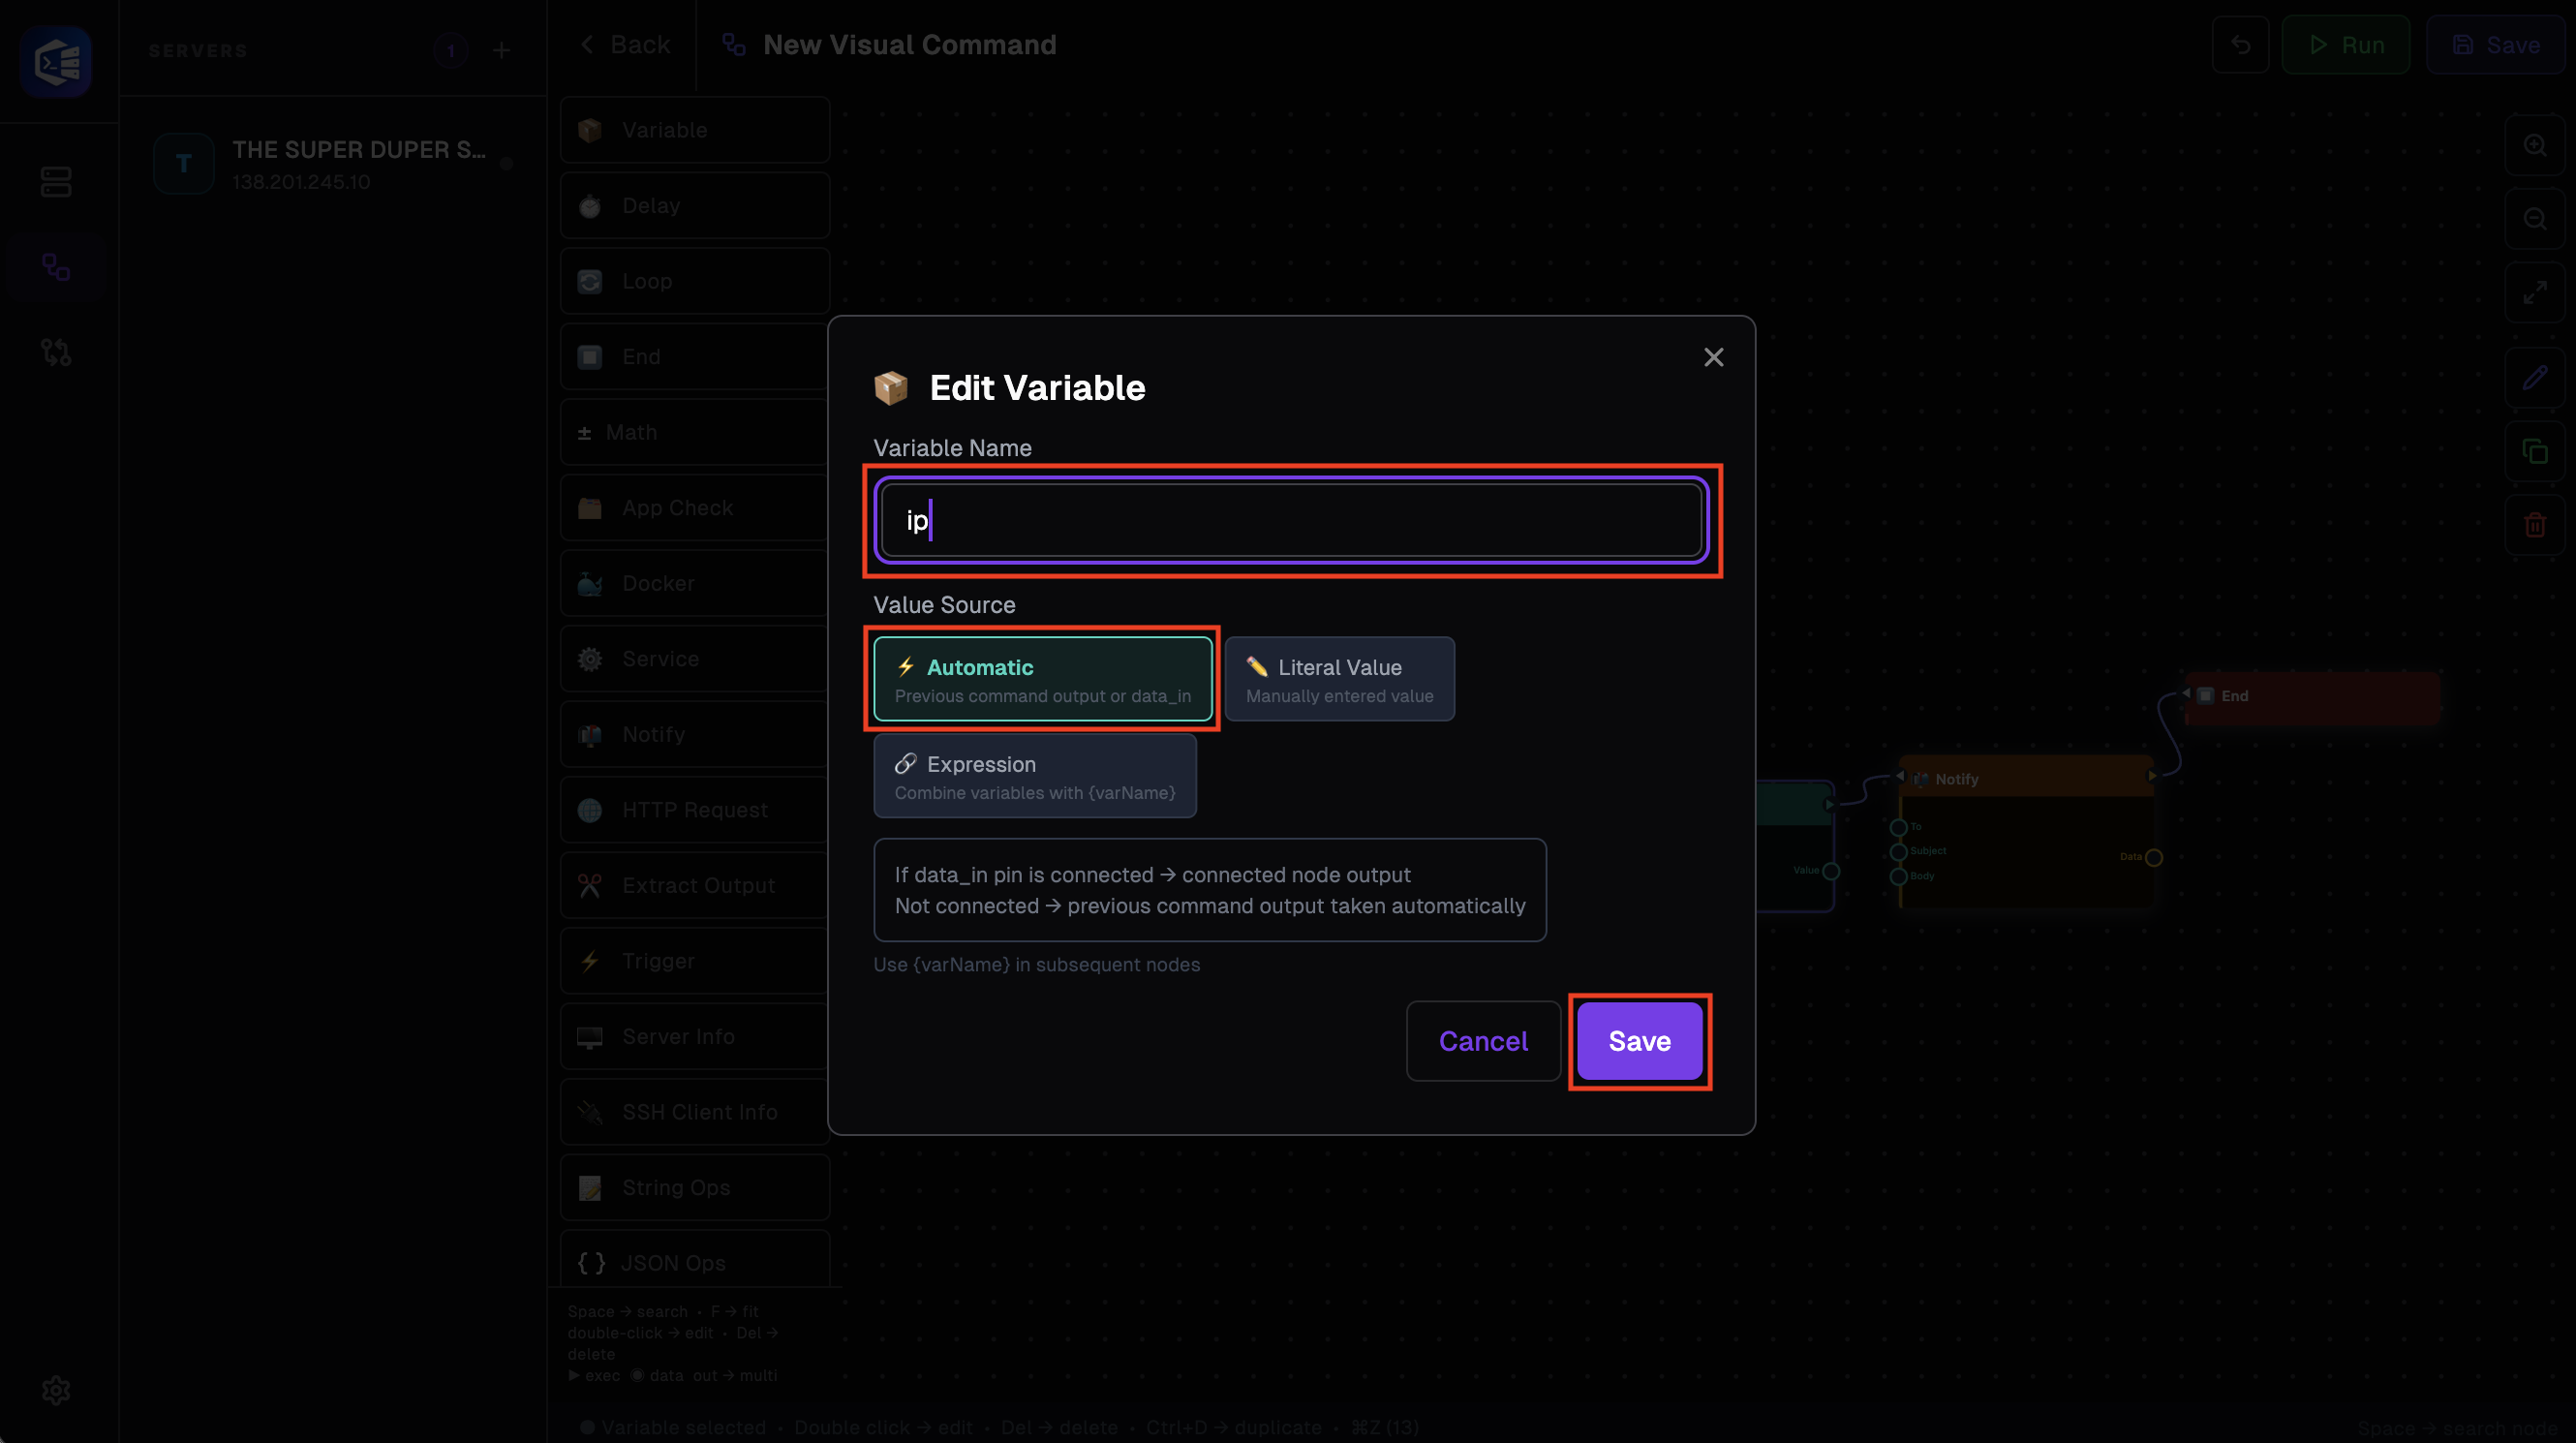
Rename the variable to “ip” as shown in the image, and once you have checked that your node looks the same as in the image, save it.
-
Setting Up “Notify” Node
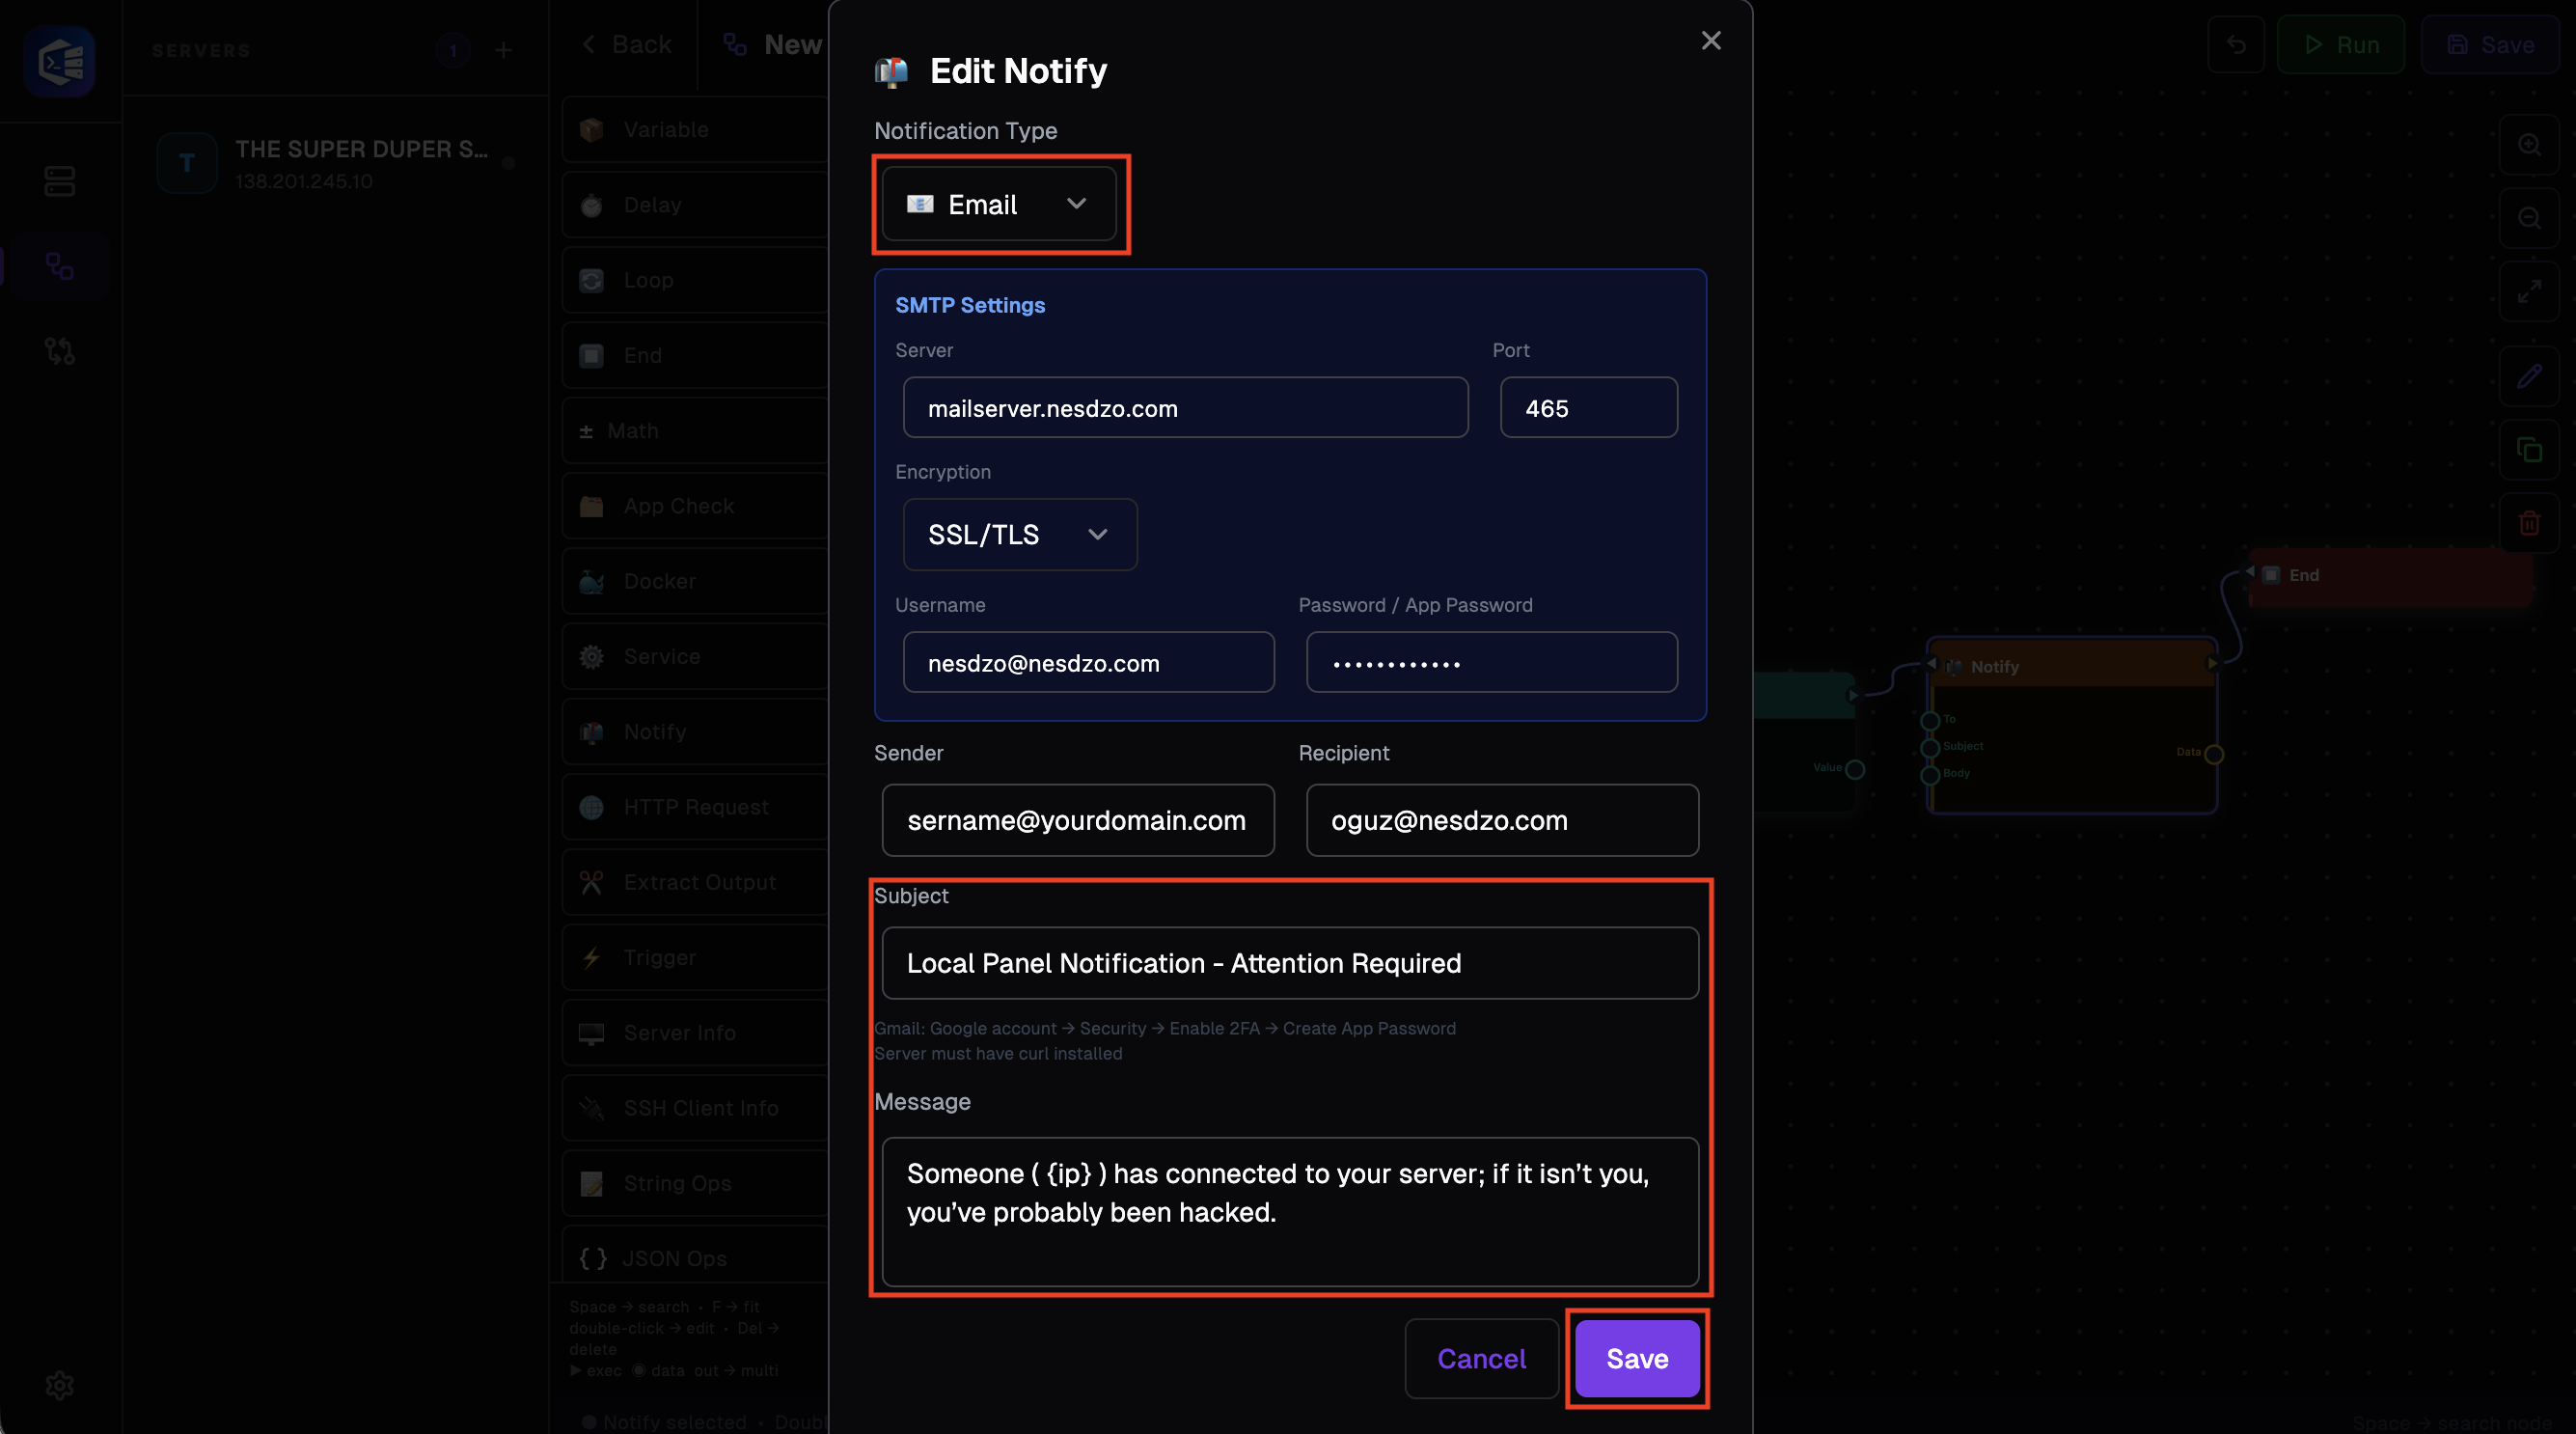
Once you have configured your SMTP settings, create an email template for yourself using the IP variable (you can use variables within curly brackets, such as ).
-
Save the visual command
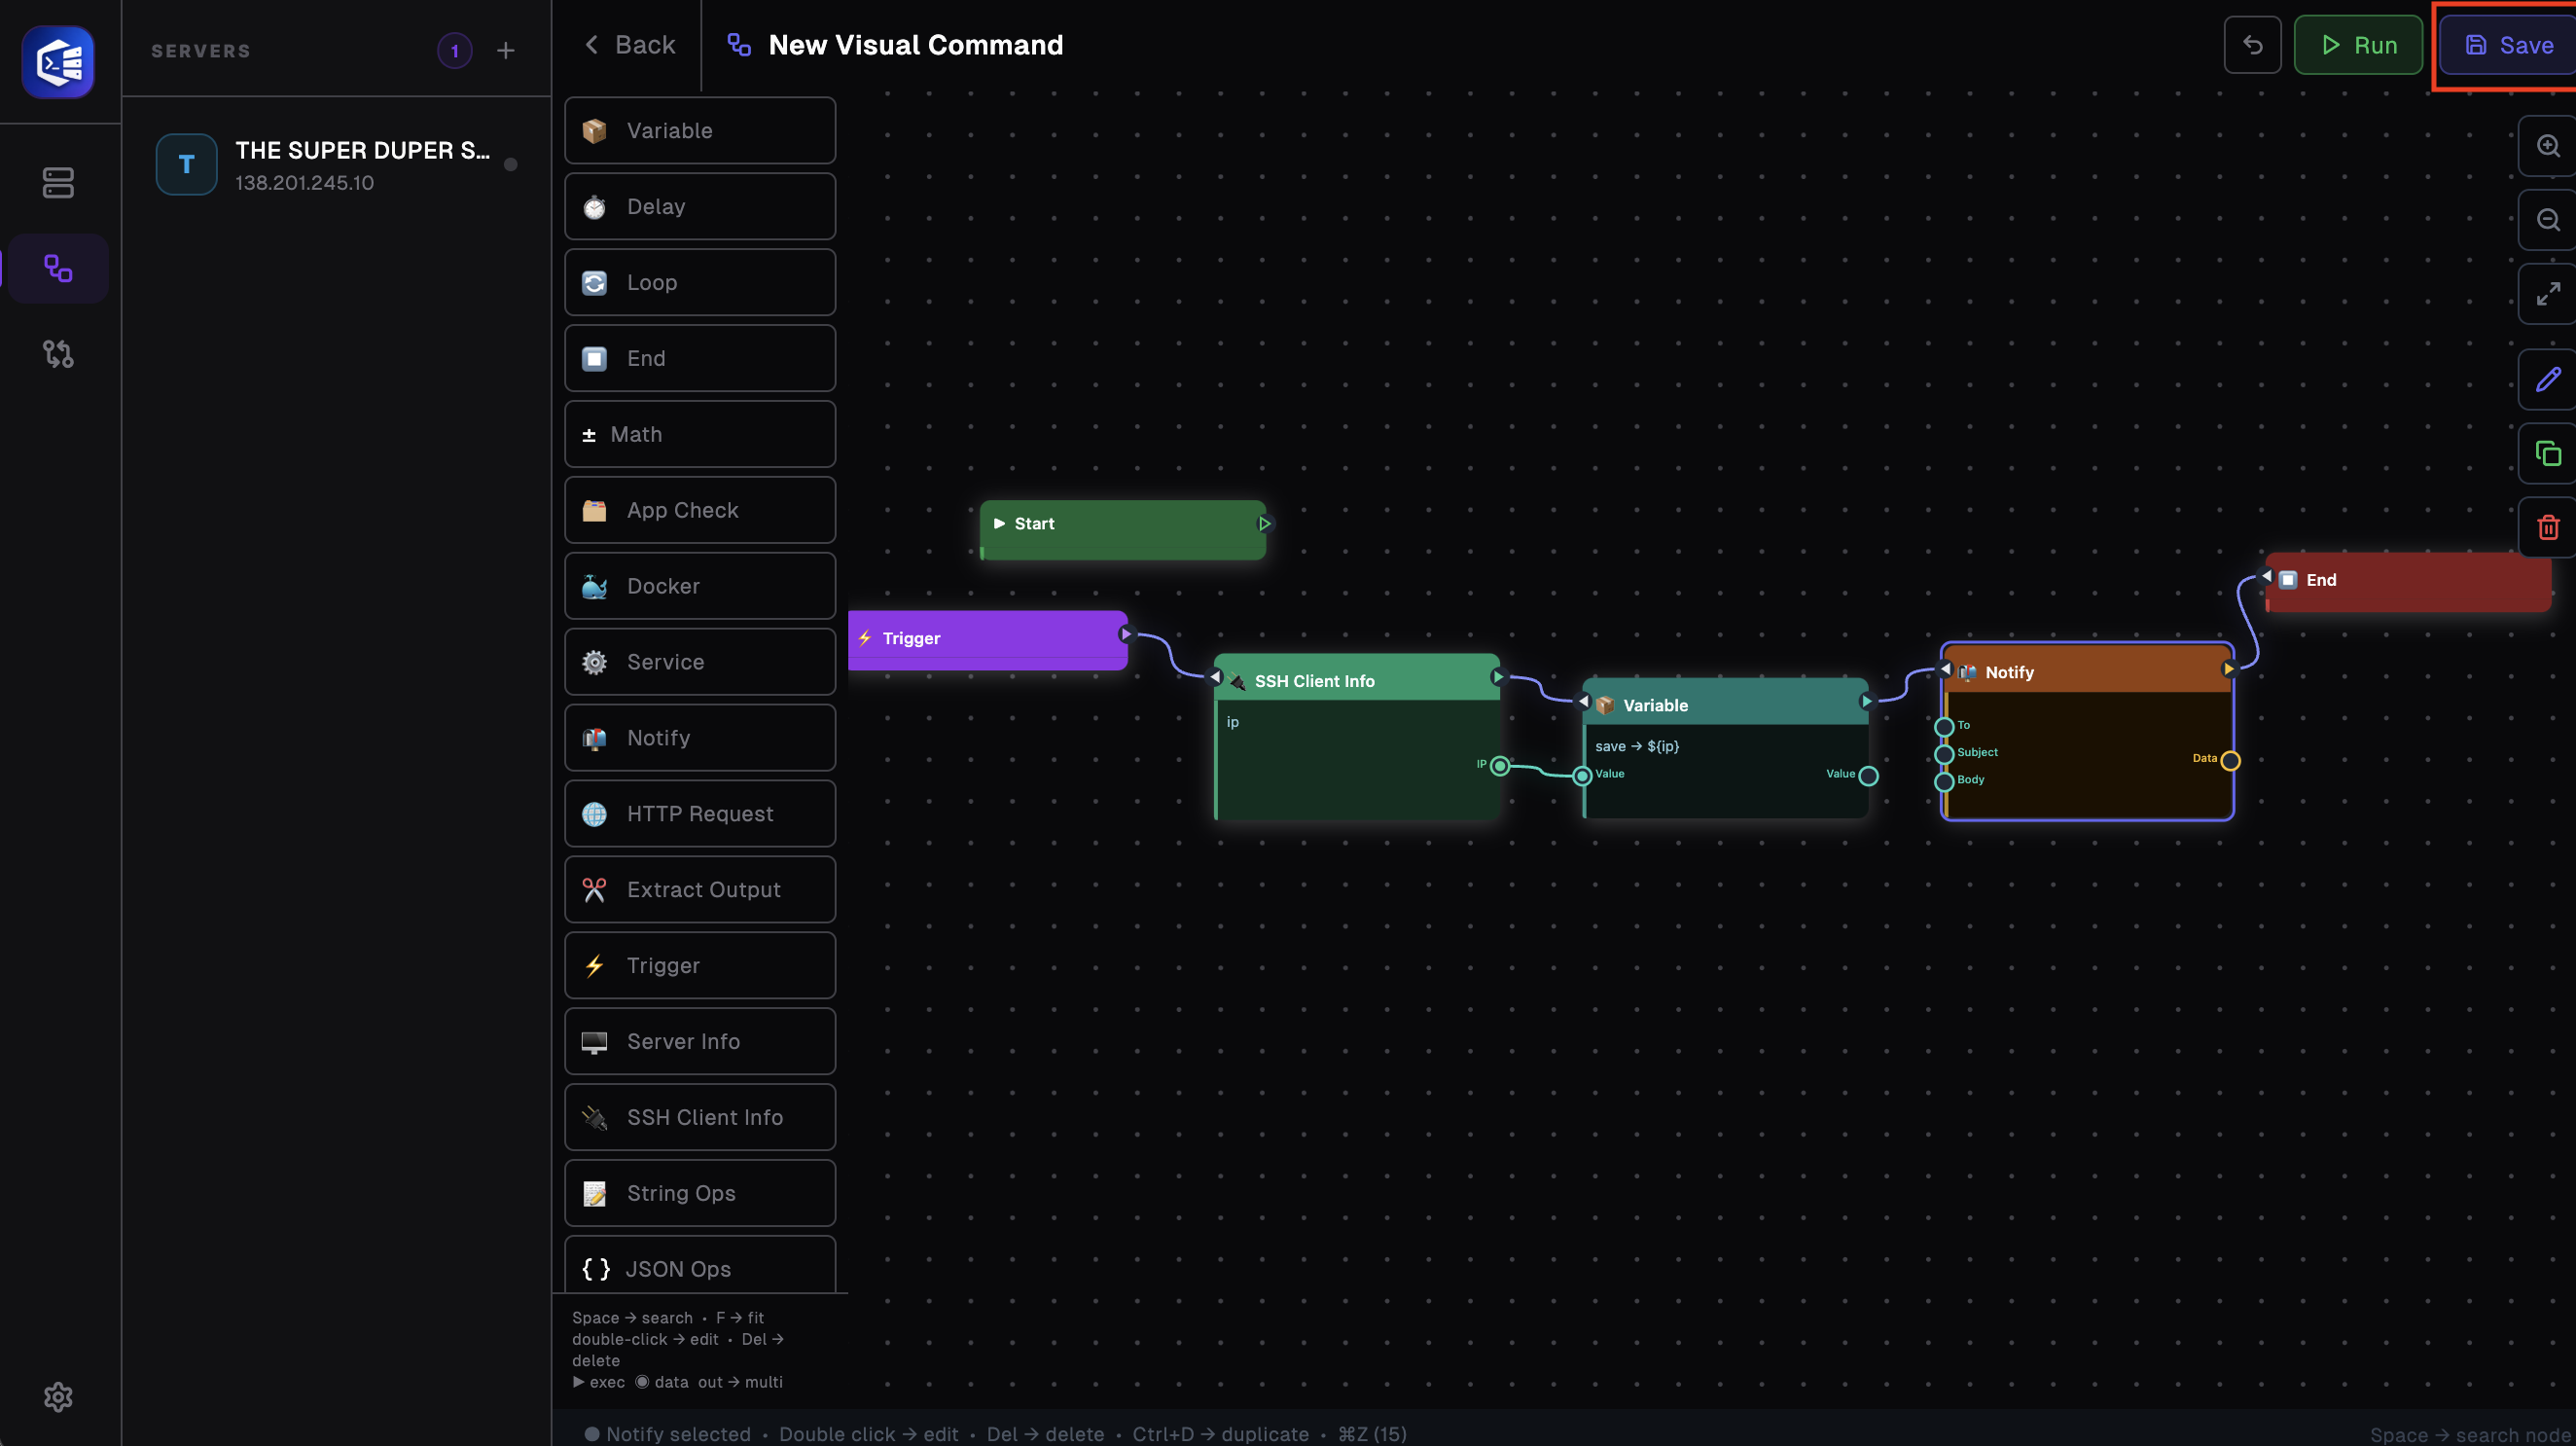
Save your code using the “Save” button in the top-right corner or the Cmd/Ctrl + S shortcut. A modal will appear on your screen asking you to name your command; you can name it whatever you like. Once it has been successfully saved, a “Saved” notification will appear in the bottom-right corner.
-
Get back to Commands Screen
Just as you did in the first step, or by using the “Back” button in the top-left corner of the visual coding screen, return to the screen containing all your commands.
-
Arm your command
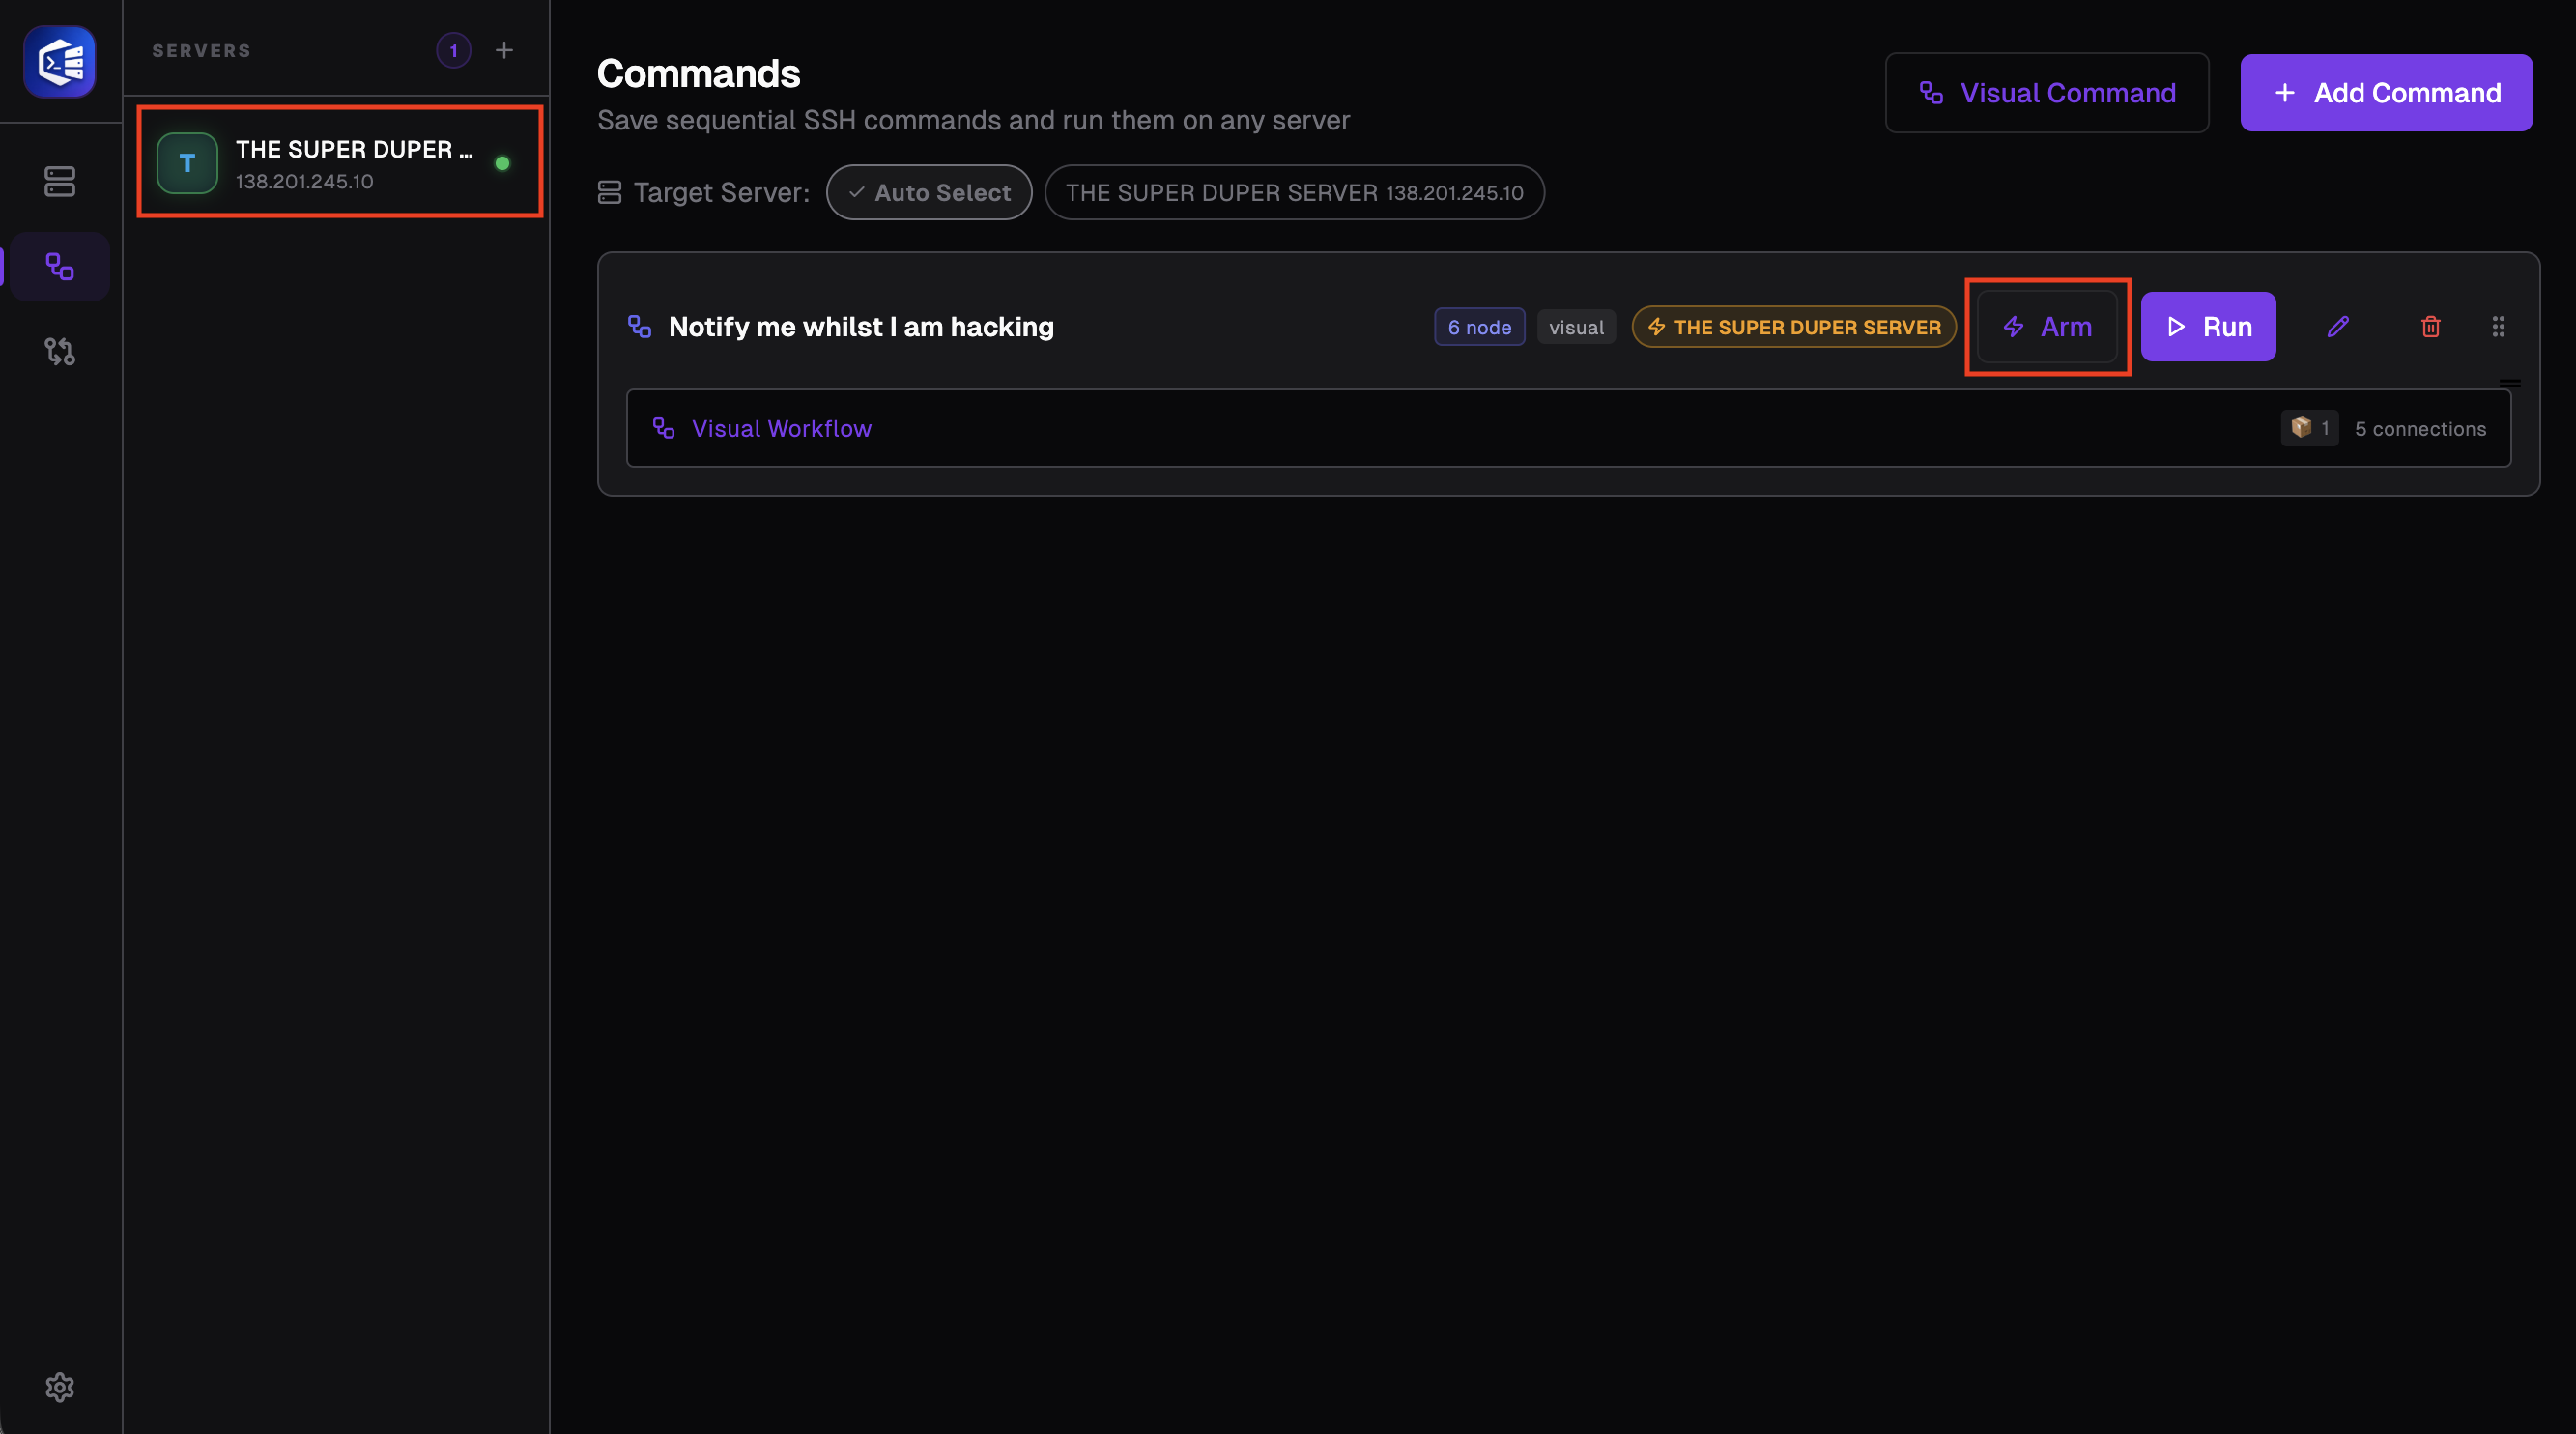
For this step, you must be connected to your server. Once you are sure you are connected to your server, you can run the ‘trigger’ command we wrote using the ‘Arm’ button. As shown in the image, if you see your server’s name in orange to the left of the ‘Arm’ button, you have configured it correctly. Congratulations – you will now receive an email with every SSH connection.
-
Test the bash
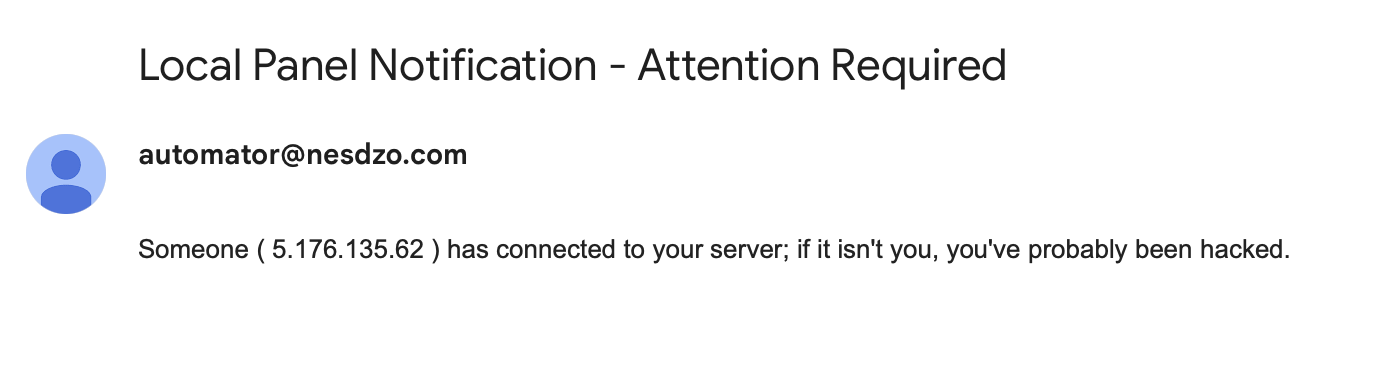
Now try connecting to your server either by disconnecting and then reconnecting via the local panel, or using any other SSH method. If you receive an email like the one shown in the image, you have successfully completed all the steps – congratulations.
Still stuck? Email contact@nesdzo.co.uk — we're happy to help.