 Local Panel by Nesdzo
Configure nginx Configurations
Dealing with Nginx configurations can be very difficult, especially if you’re hosting multiple websites and web servers on the same server. Local Panel saves you from this hassle by allowing you to view all your configurations in one place. It enables you to make the necessary changes in seconds rather than minutes.
In this guide, you’ll learn how to do this.
Prerequisites:
- Local Panel
- A server with SSH
- A Windows or macOS computer with network connection
Before we begin:
You need to set up your server in Local Panel; if you’re not sure how to do this, please take a look at our quick start guide.
Our HTML code is located in the /var/www/testourlocalpanel/public directory on our server, and we want to configure Nginx for this. Let’s see how to do this together. You can download the HTML file I will be using in this example from here.
Total Time: 5 minutes
Connect and Open your panel on Local Panel
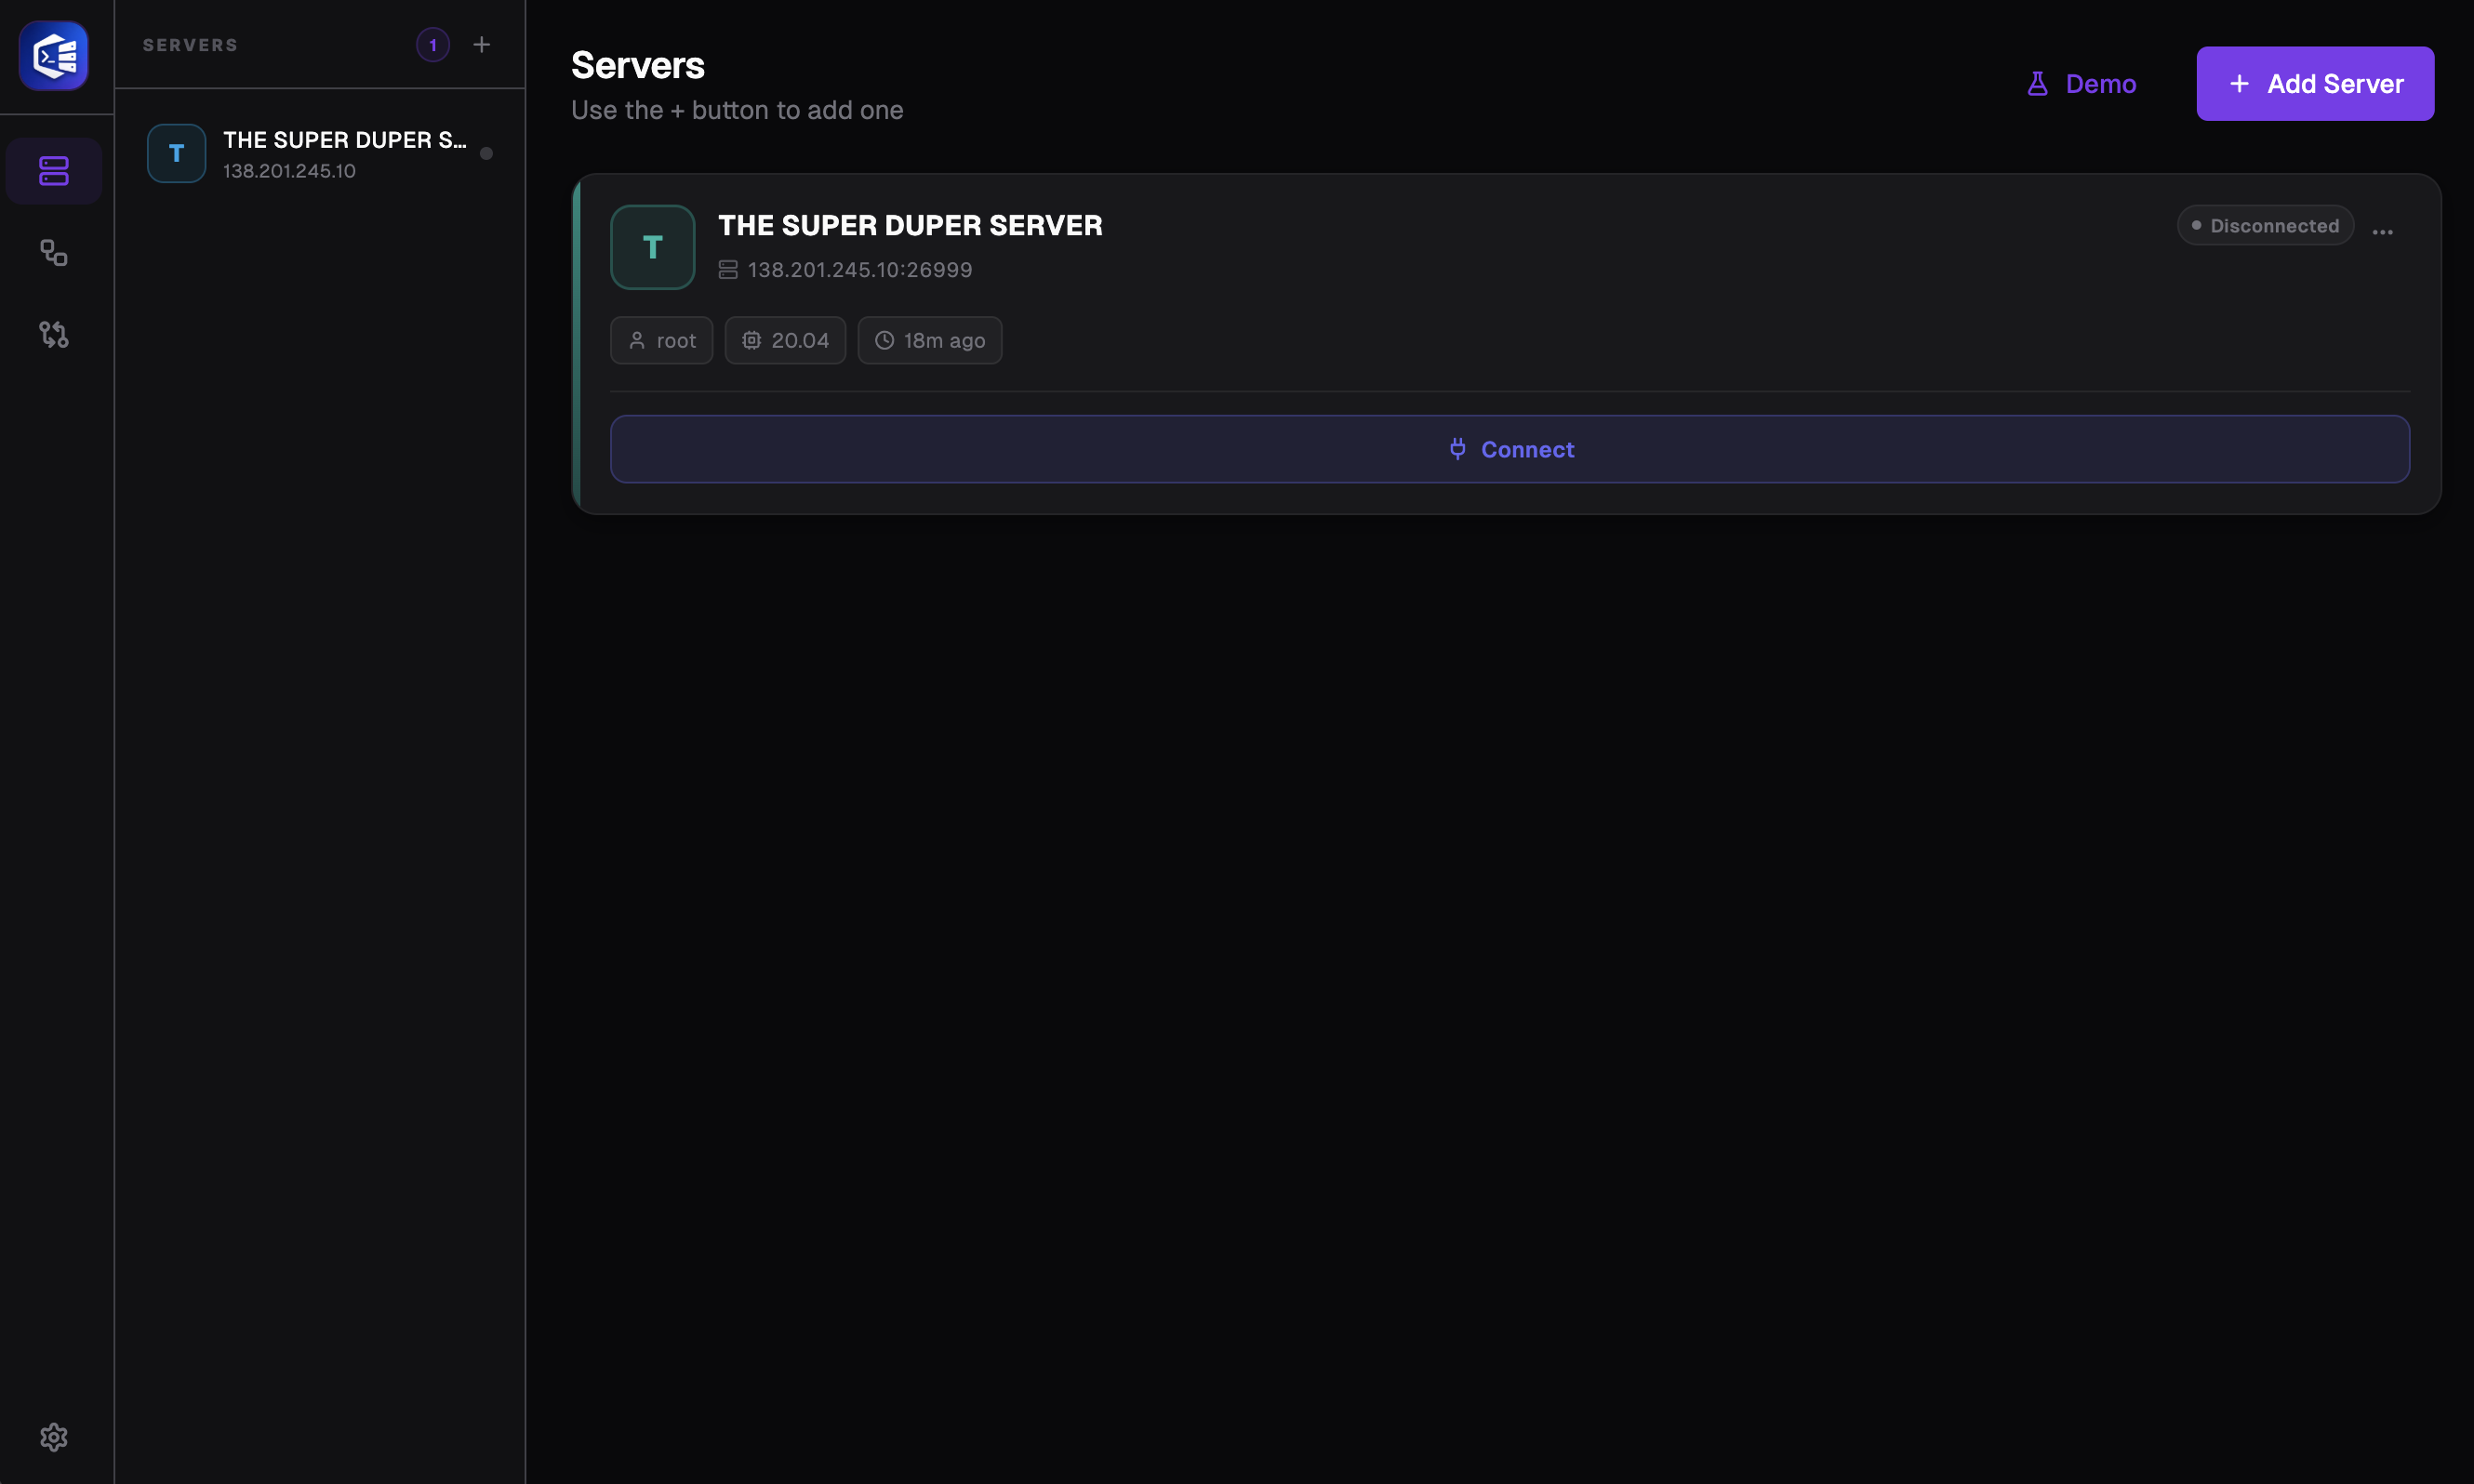
Once you click the ‘Connect’ button, you will be automatically redirected to the dashboard; if this does not happen, you can access your dashboard by clicking the ‘Open Dashboard’ button that appears. You will see data such as the server’s CPU, RAM and storage on your screen.
Open sites tab
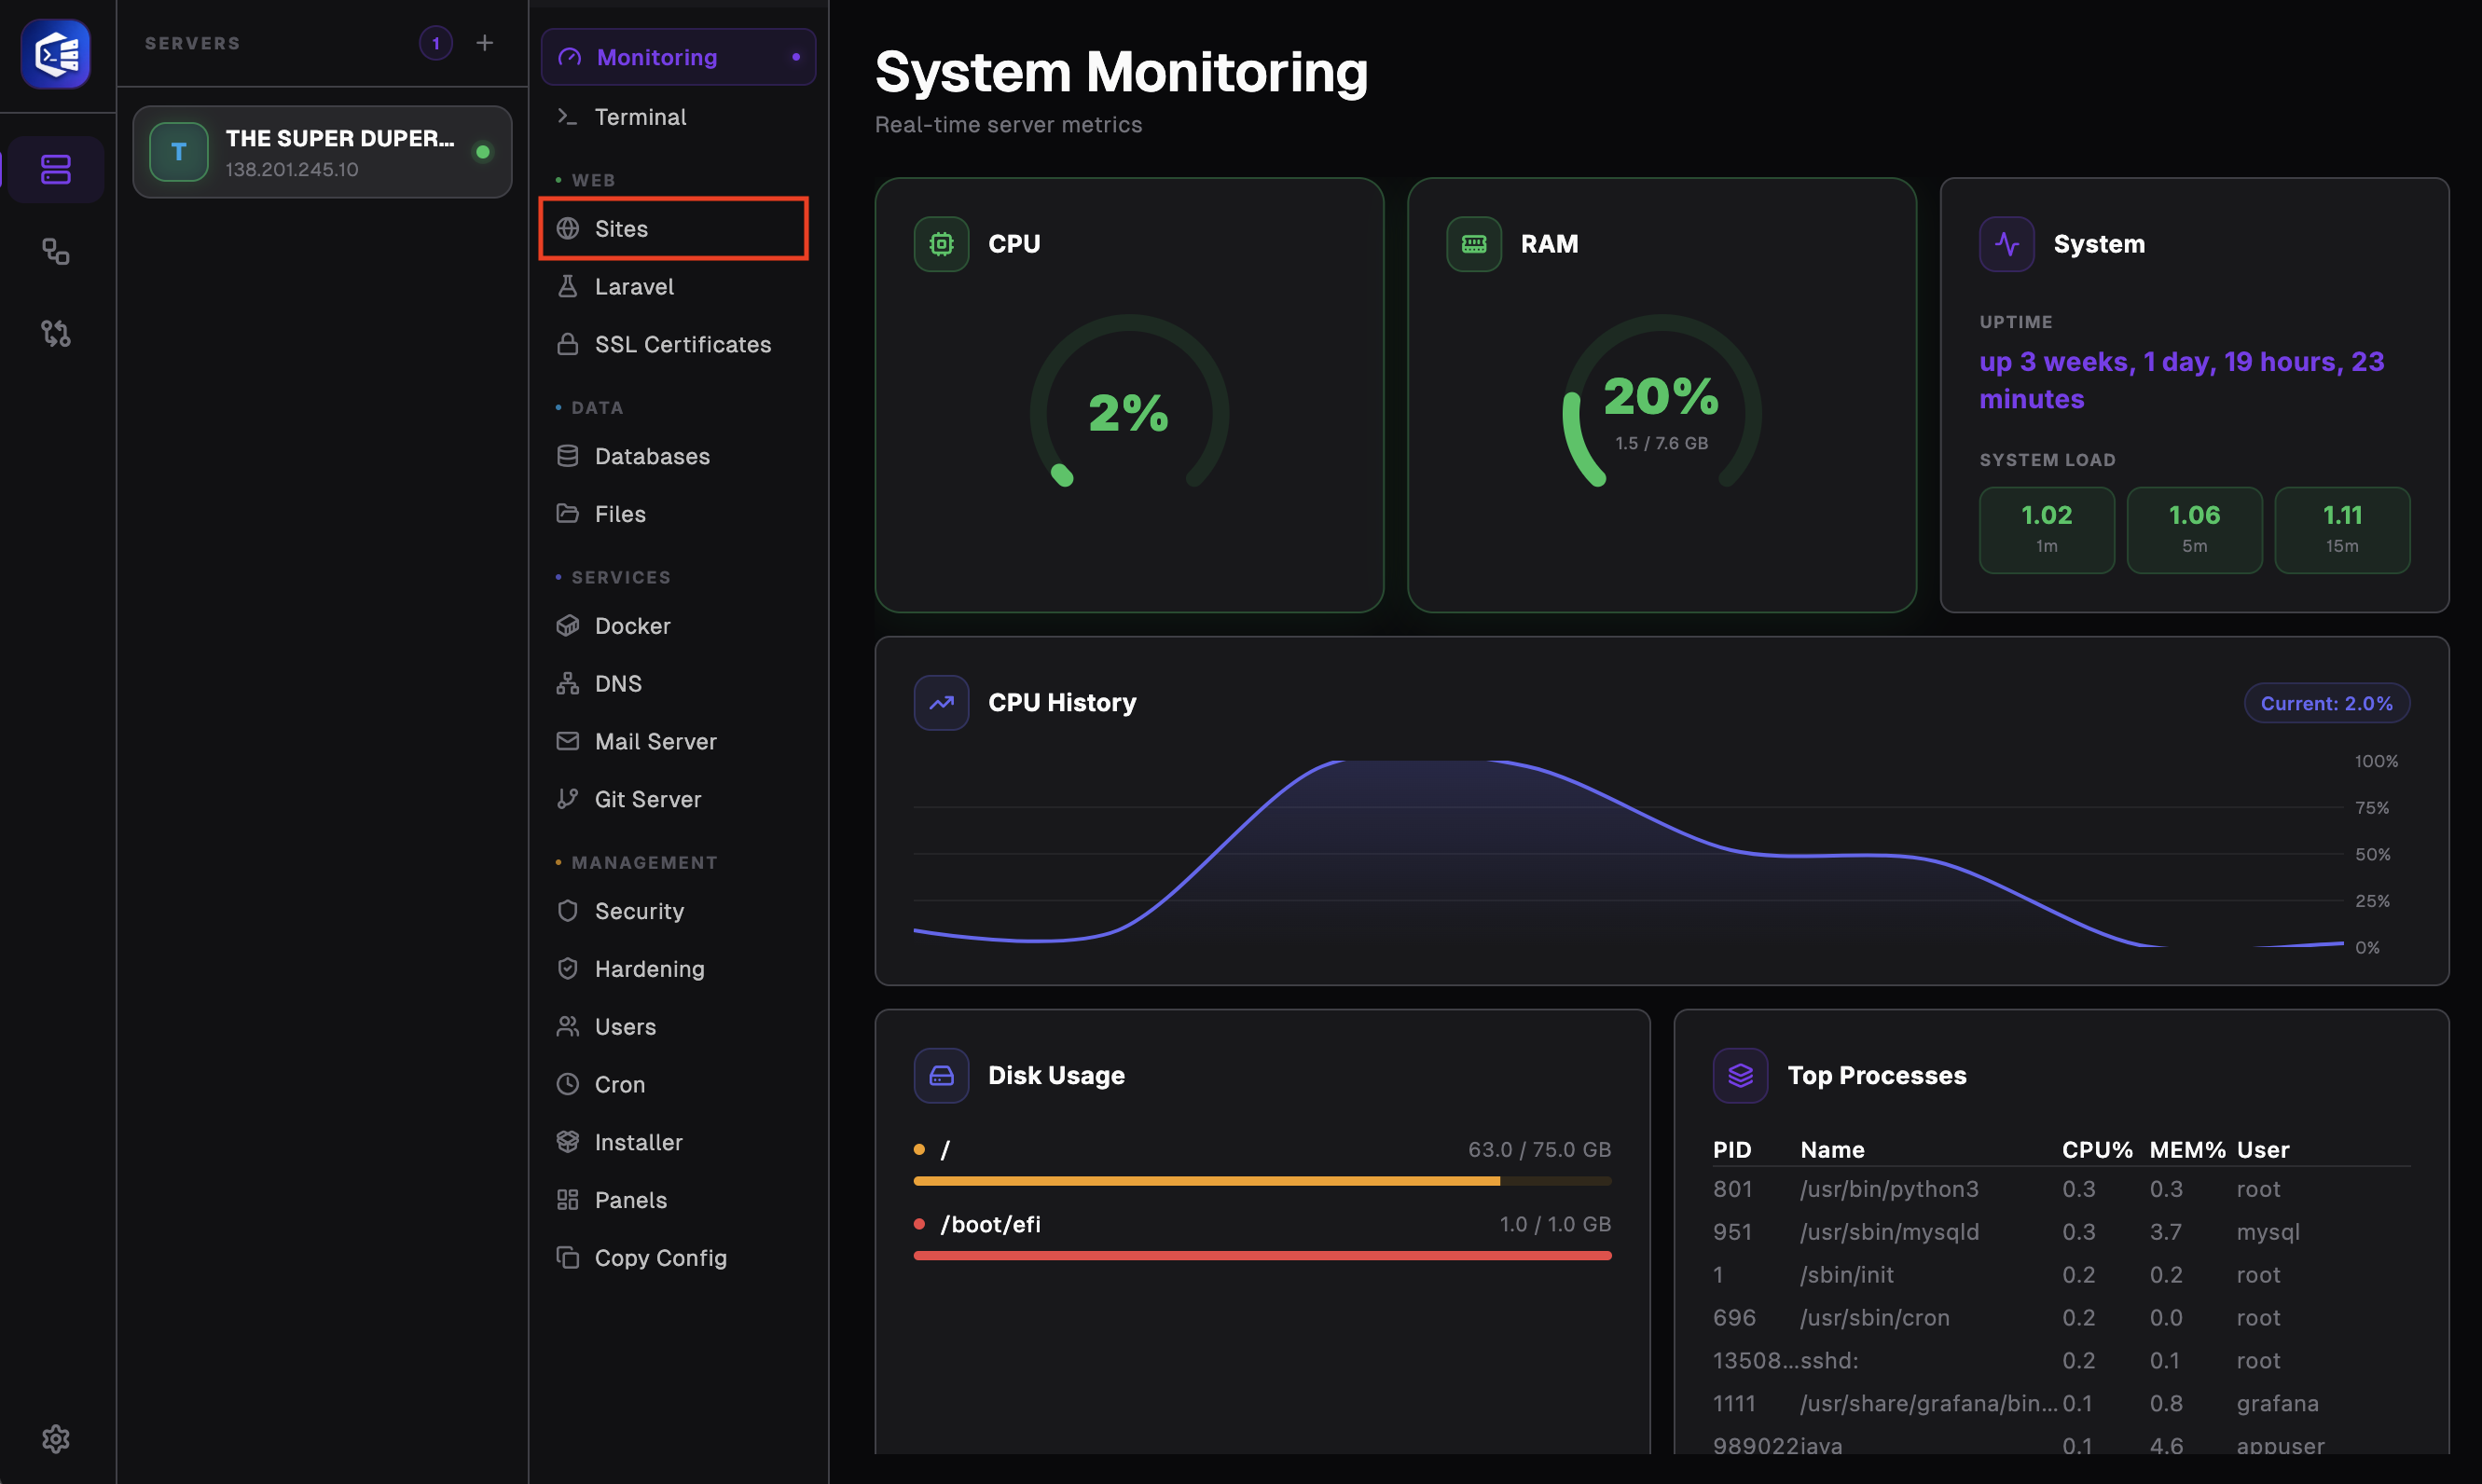
Click the “Sites” button in the left-hand panel to go to the “Sites” tab.
Add Site
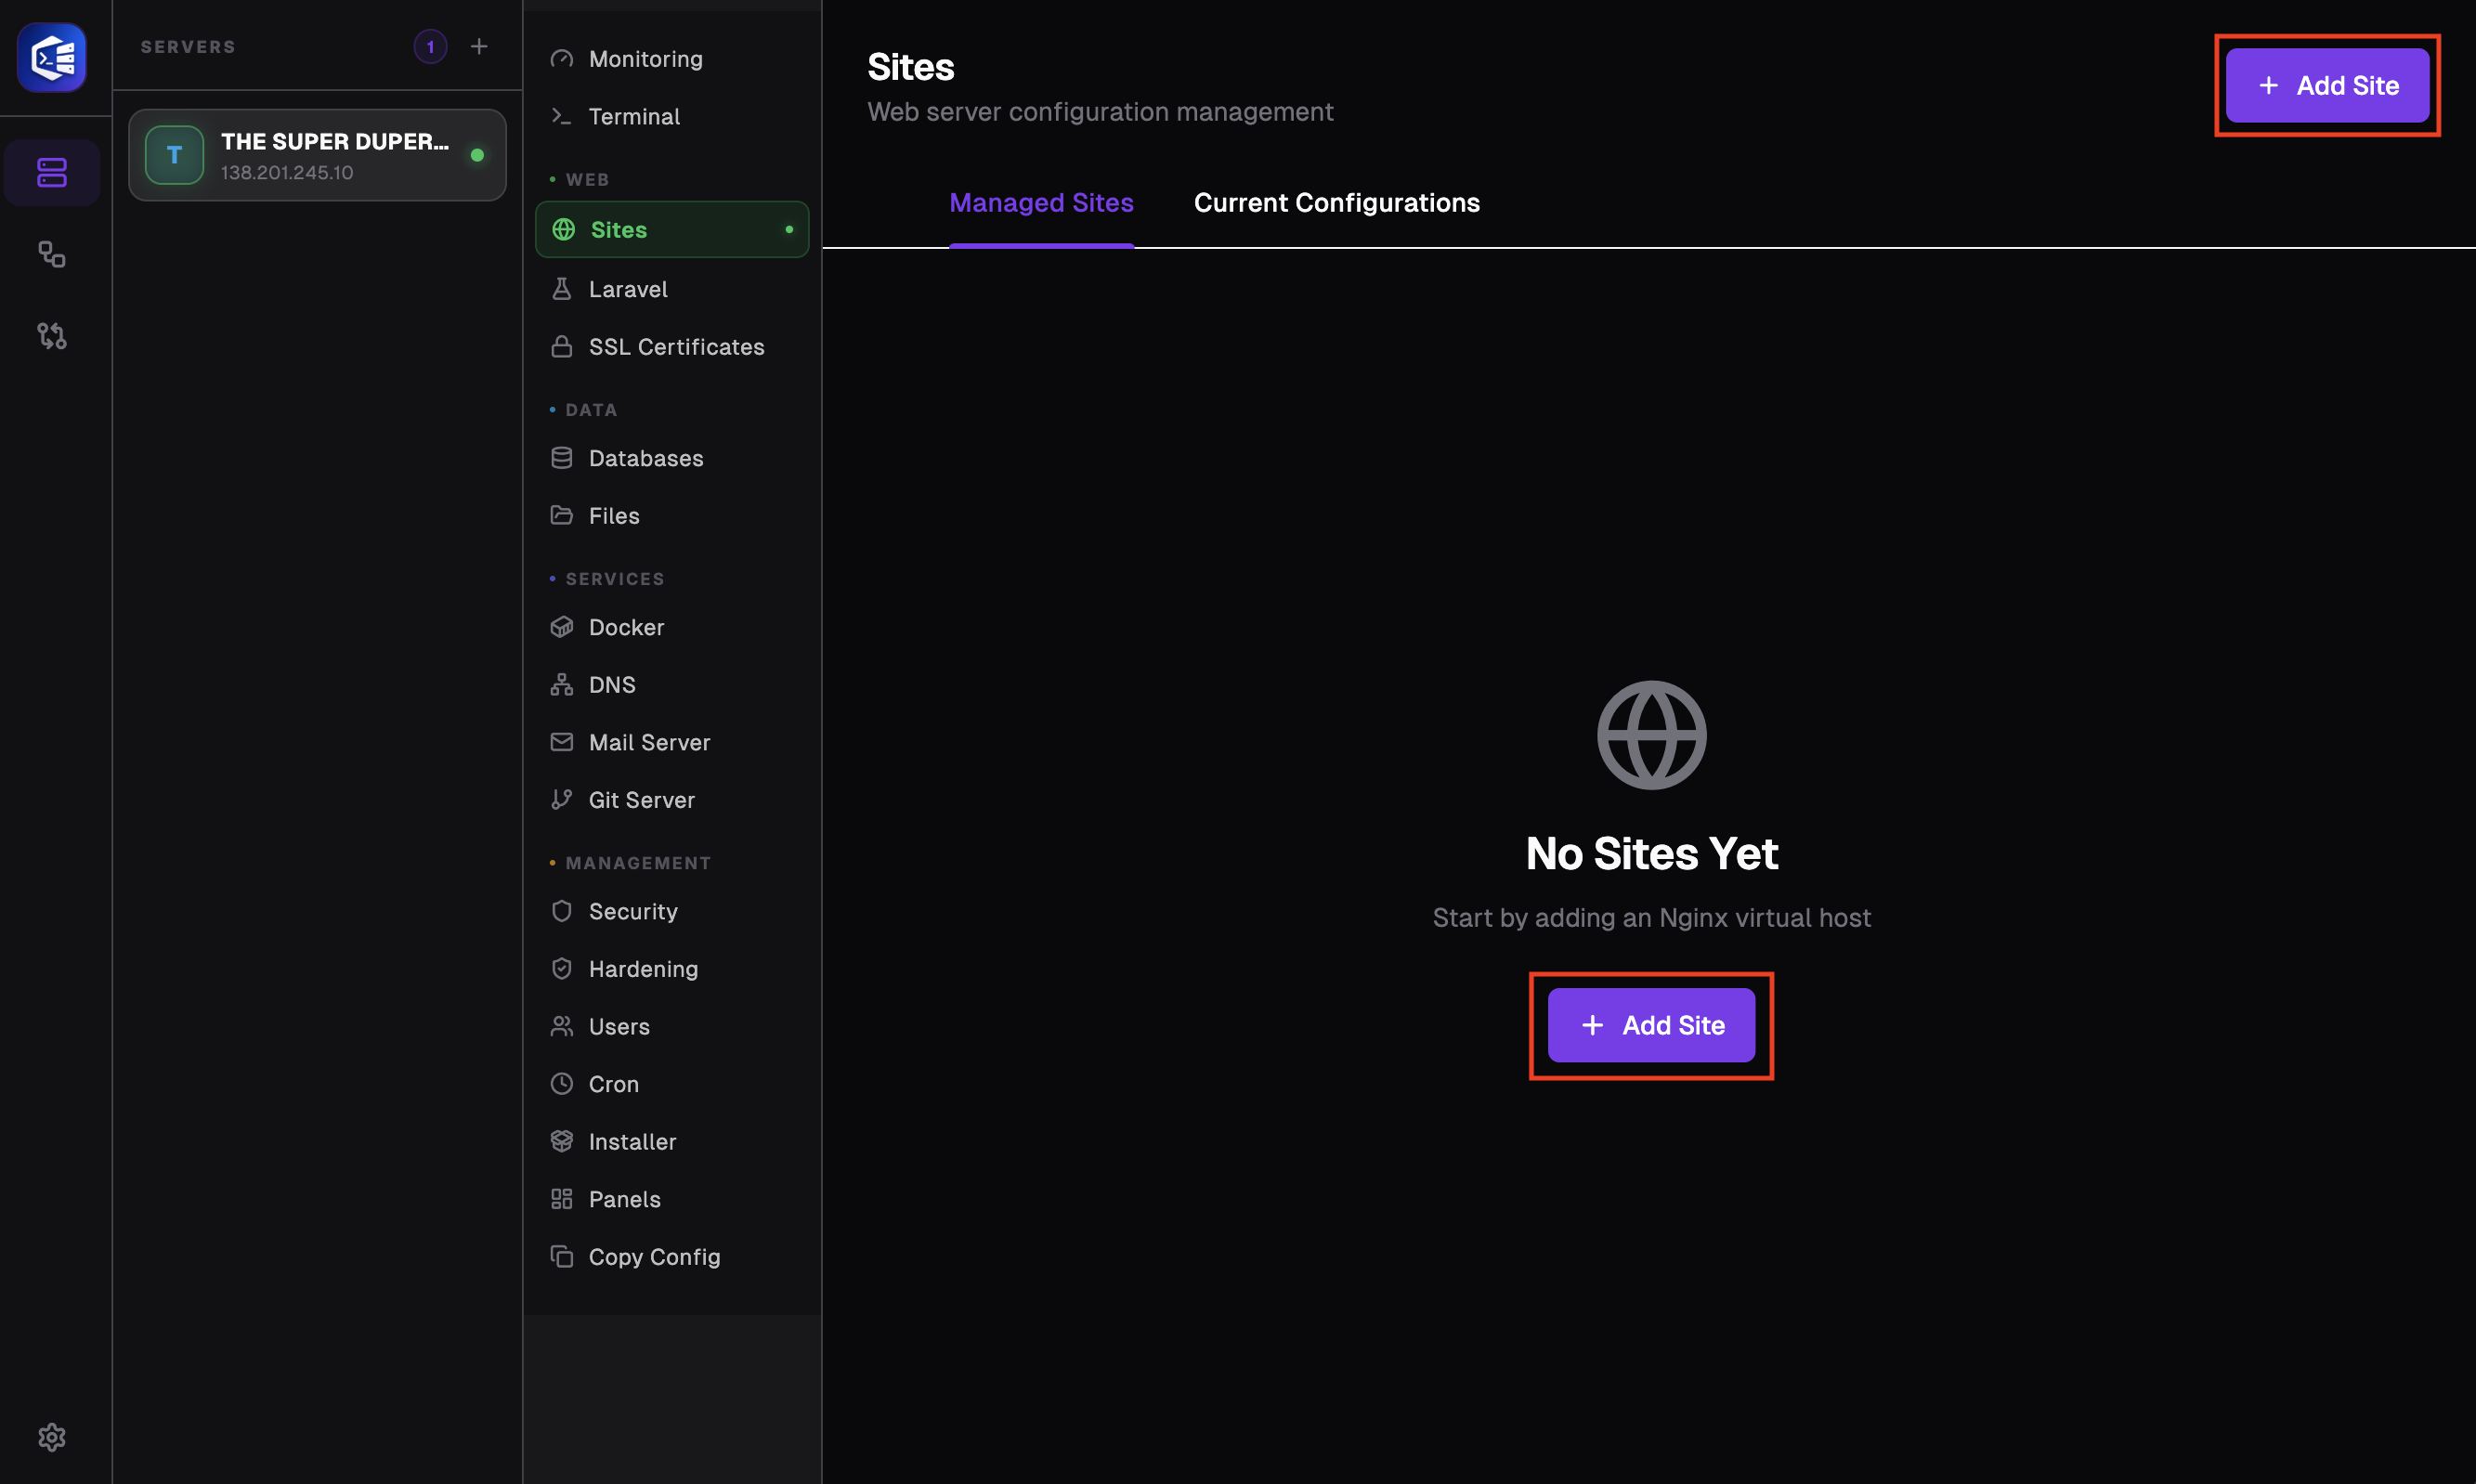
Let’s add a site with a new Nginx configuration by clicking the ‘+ Add Site’ button. After this step, we will specify both our domain and our path.
Fill in fields and Deploy
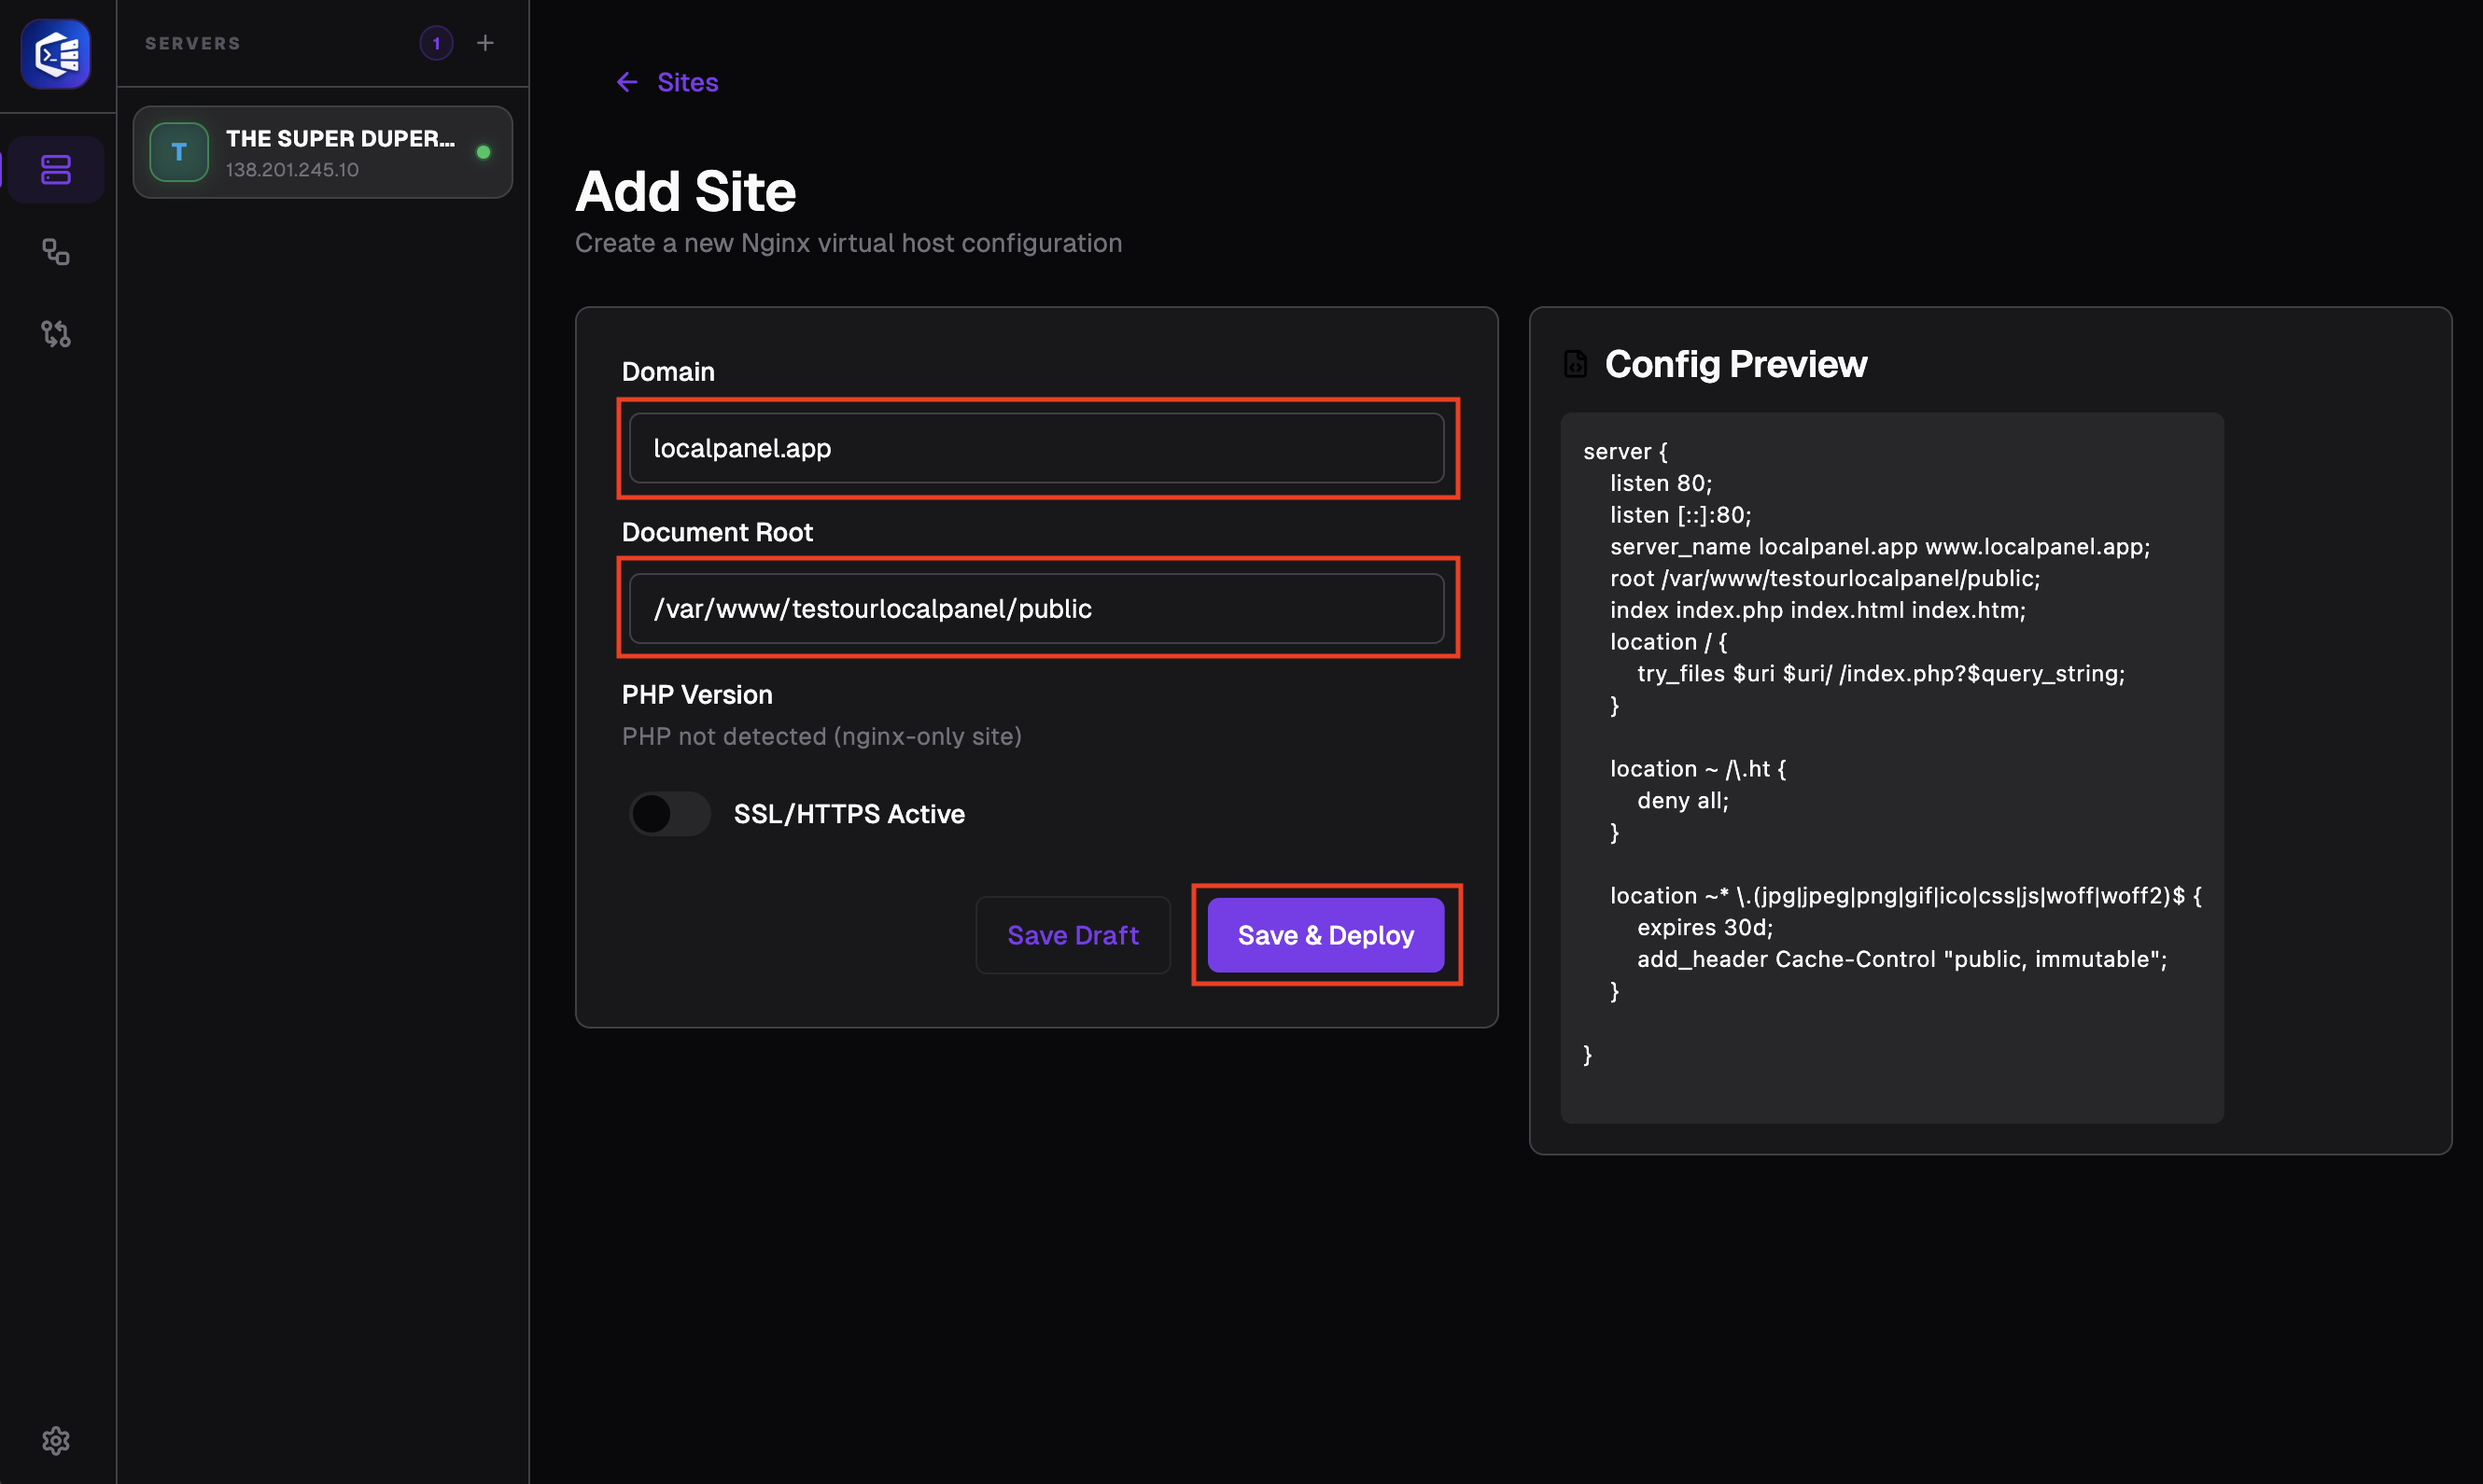
Enter your domain and file path, and tick the box to indicate whether you require SSL. The preview screen shows a preview of the Nginx file that will be generated for you. When you click the ‘Deploy’ button, the system will perform the necessary checks and configure Nginx for you.
Go to files tab
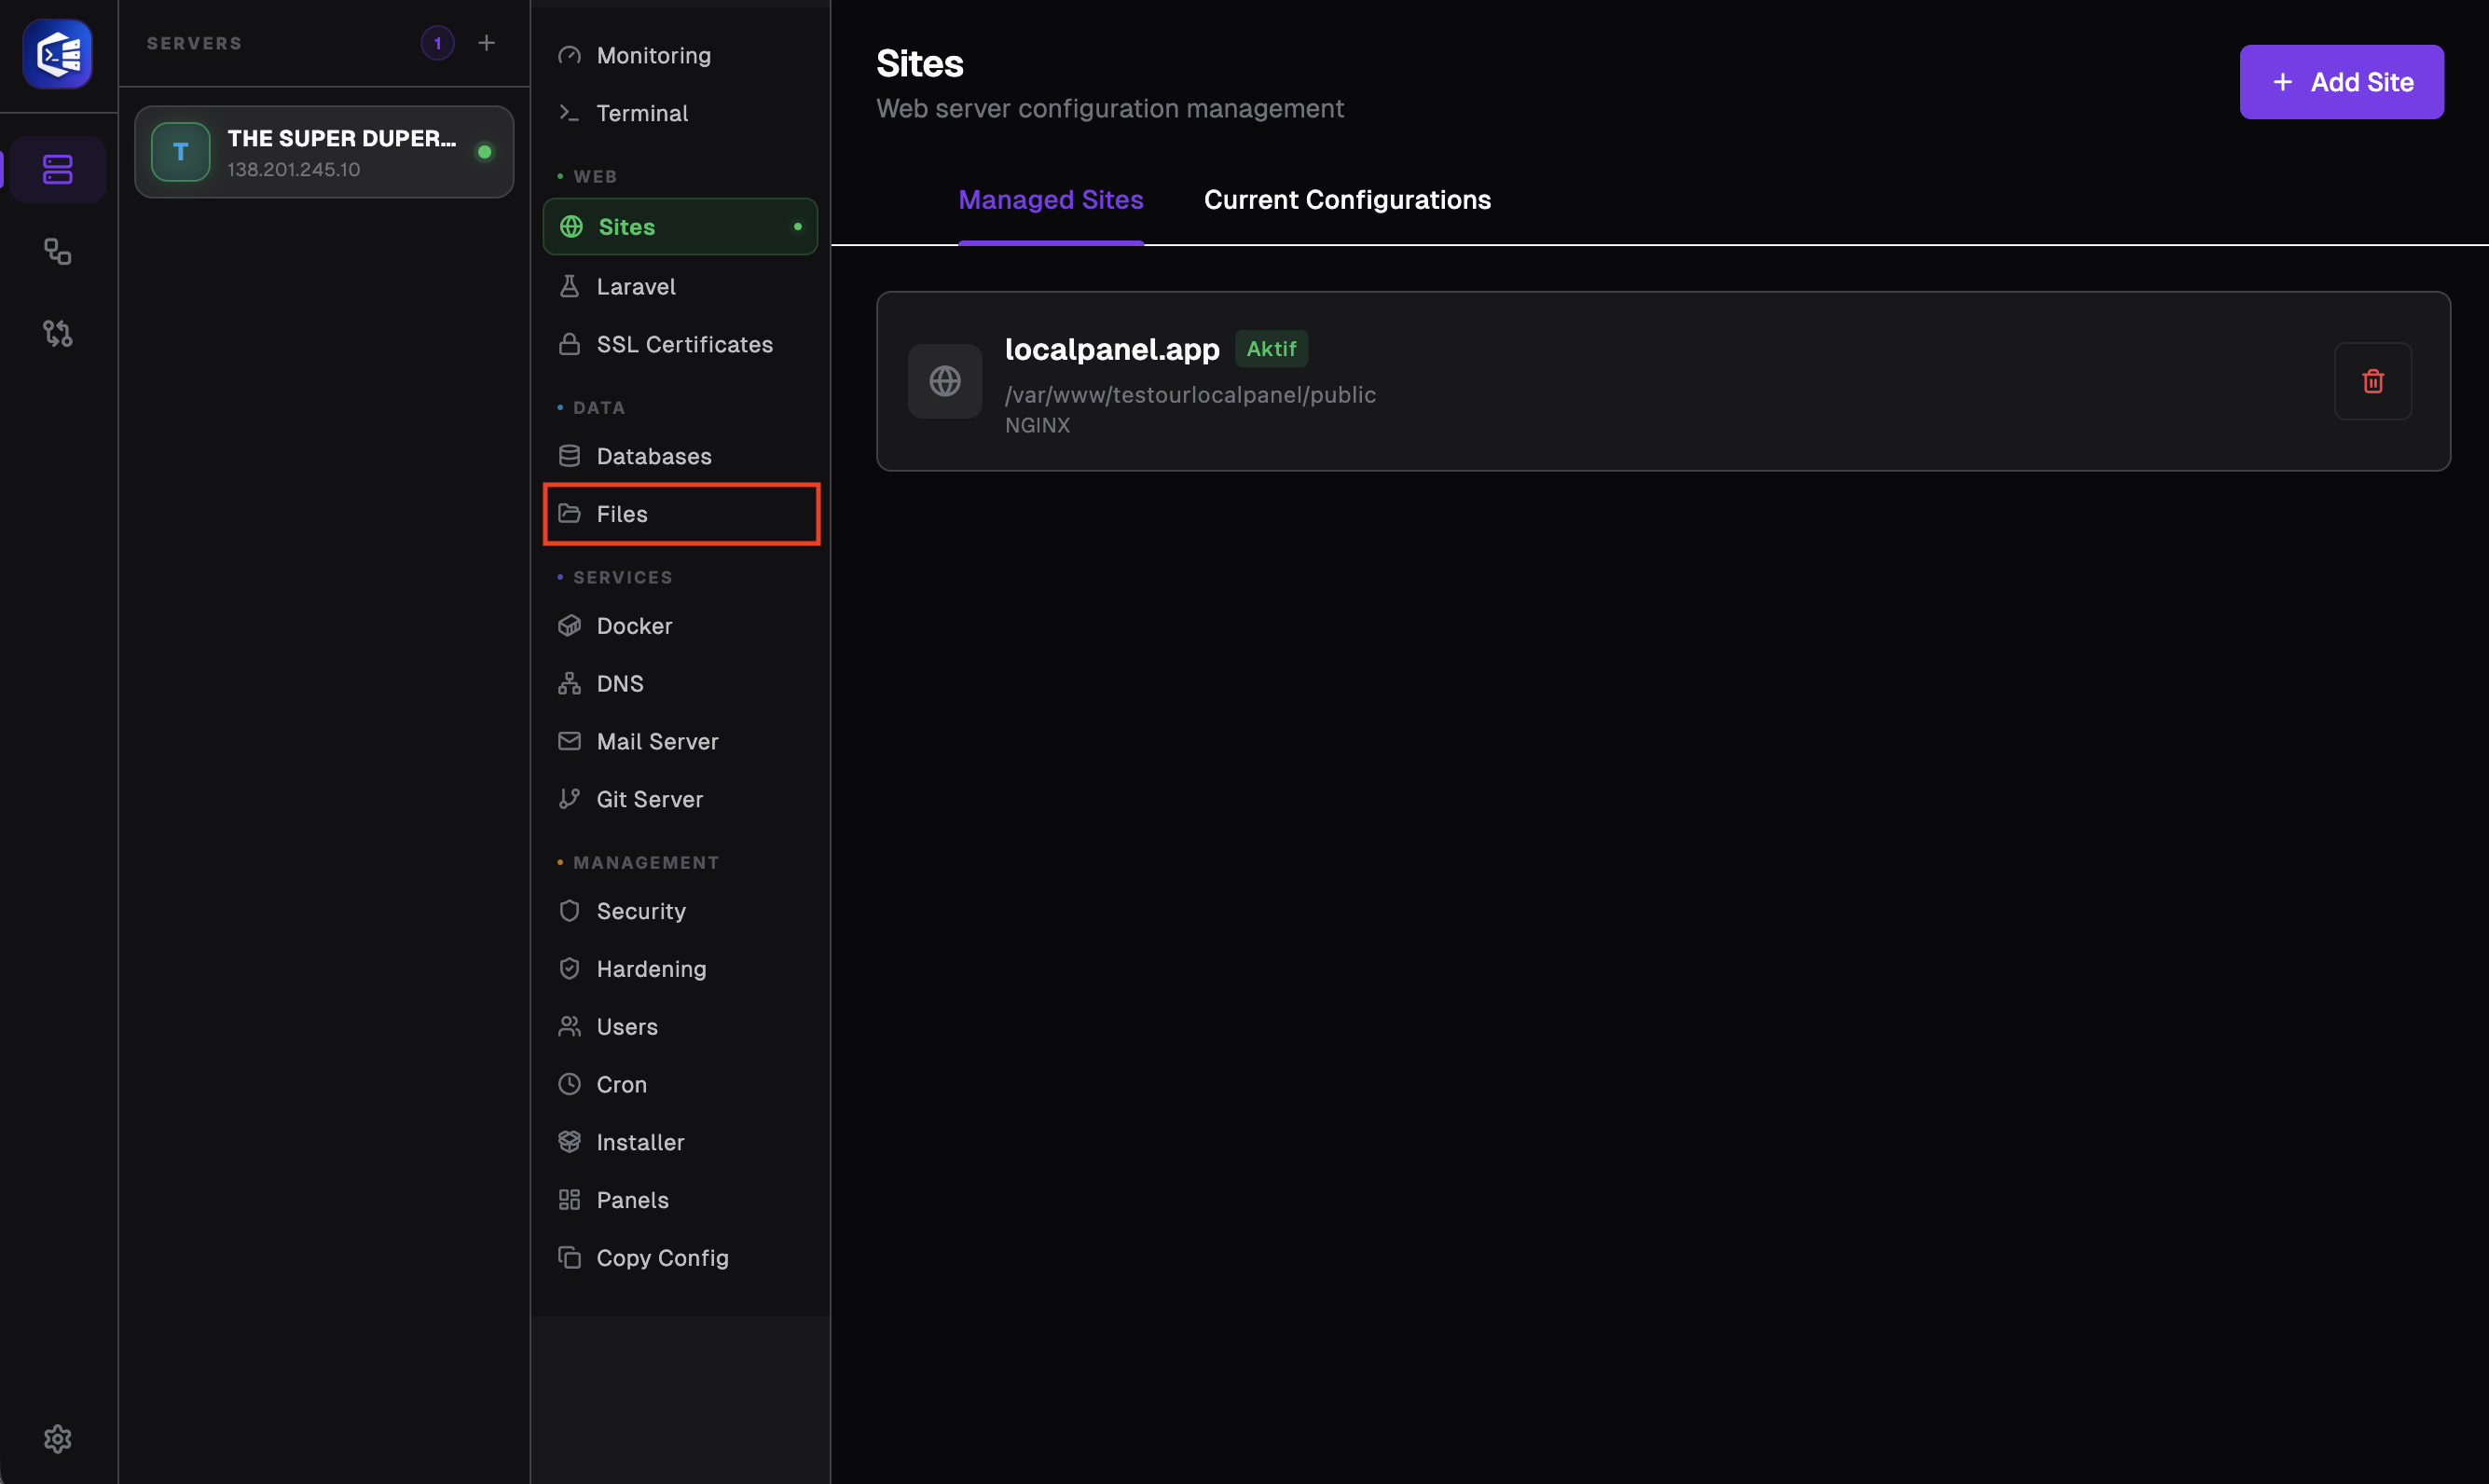
By selecting “files” from the panel on the left, you will be taken to the tab where you can view and interact with the files on your server.
Go to configure folder and upload your file
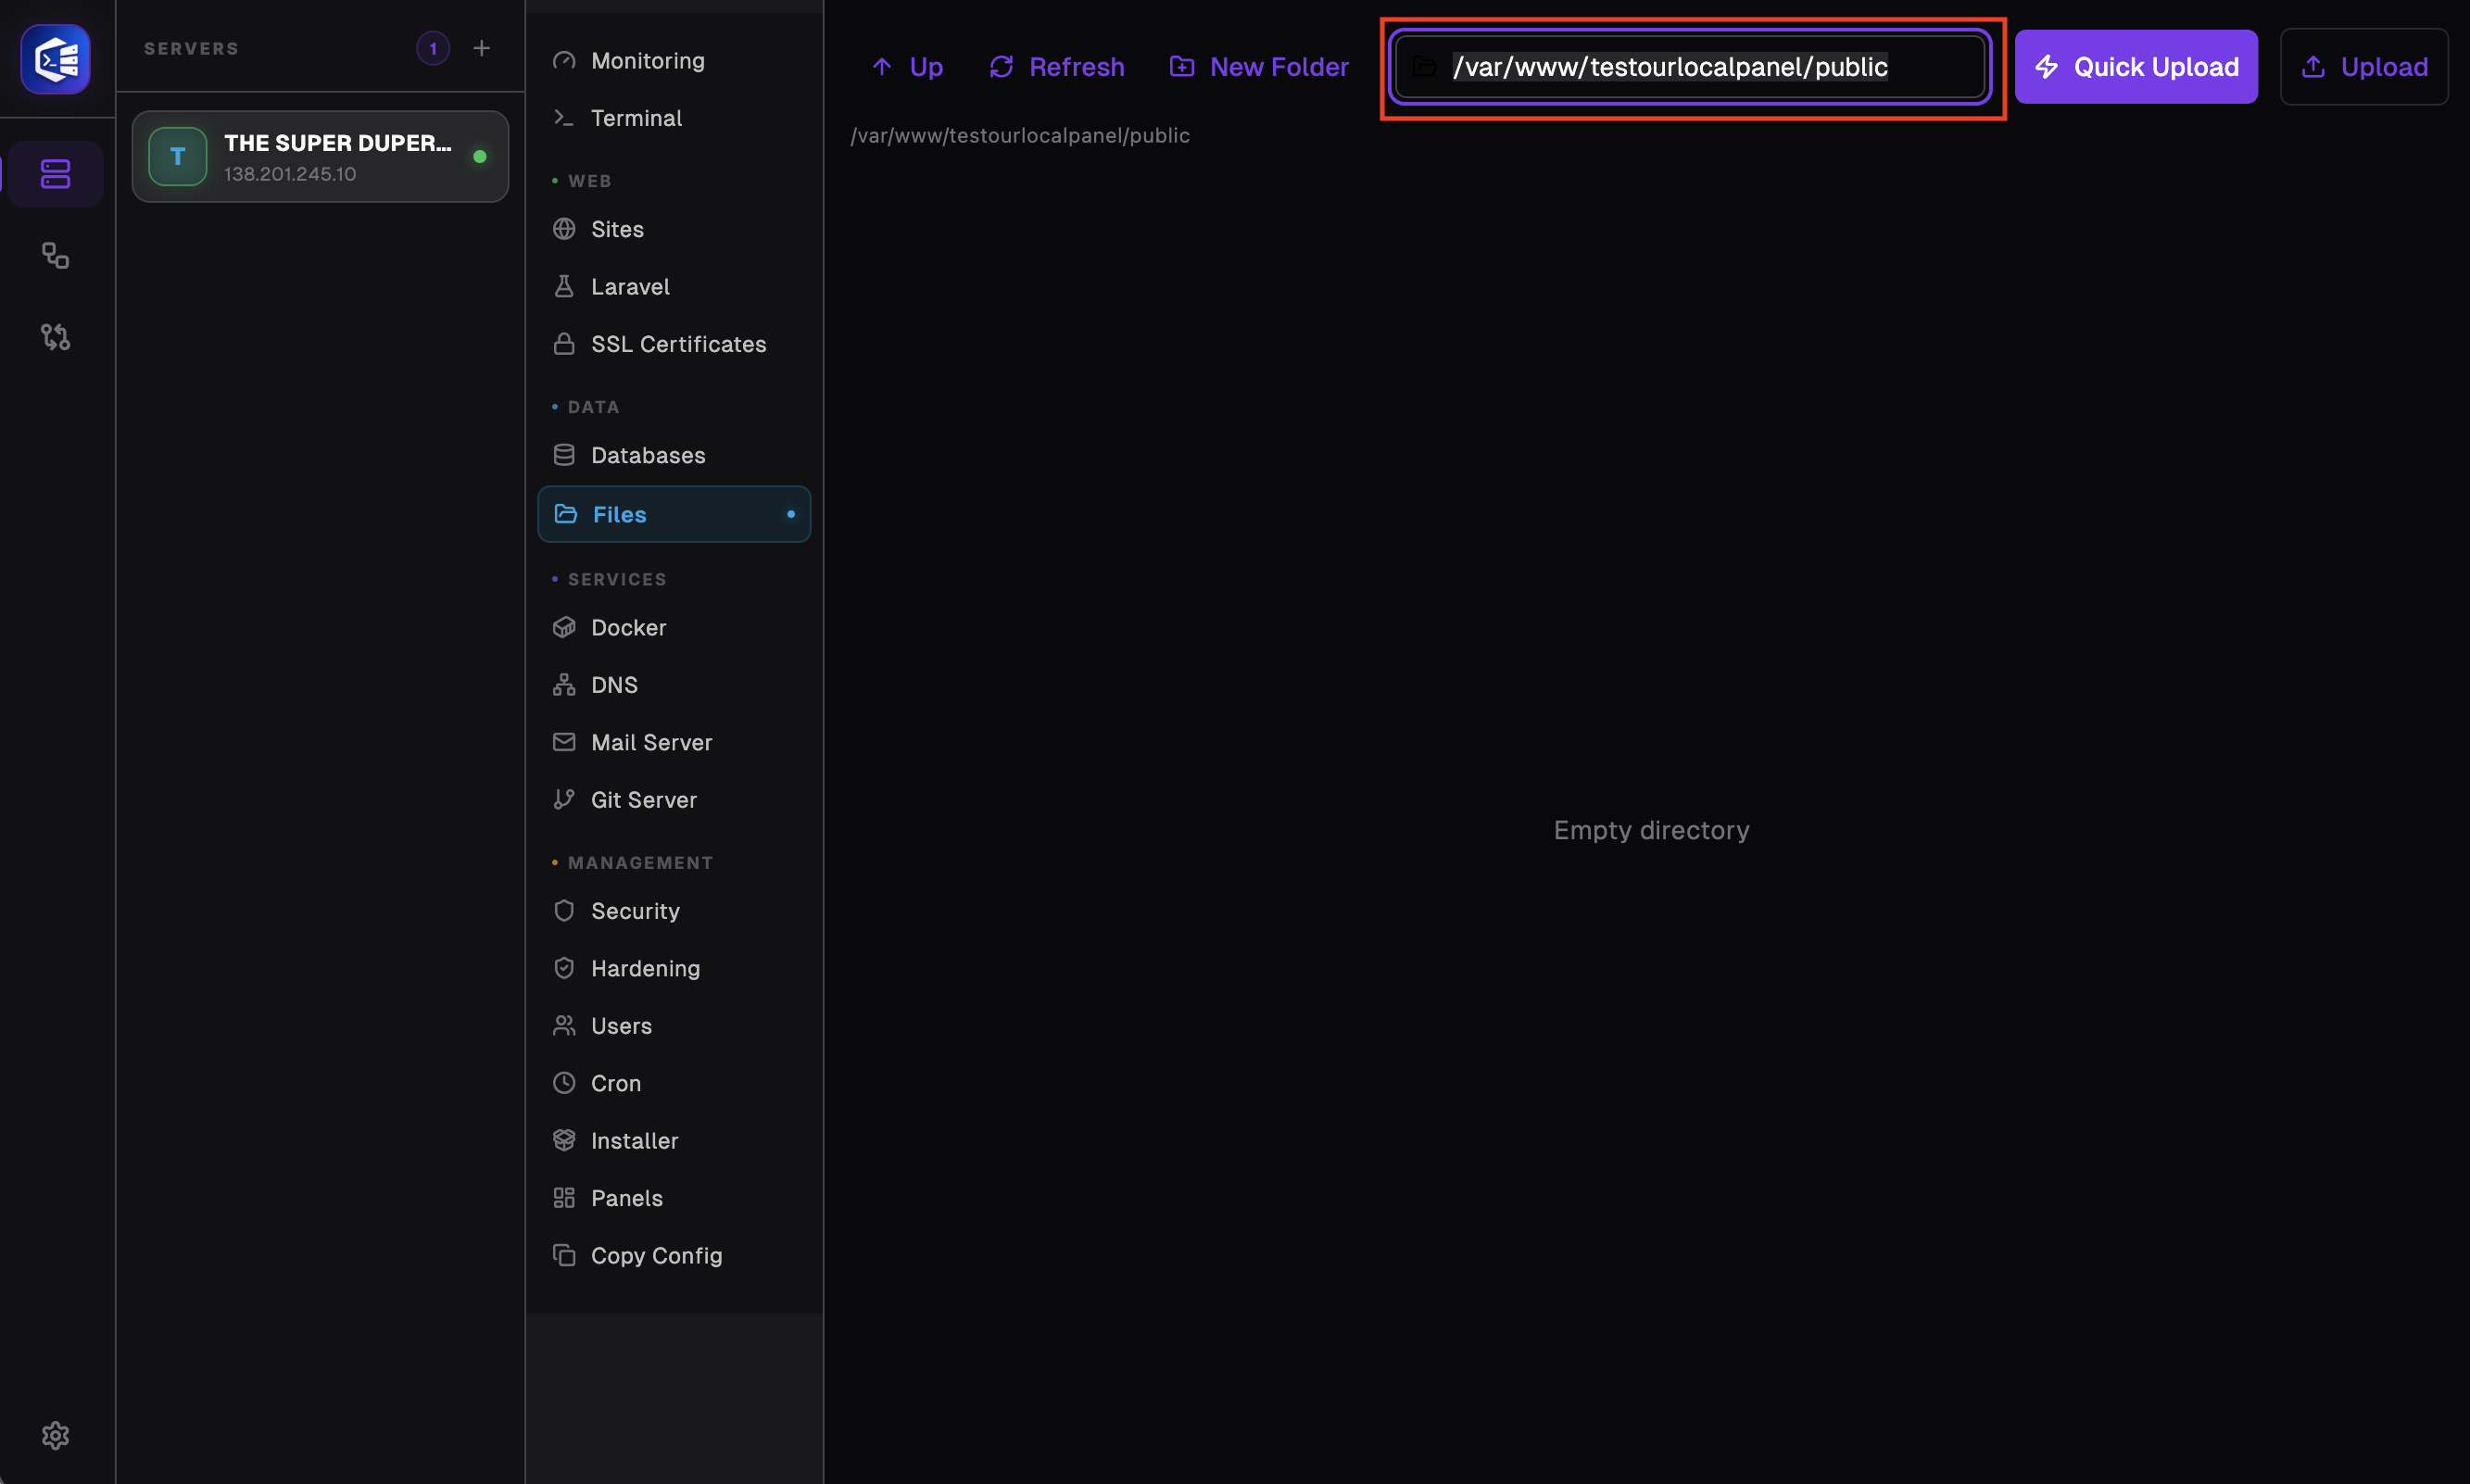
Navigate to the file path you entered in the previous step using the bar at the top or by selecting folders one by one, and upload your HTML file here either by dragging and dropping it or by clicking the ‘Upload’ button in the top-right corner.
Be sure the file uploaded
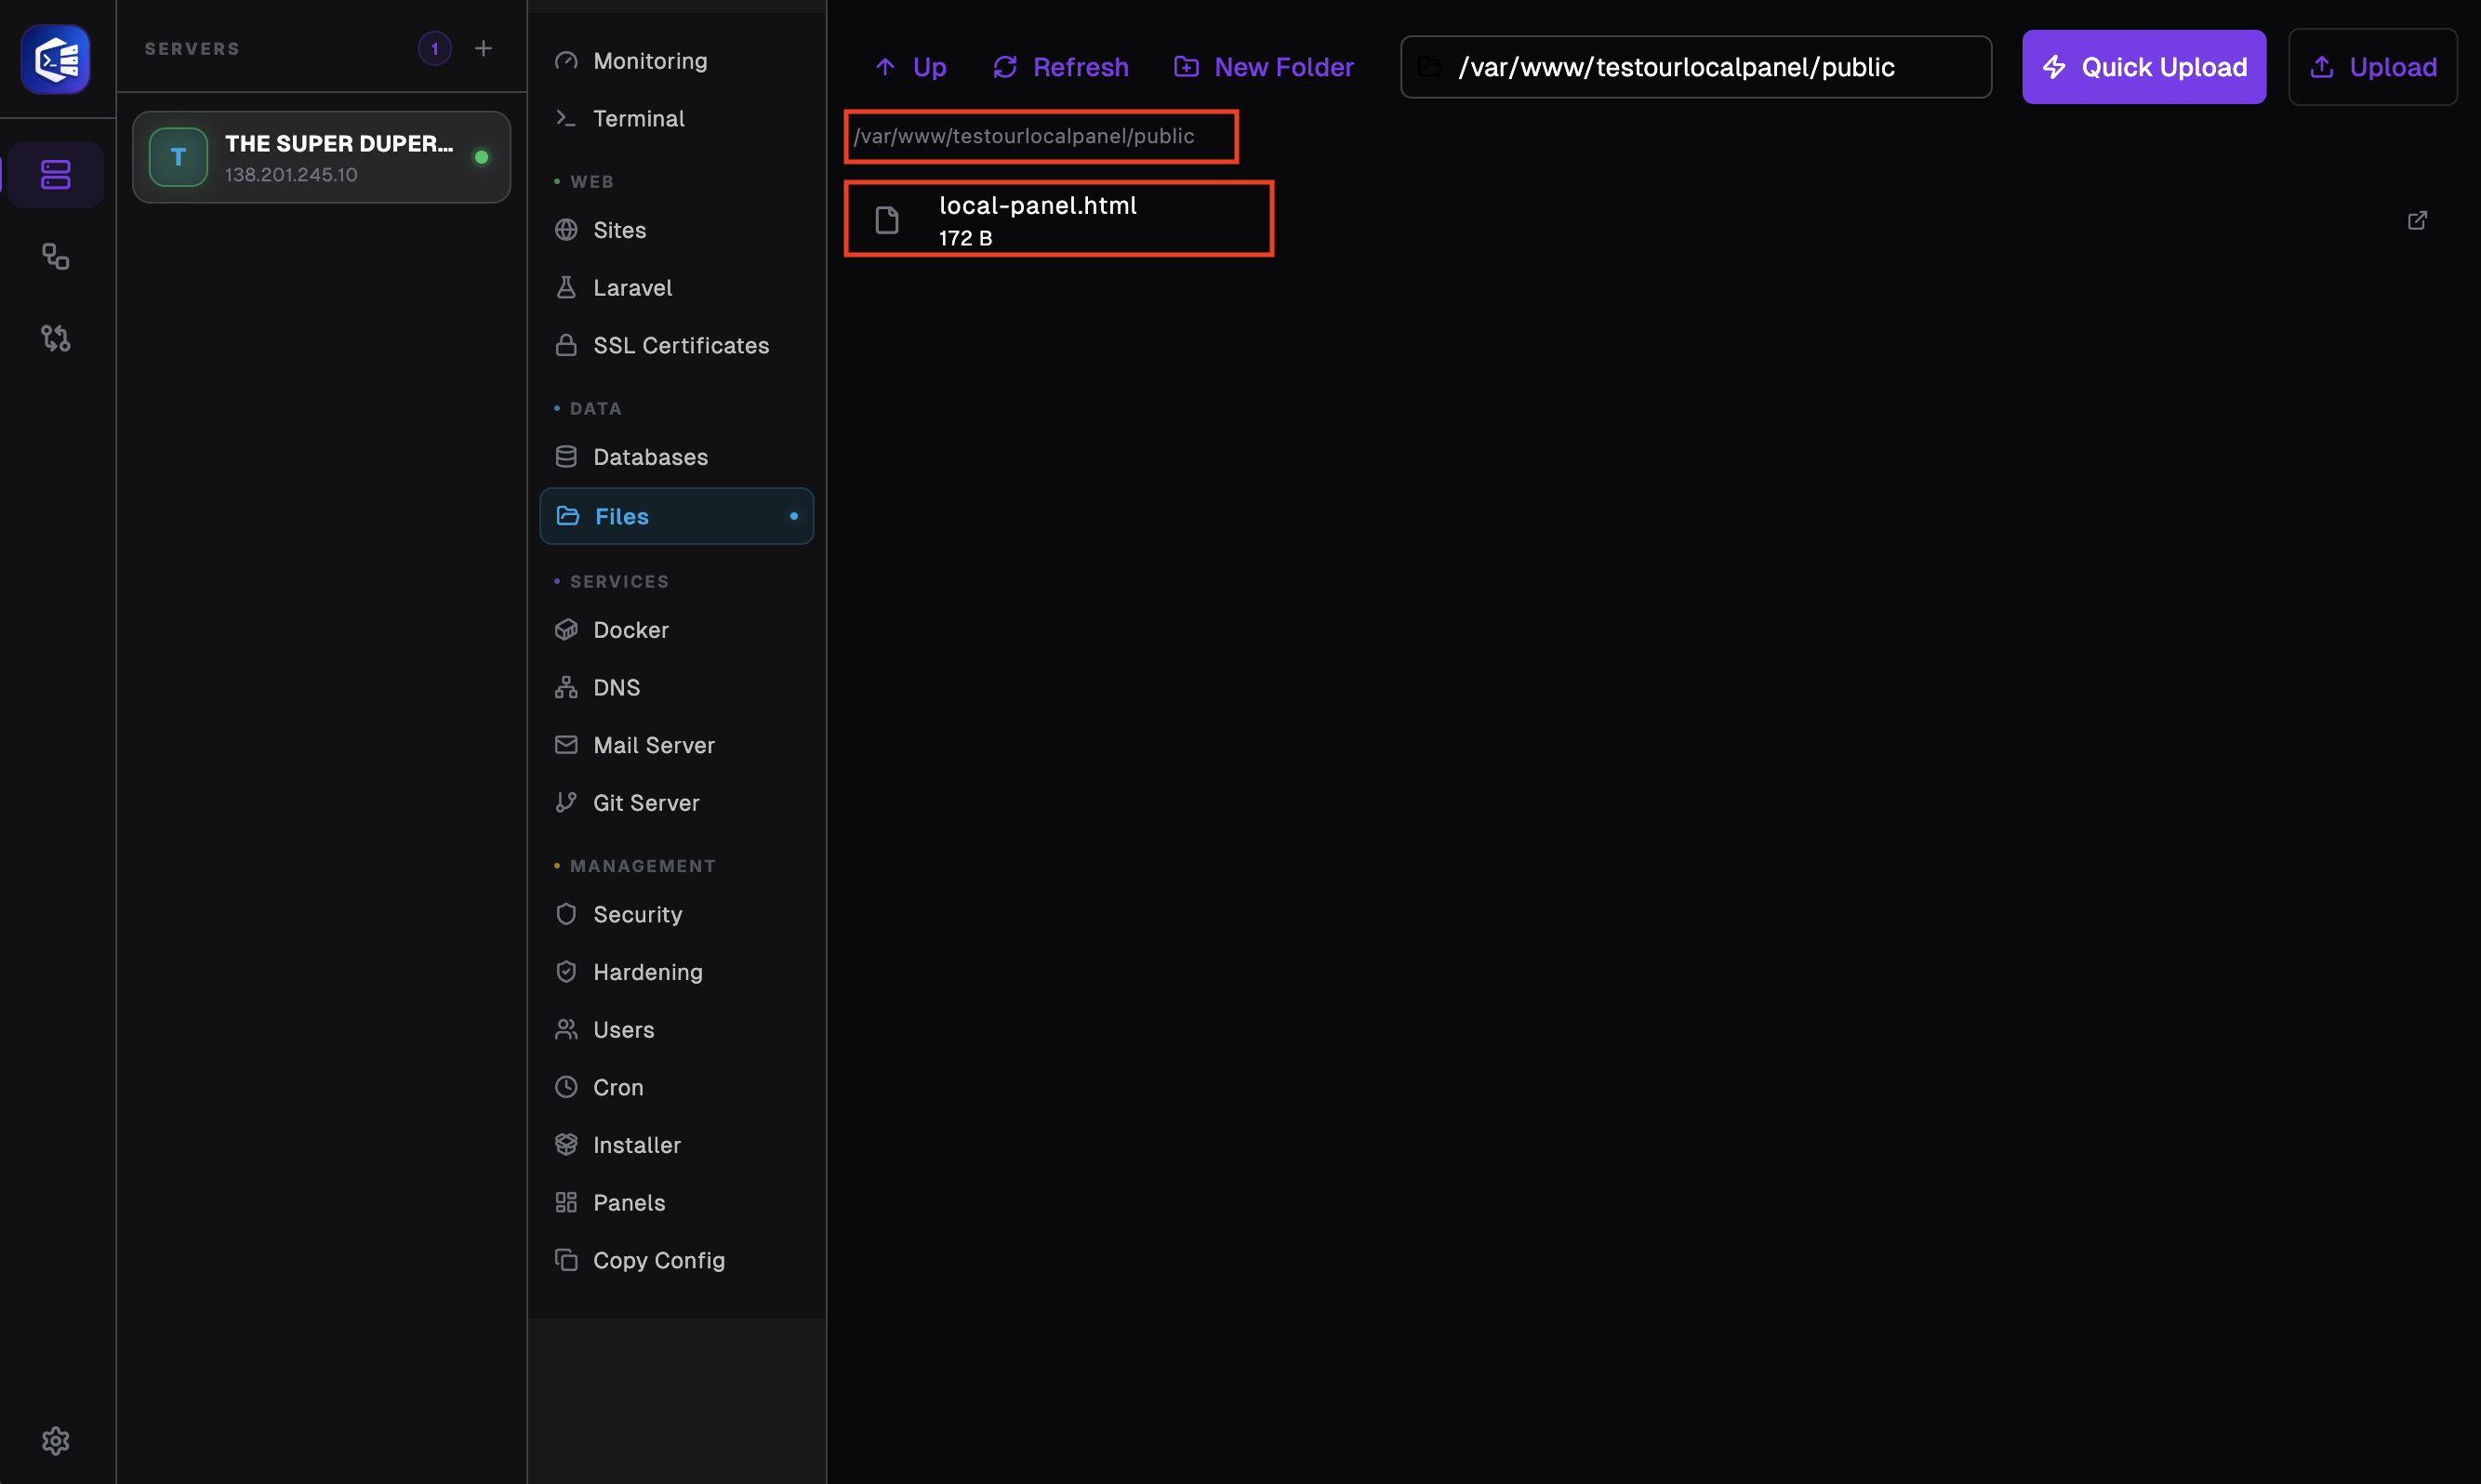
Please check the file path and the files you wish to upload, and make sure they are correct
Check the website

This is the final step. If you have followed all the steps correctly and your DNS settings for your domain are correct, you will see a result in your browser as shown in the image.
Still stuck? Email contact@nesdzo.co.uk — we're happy to help.