 Local Panel by Nesdzo
Commands Screen
It provides a screen where you can write and save visual or manual commands. Visual code is compiled using the Local Panel’s powerful Bash engine, meaning you can tackle complex tasks using visual coding even if you don’t know any code. Let’s take a look at the Commands screen:
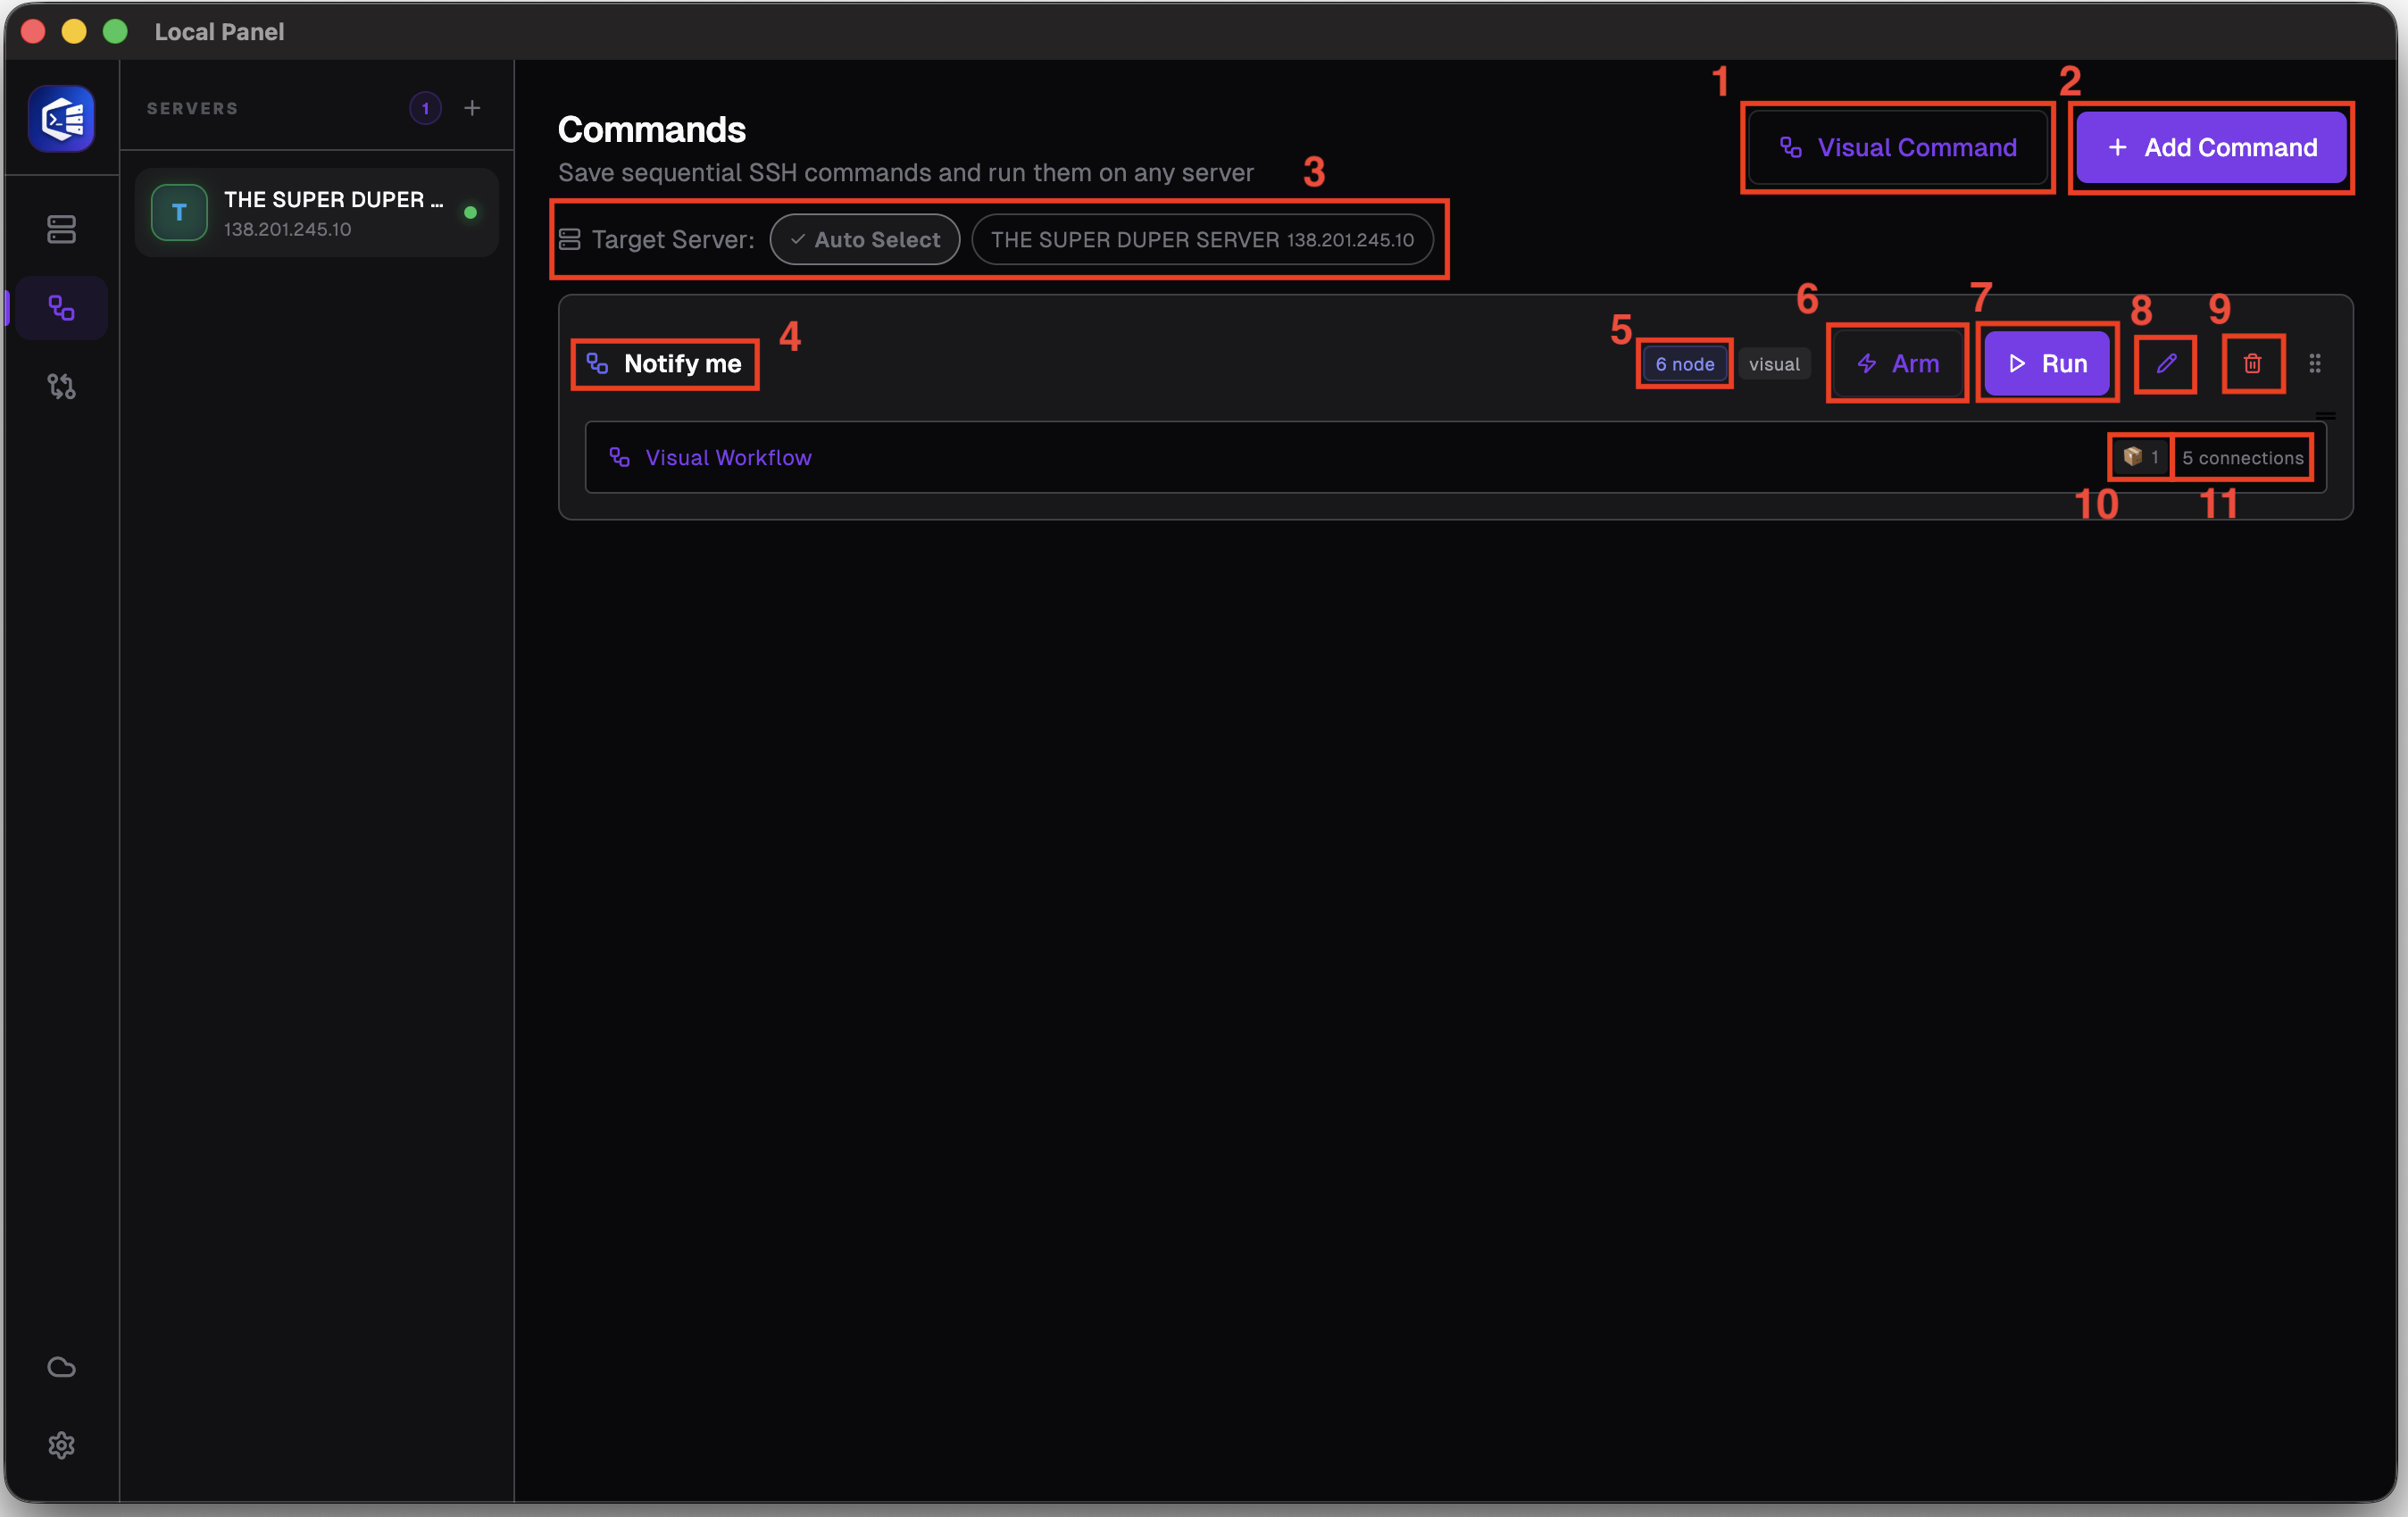
You can access this screen by clicking the ‘Commands’ button, which is the second from the top in the navigation bar on the far left. Let’s go through the numbered sections in the image one by one:
Number 1: This is the button you’ll want to press if you wish to access the visual coding screen (if you’re going to create a new visual code).
Number 2: This button opens a modal window that allows you to enter code manually. This button is primarily intended for technical users and is designed to help resolve specific issues.
Number 3: This is where you can select the server on which you wish to run the command; to run a command on a server, you must be currently connected to that server.
Number 4: Command name
Number 5: How many nodes are there in the command
Number 6: If you have used the trigger node, this is the button you need to click to activate the command on your server
Number 7: The button used to run workflows that start from the start node.
Number 8: Edit the workflow or command
Number 9: Delete the workflow or command
Number 10: How many variable nodes are there
Number 11: How many connections are there (both streaming and data connections)
+ Add Command Modal
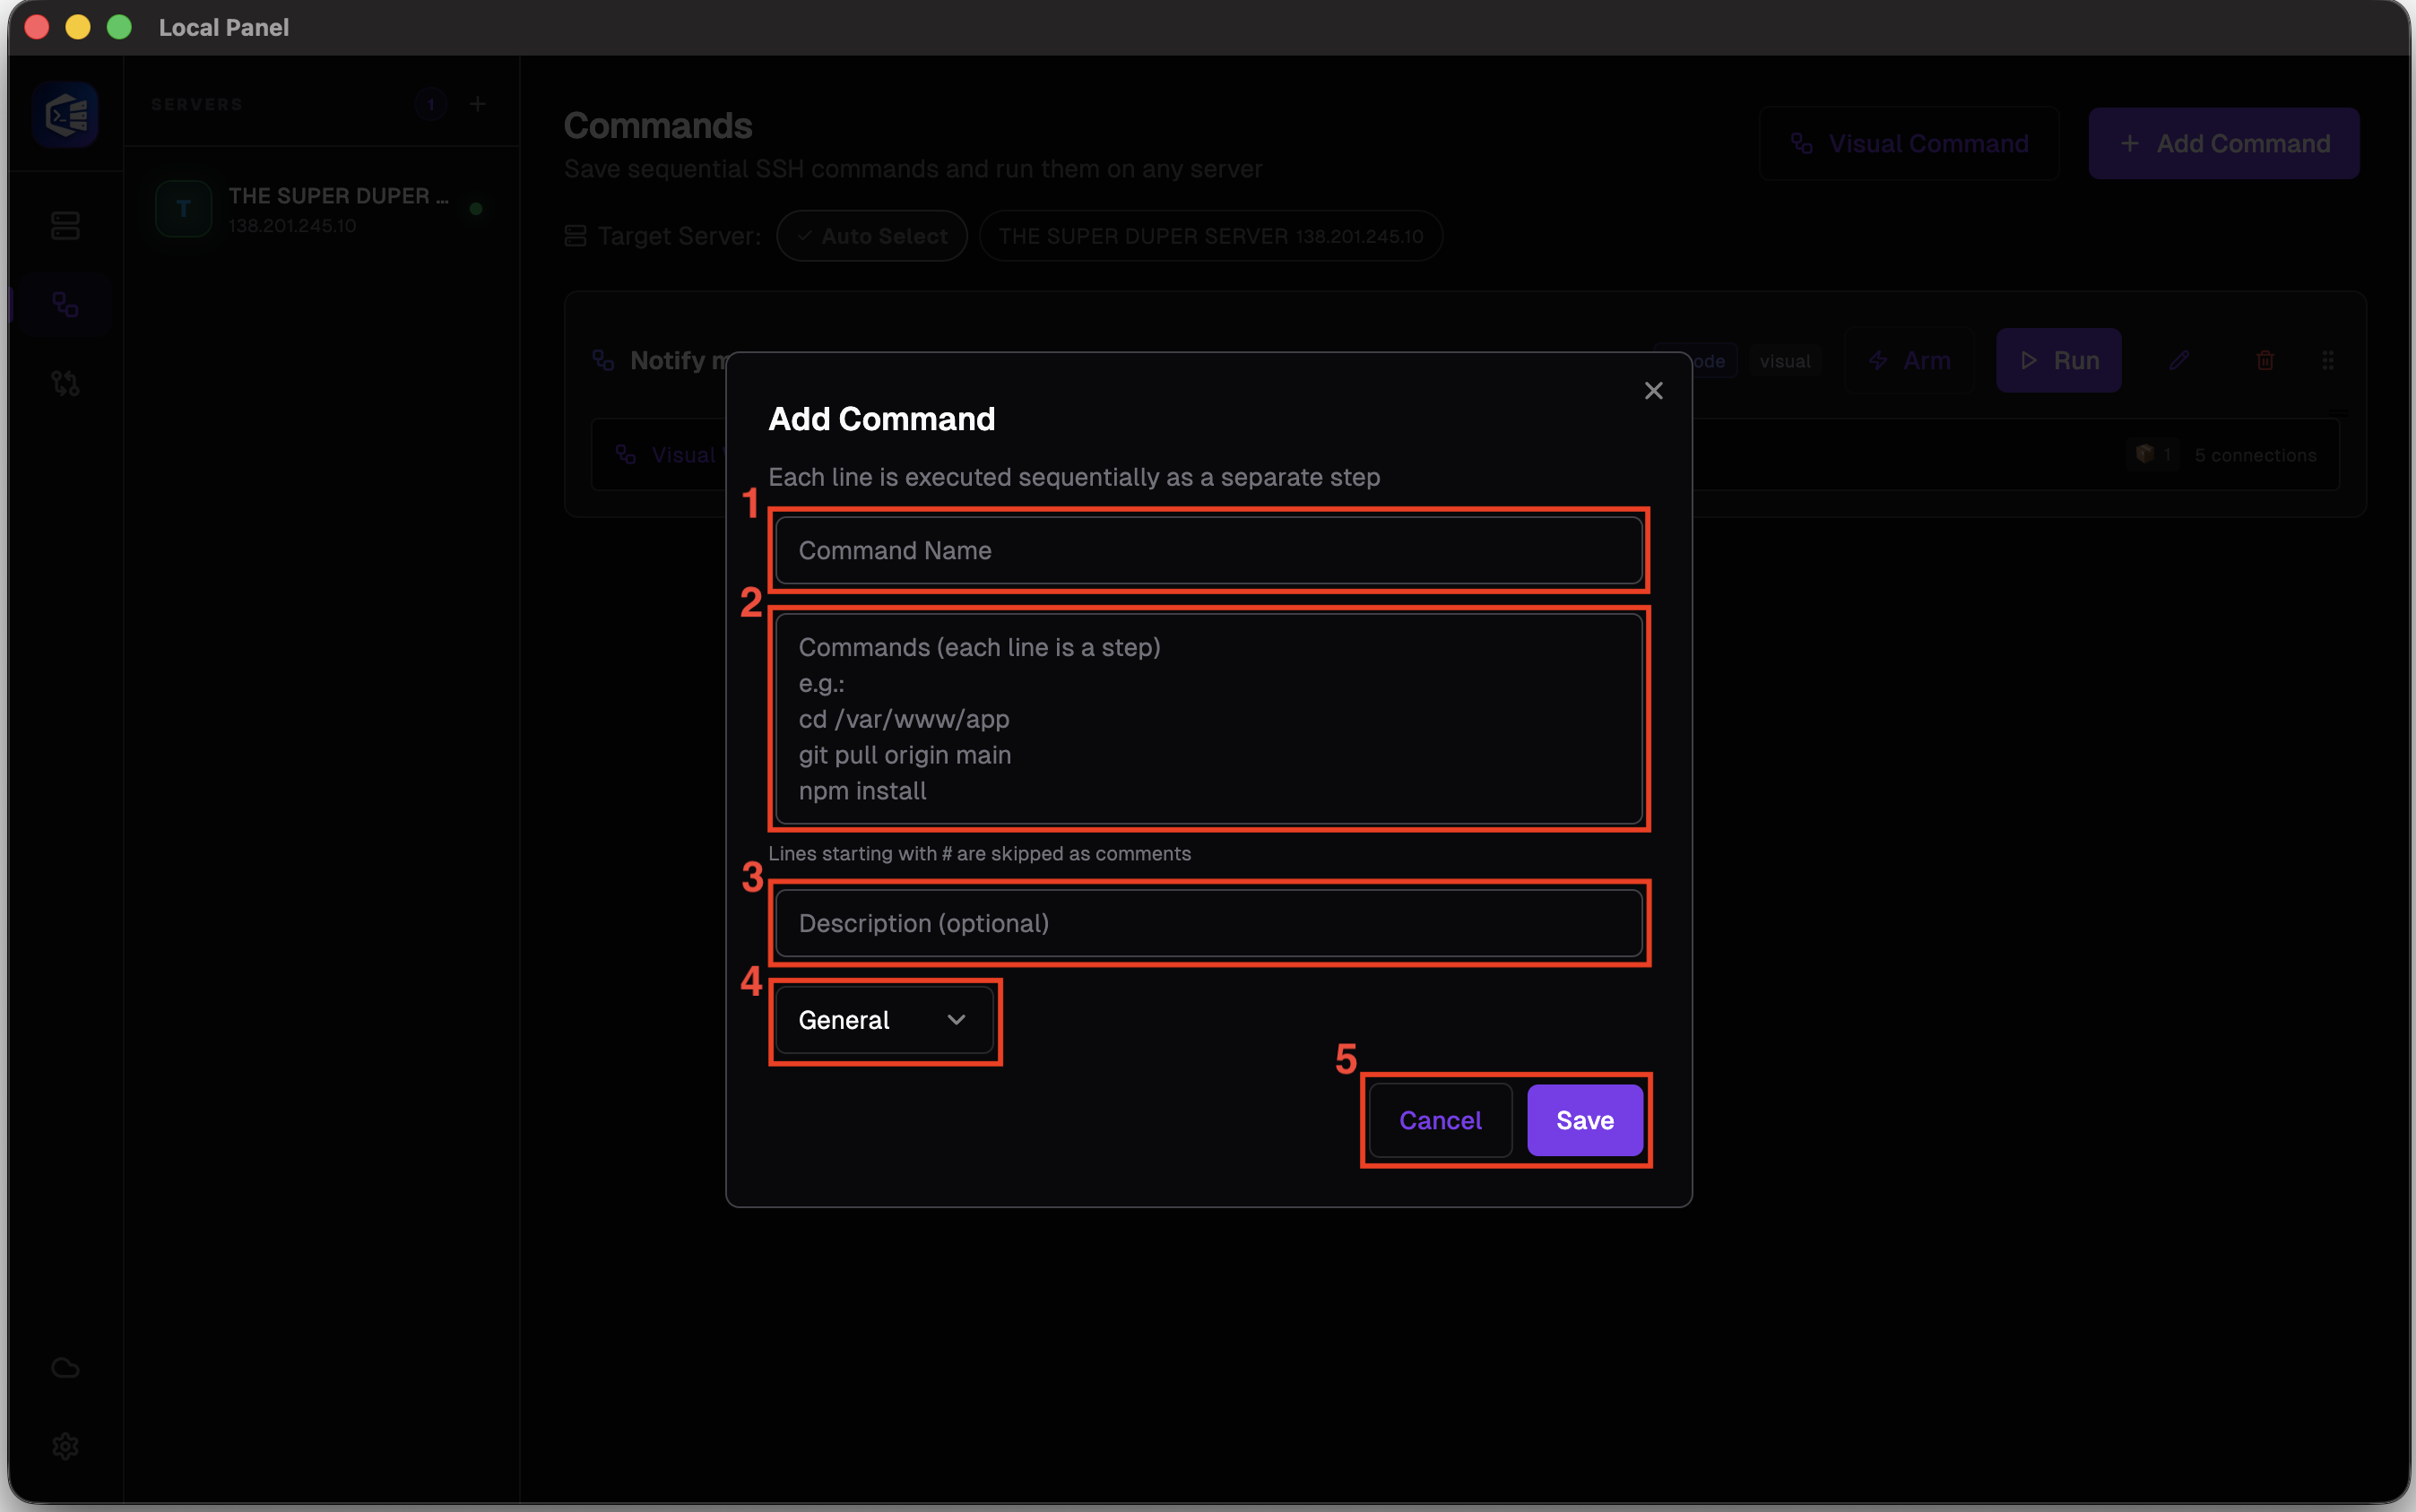
Number 1: A name that will remind you what the command is
Number 2: You can move to a new line for each new command you run, and you can add comment lines using the # symbol.
Number 3. A description for this command
Number 4: A field where you can set the category of your command
Number 5: If you wish to cancel, click the ‘Cancel’ button; if you wish to save, click the ‘Save’ button to either cancel or save your command.
When you arm your command

Number 1: When you press the “Arm” button to activate your workflow starting with the trigger node on the server, you should see the name of the server you have activated displayed next to your command. To disarm it, hover over the server name; it should turn red and display the word “Disarm”, at which point you should click on it.
Still stuck? Email contact@nesdzo.co.uk — we're happy to help.