 Local Panel by Nesdzo
Servers Screen
This is the screen that greets us when the app first opens. On this screen, all our servers are displayed in a list; we can add a new server, delete an existing one, and, if we wish, send a connection request to a shared server using ‘Add by code’. If you have added a server, the screen will look like the one below.
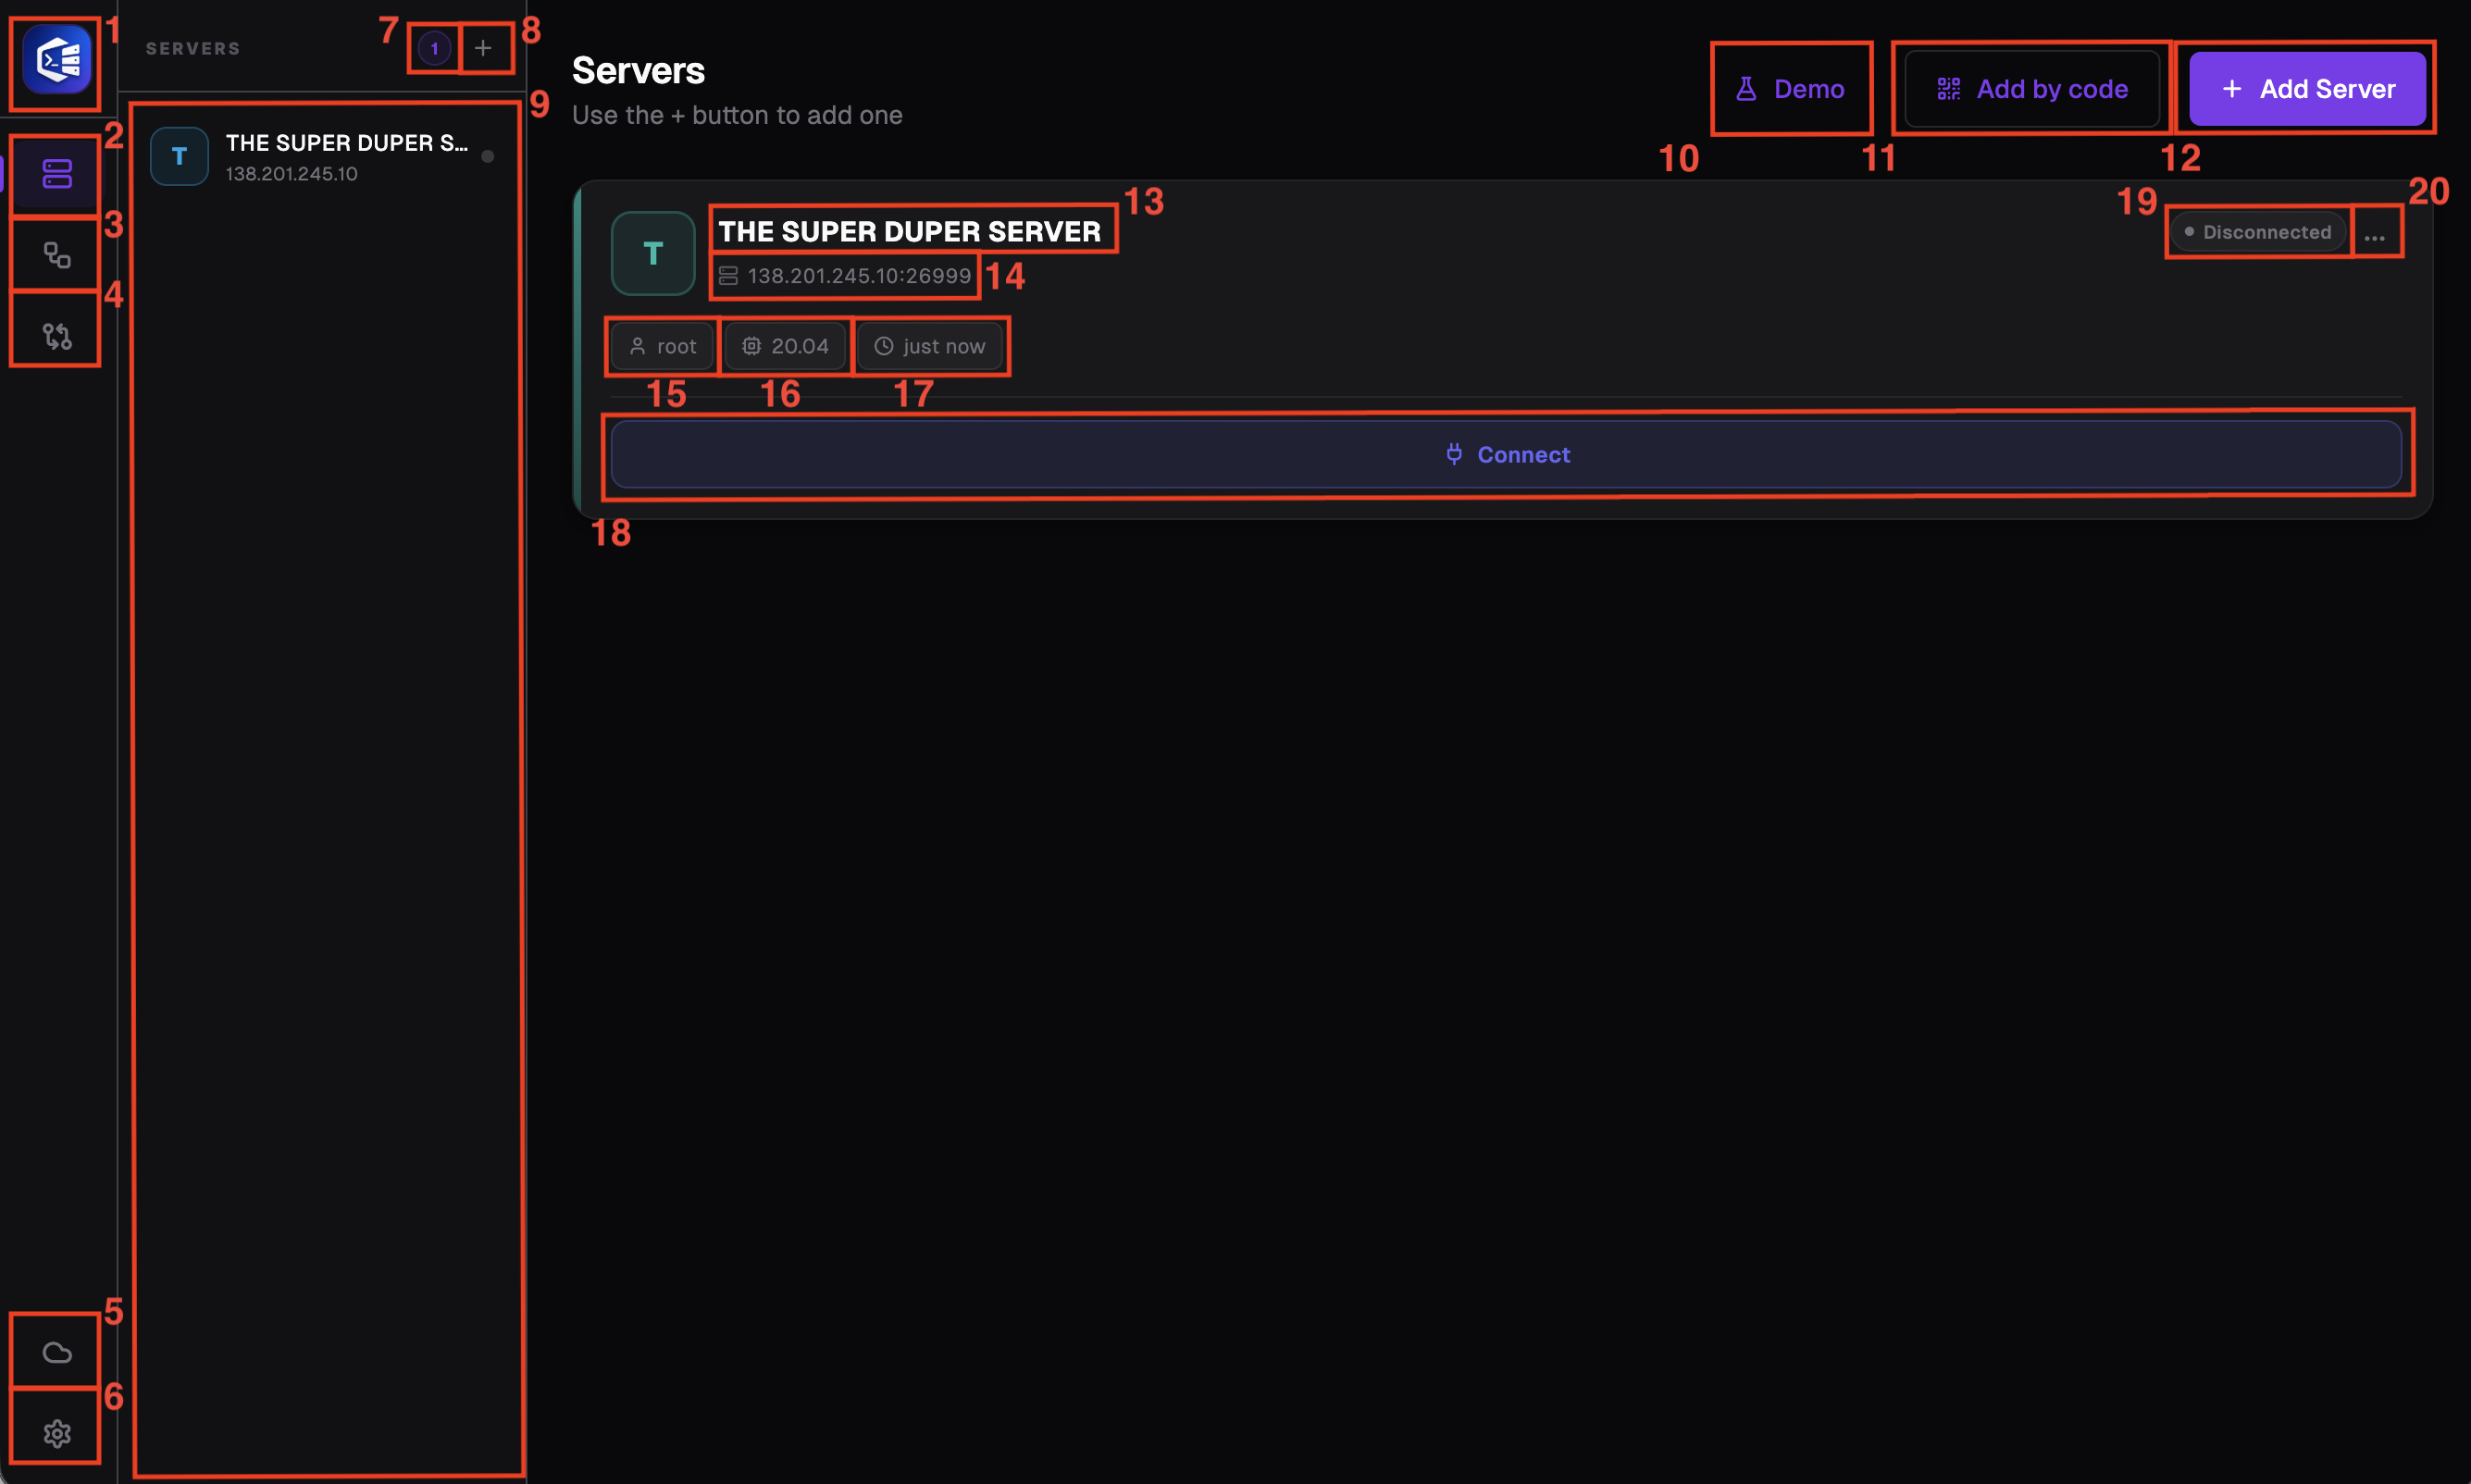
As you can see, we have numbered almost every significant area; let’s go through what each one is used for in turn.
Number 1: This button, which also serves as the Local Panel logo, takes us to the server list screen we are currently viewing.
Number 2: Just like button number 1, this takes us back to the servers screen we are currently viewing.
Number 3: It takes us to a screen where we can create, run or activate triggers on the server. Commands can be entered manually or using the Local Panel’s powerful visual coding engine.
Number 4: This is the screen you’ll want to access if you wish to see the differences between the two servers you’ve added to the Local Panel from almost every angle; simply select the servers you wish to compare and view the differences in the list. You must add at least two different servers to use this feature.
Number 5: This button takes you to the screen where you can log in to your Local Panel account, log out, and manage your data.
Number 6: If you wish to access all the app’s settings, bug logs and version information, please click on this button, which looks like a cogwheel.
Number 7: This element shows how many servers you have.
Number 8: This is one of the two buttons you can click to add a new server. (If you haven’t added any servers yet, you have three different options for adding a new server.)
Number 9: A section listing your servers, which are generally accessible from anywhere and help you switch servers quickly and connect to a server swiftly.
Number 10: If you want to test the Local Panel but don’t have a server to test it on, you can add a sample server using the Demo button. (Many features will not work; this is for demonstration purposes only.)
Number 11: If someone has shared their server with you via Safe Share using a code, you should click this button to access the field where you can enter the code.
Number 12: It is one of the two buttons on the screen, which looks like number 8, used to add a server.
Number 13: This is the name you give to your server when adding it.
Number 14: This is the IP address and port of your server written in the IP:port format.
Number 15: The username to be used to connect to your server is listed here.
Number 16: The version of the operating system on your server is shown here.
Number 17: You can see here when you last connected to this server via Local Panel.
Number 18: A huge “Connect” button you can use to connect to the server
Number 19: This is a status indicator that shows whether you are connected to the server. It currently shows that we are not connected.
Number 20: The ‘More’ button allows us to access some minor settings for our server; it displays different options depending on whether we are connected to the server or not.
when connected to the server
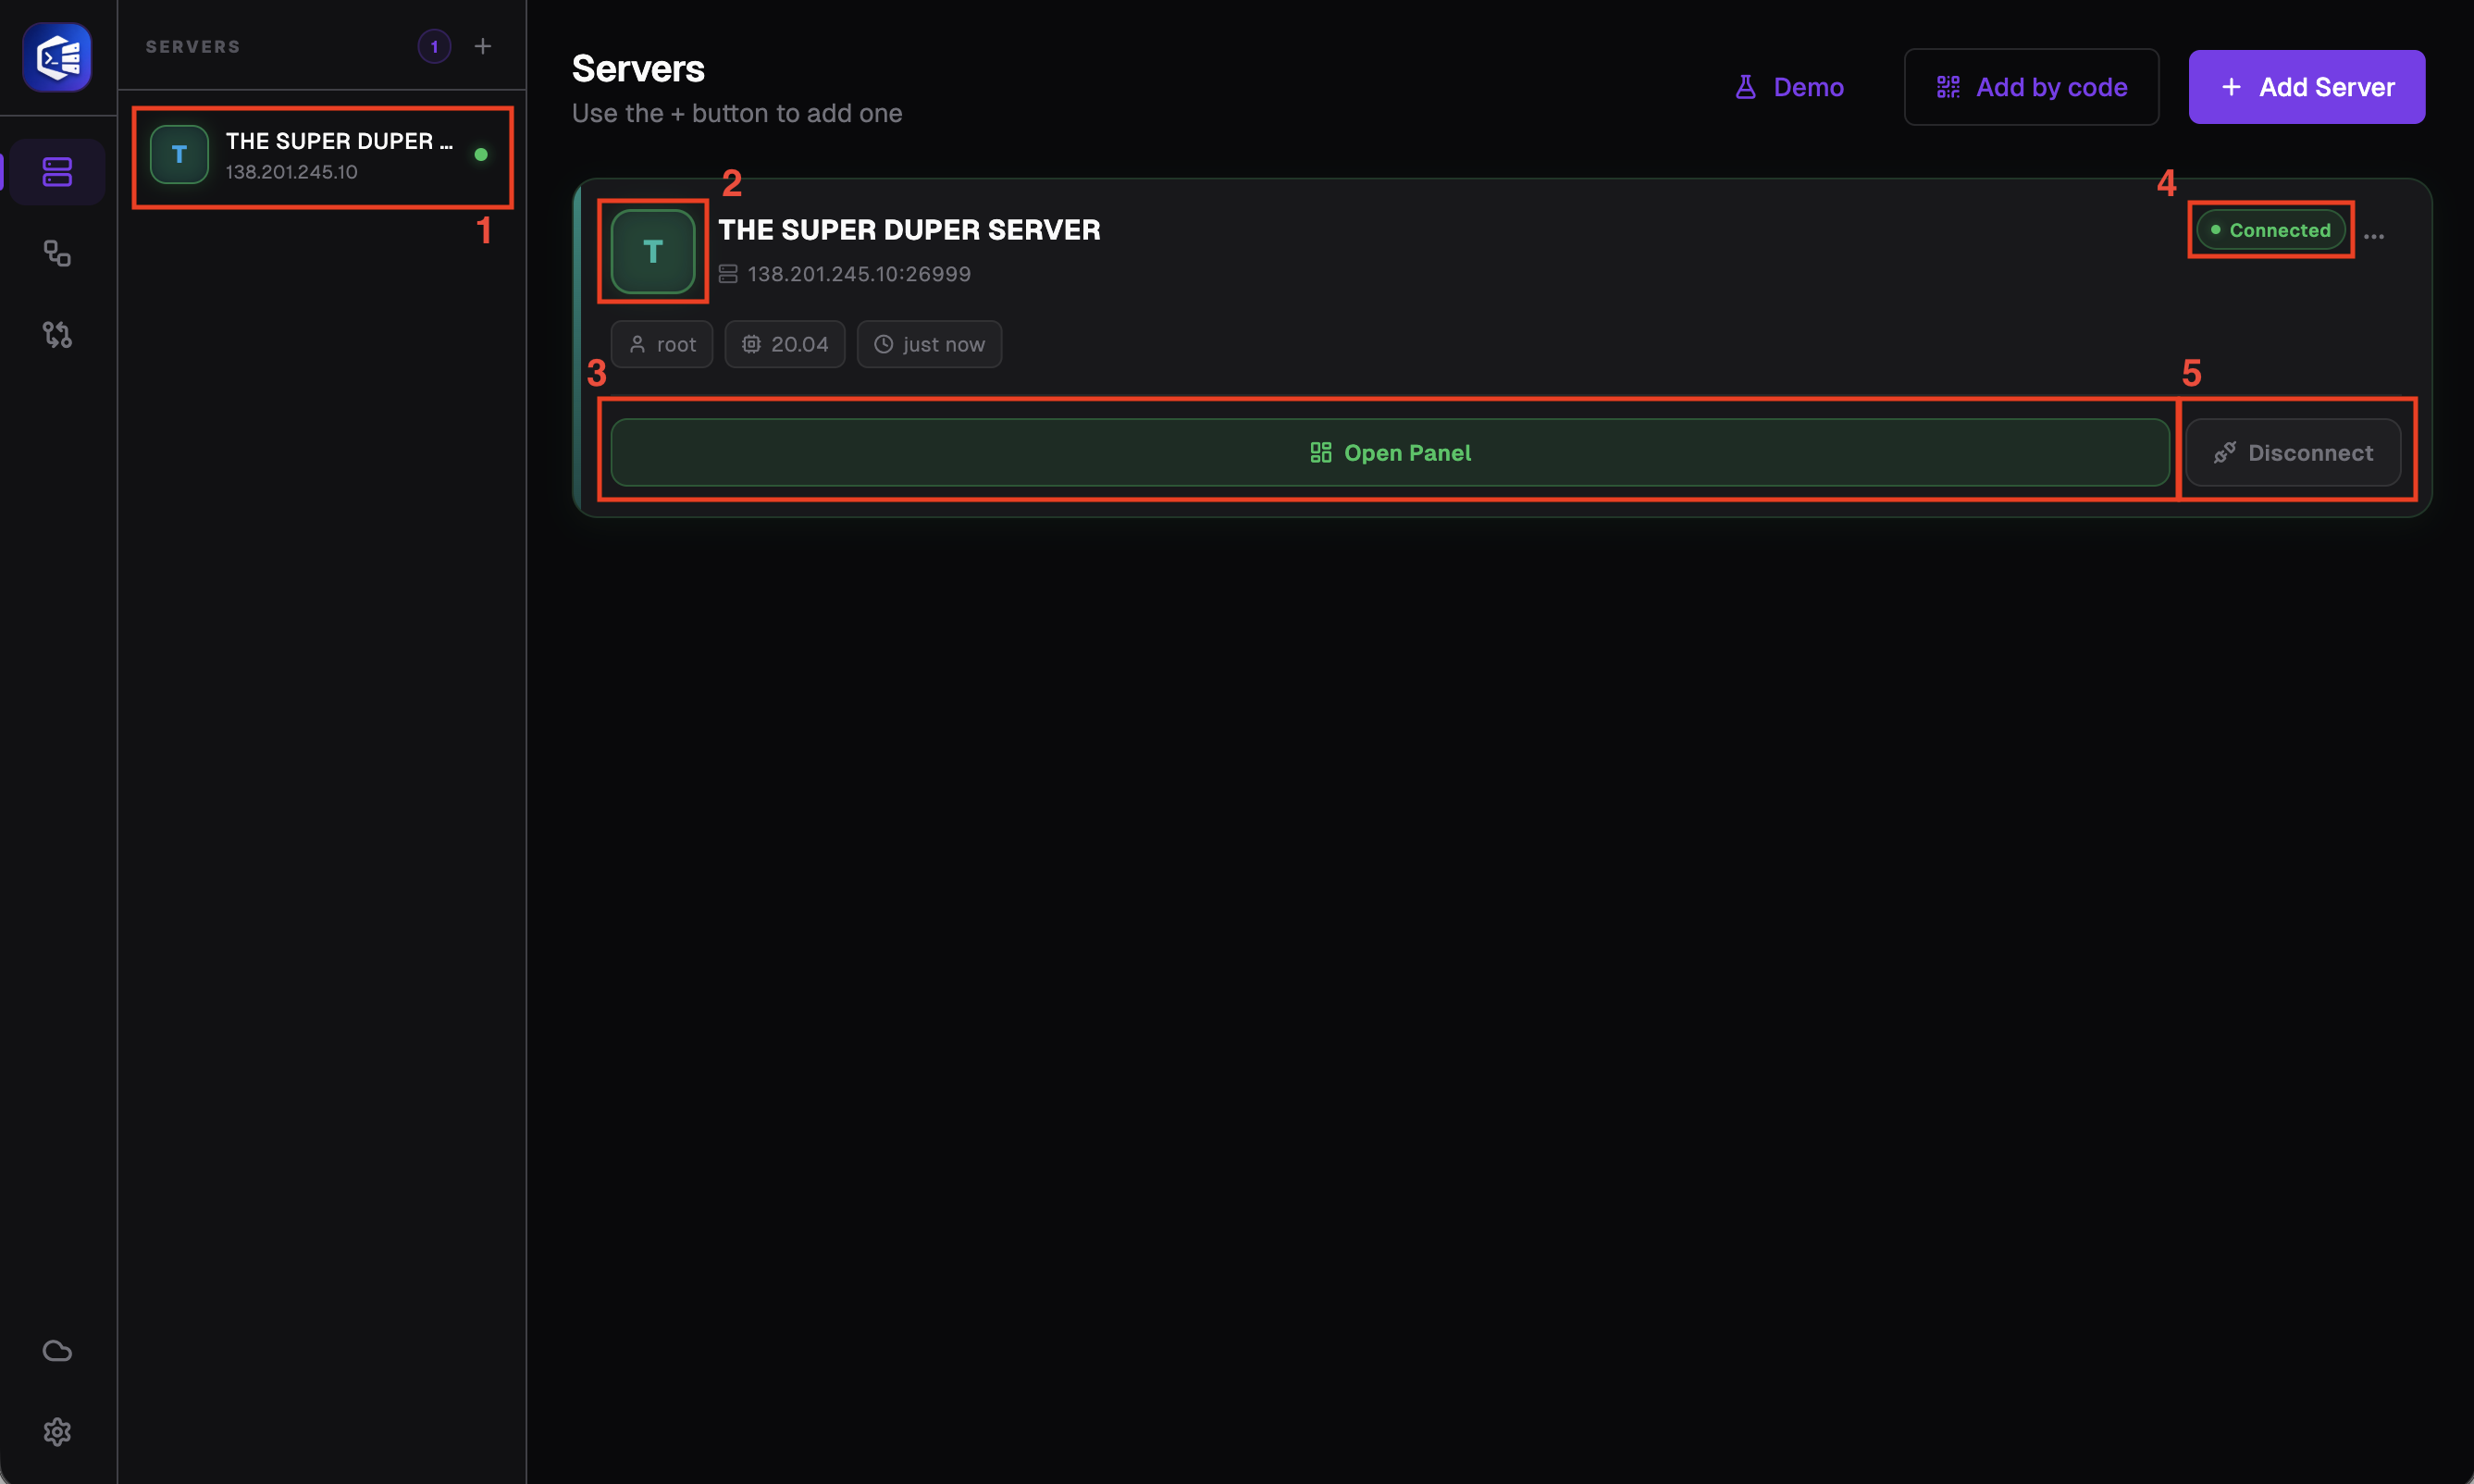
We will discuss the indicators that will help you determine whether you are connected to a server.
Number 1: A glow effect appears behind the avatar and the indicator on the far right turns green. You can also access the panel by clicking here.
Number 2: A glow effect can also be seen behind the large avatar.
Number 3: It can be used to access the larger of the two buttons that have replaced the large “Connect” button.
Number 4: If you are connected to the server, the text in your language will display “Connected” and the indicator will turn green
Number 5: The smaller of the two buttons that replace the large ‘Connect’ button displayed when you are not connected is used to disconnect from the server.
Options for the “More” button when we are not connected
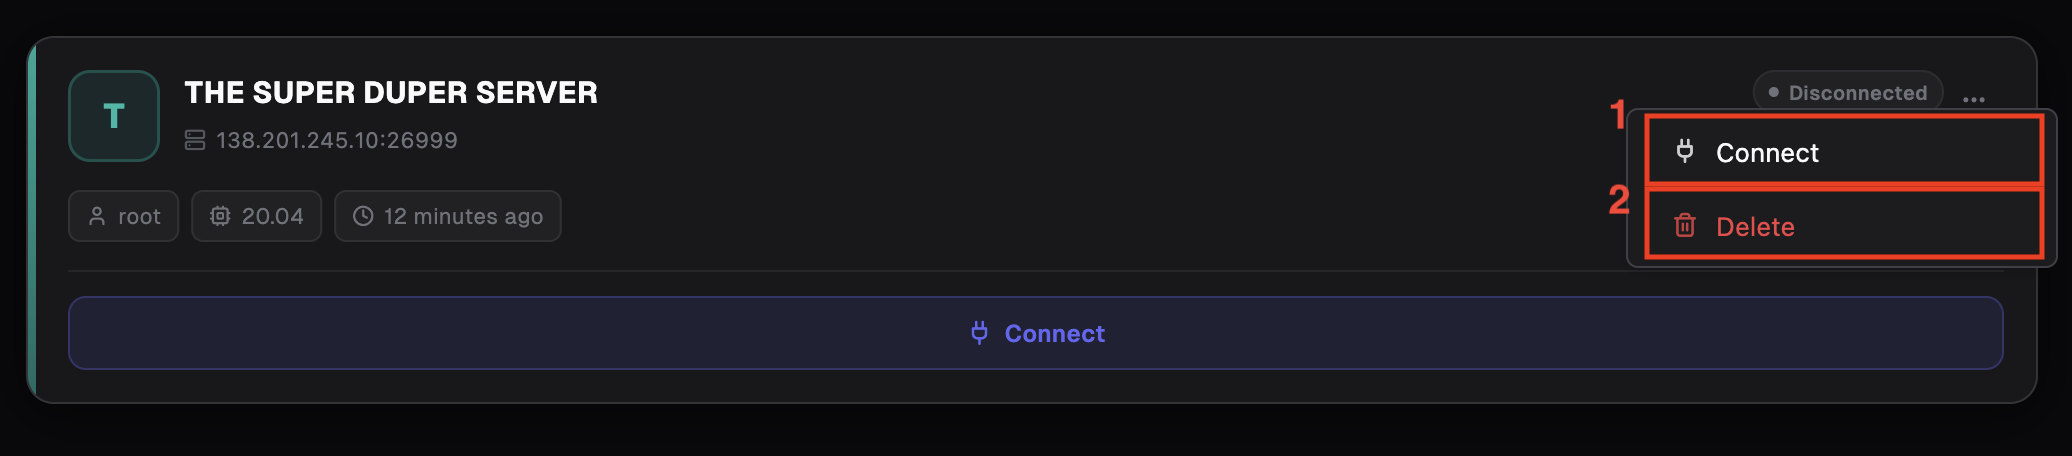
When we are not connected, we only see two options; let’s explain these for those who need them.
Number 1: It’s a small button you can use as an alternative to the huge one for connecting to the server.
Number 2: You can use this button to permanently delete your server from this list; you can add the same server again at any time using the ‘Add Server’ option.
Options for the “More” button when we are connected
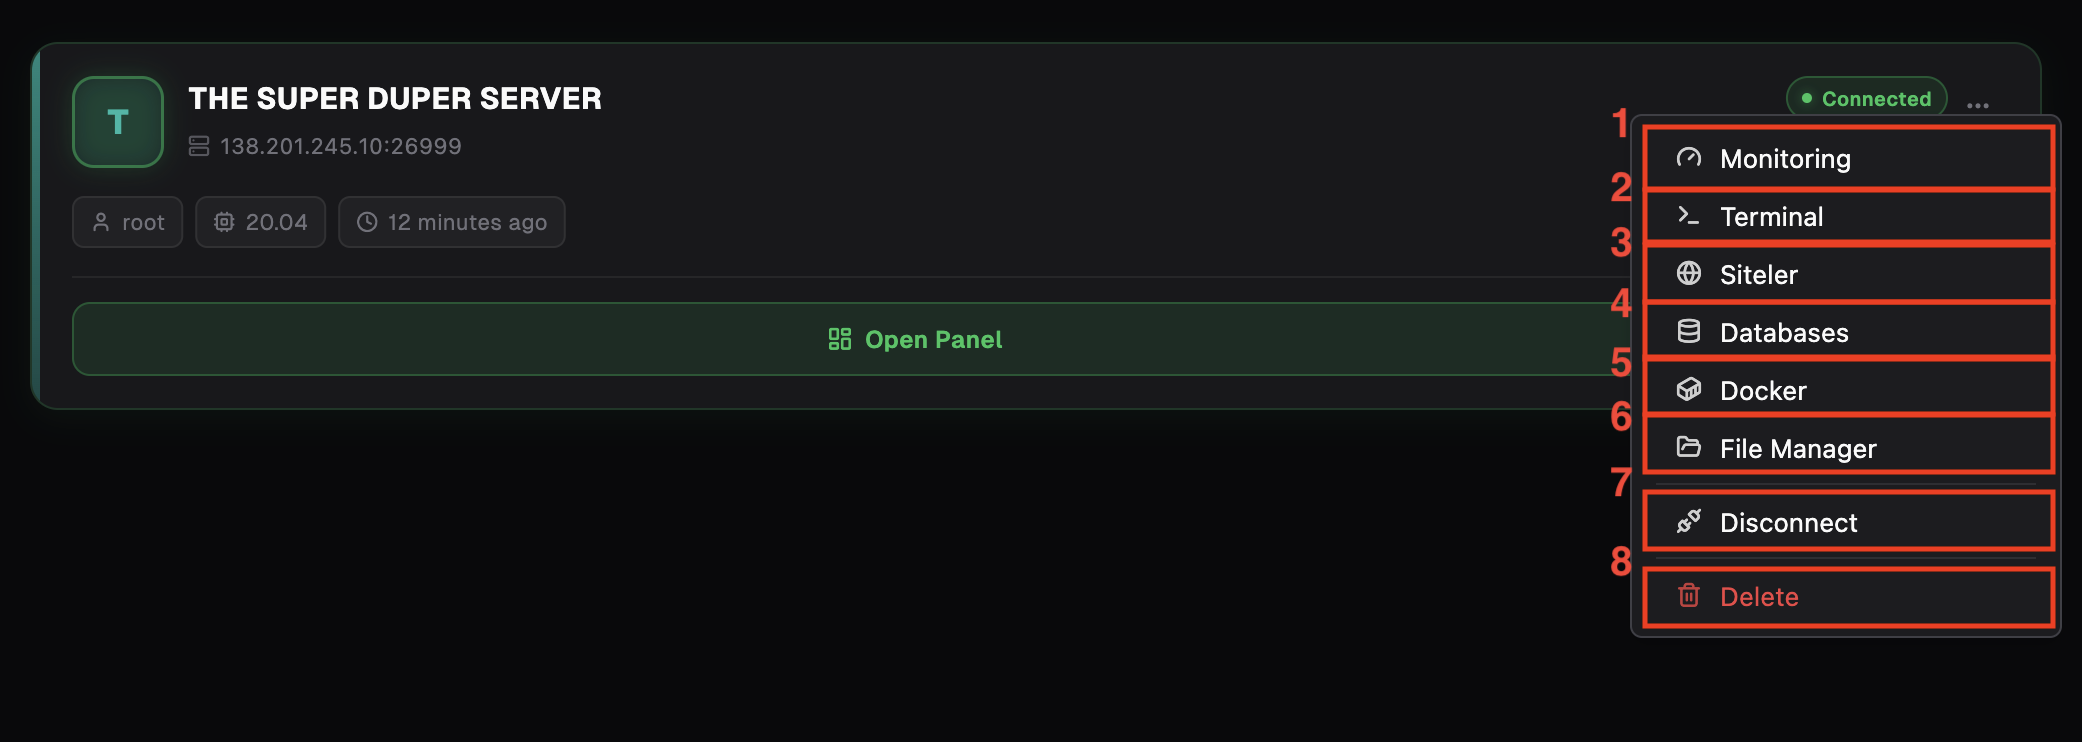
When connected to the server, additional options become available. Let’s go through them one by one to clarify:
Number 1: This can be used to navigate to the screen that appears when you first log in to the control panel to monitor your server.
Number 2: You can use this if you want to access your server’s terminal more quickly.
Number 3: This is a quick-access button for your Nginx and Apache configuration files.
Number 4: If you need a quick access button to manage the databases on your server, you will need to click on it.
Number 5: If you’re a regular Docker user and want to access it more quickly, this is the button I think you’ll need.
Number 6: Quick access button to access the file manager on your server.
Number 7: This is a button that will help you disconnect from your server.
Number 8: You can use this button to permanently delete your server from this list; you can add the same server again at any time using the ‘Add Server’ option.
Still stuck? Email contact@nesdzo.co.uk — we're happy to help.