 Local Panel by Nesdzo
Safe Share
Safe Share is a new feature introduced in version 1.5.260611 of Local Panel; it allows you to create an SSH login method for your server that is automatically deleted after a certain period of time. You can monitor the activities of anyone who logs in using the login method you have created.
Prerequisites:
- Local Panel
- A Server with SSH
- A Windows, Linux or macOS computer
- An email address that you can access
- An recipient email address
To use this feature, you need to create a free account on Local Panel. You can easily do this using just your email address. Let’s log in to our account first, and then find out how to share our server with someone else using Safe Share.
Total Time: 12 minutes
-
Open “Cloud account” tab
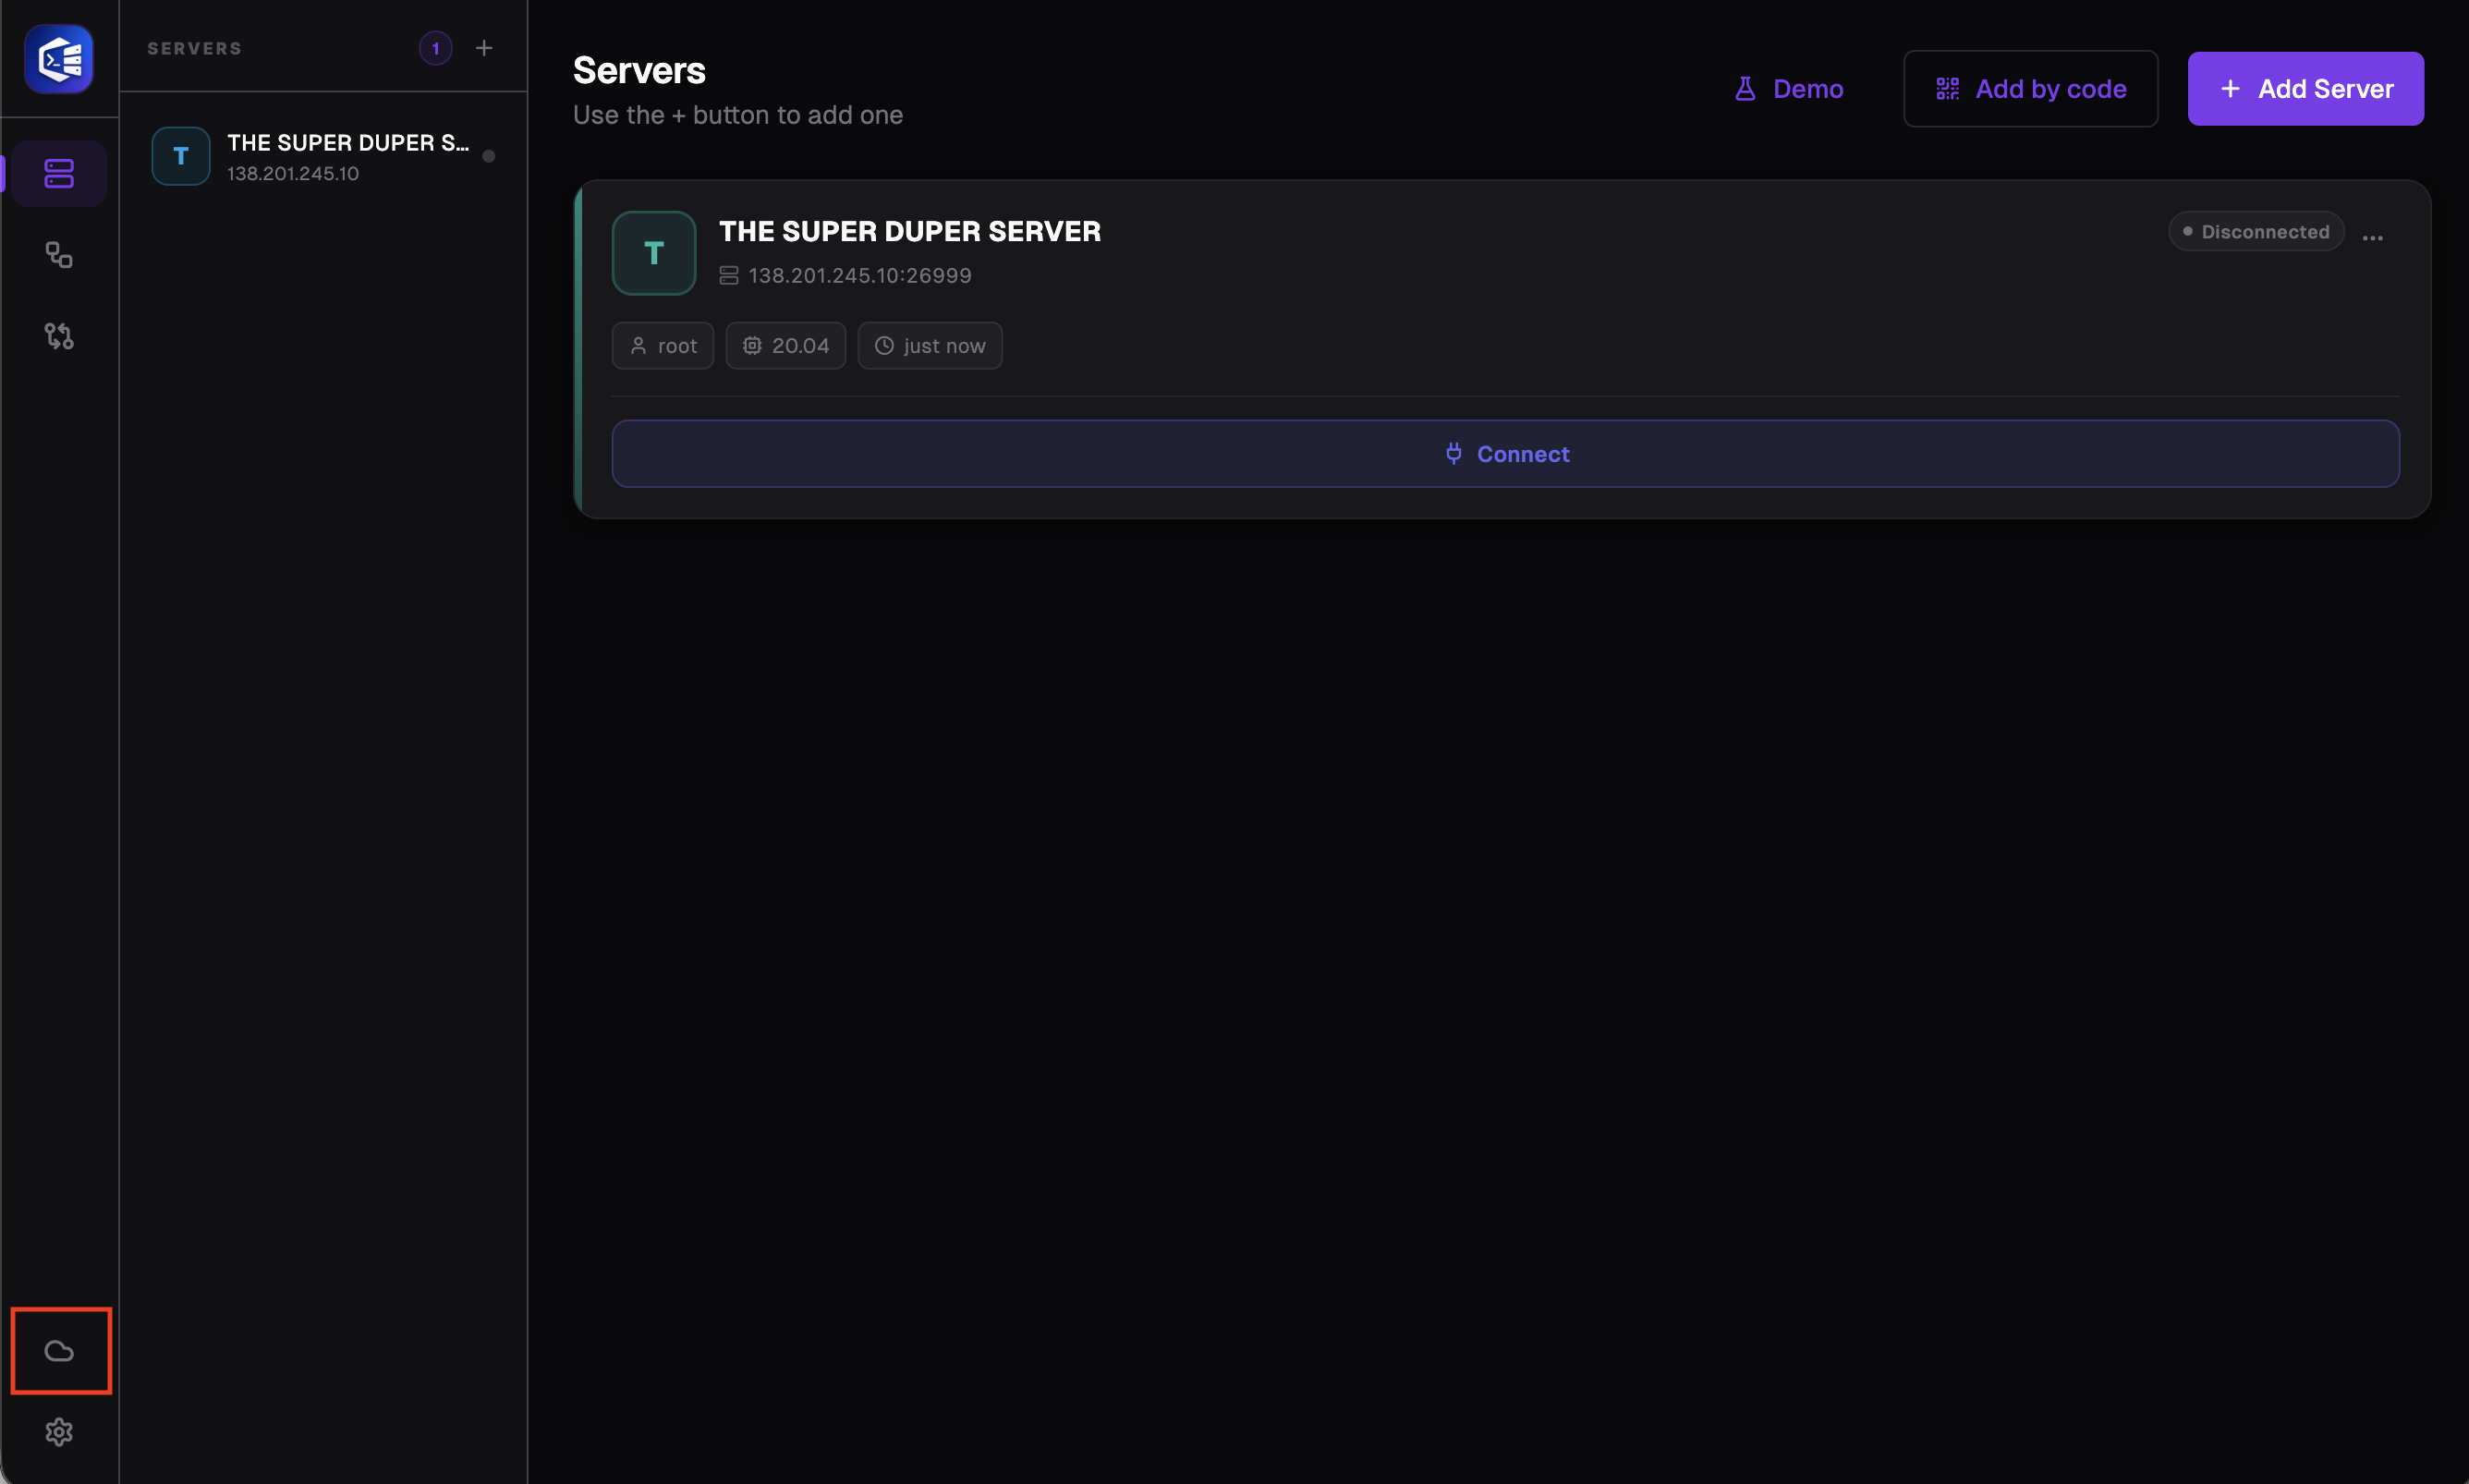
Click on the cloud icon in the bottom-left corner of your screen to go to the “Cloud account” tab.
-
Sign in with email
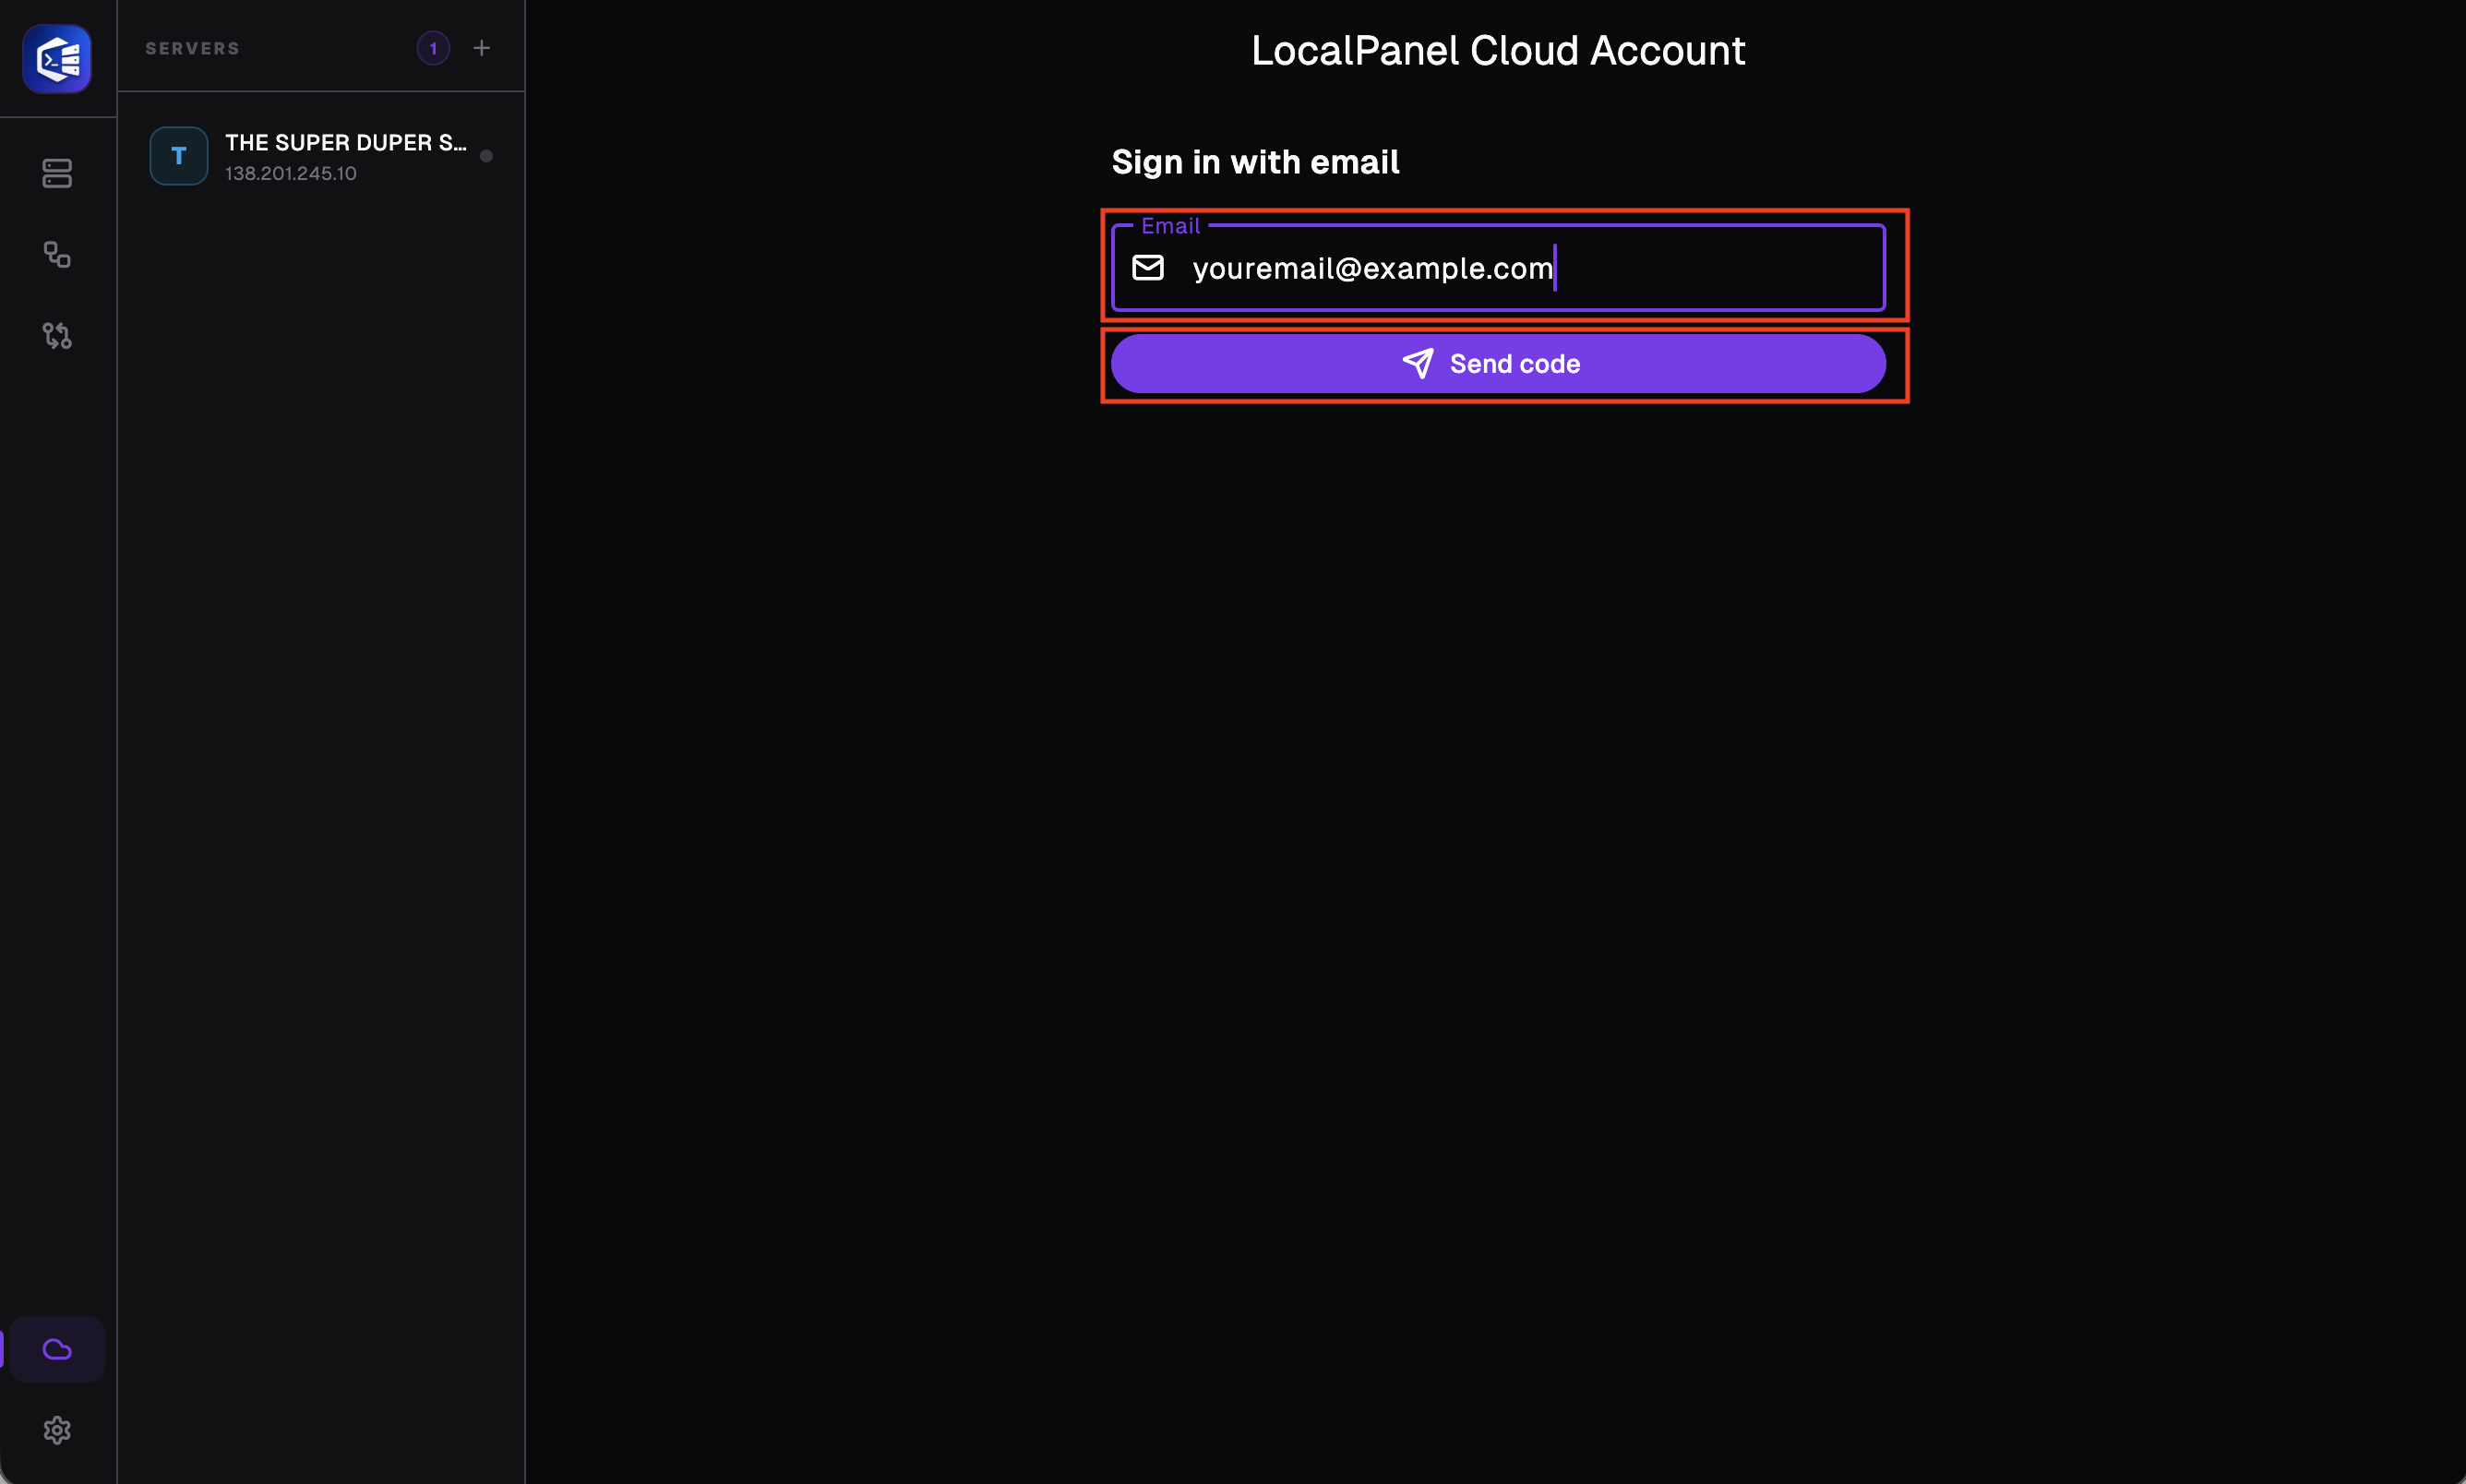
There is no extra step required to register; if you do not have an account, one will be created automatically; if you do, you will be logged in. After entering your email address in the designated field, click the “Send Code” button.
-
Verify your email
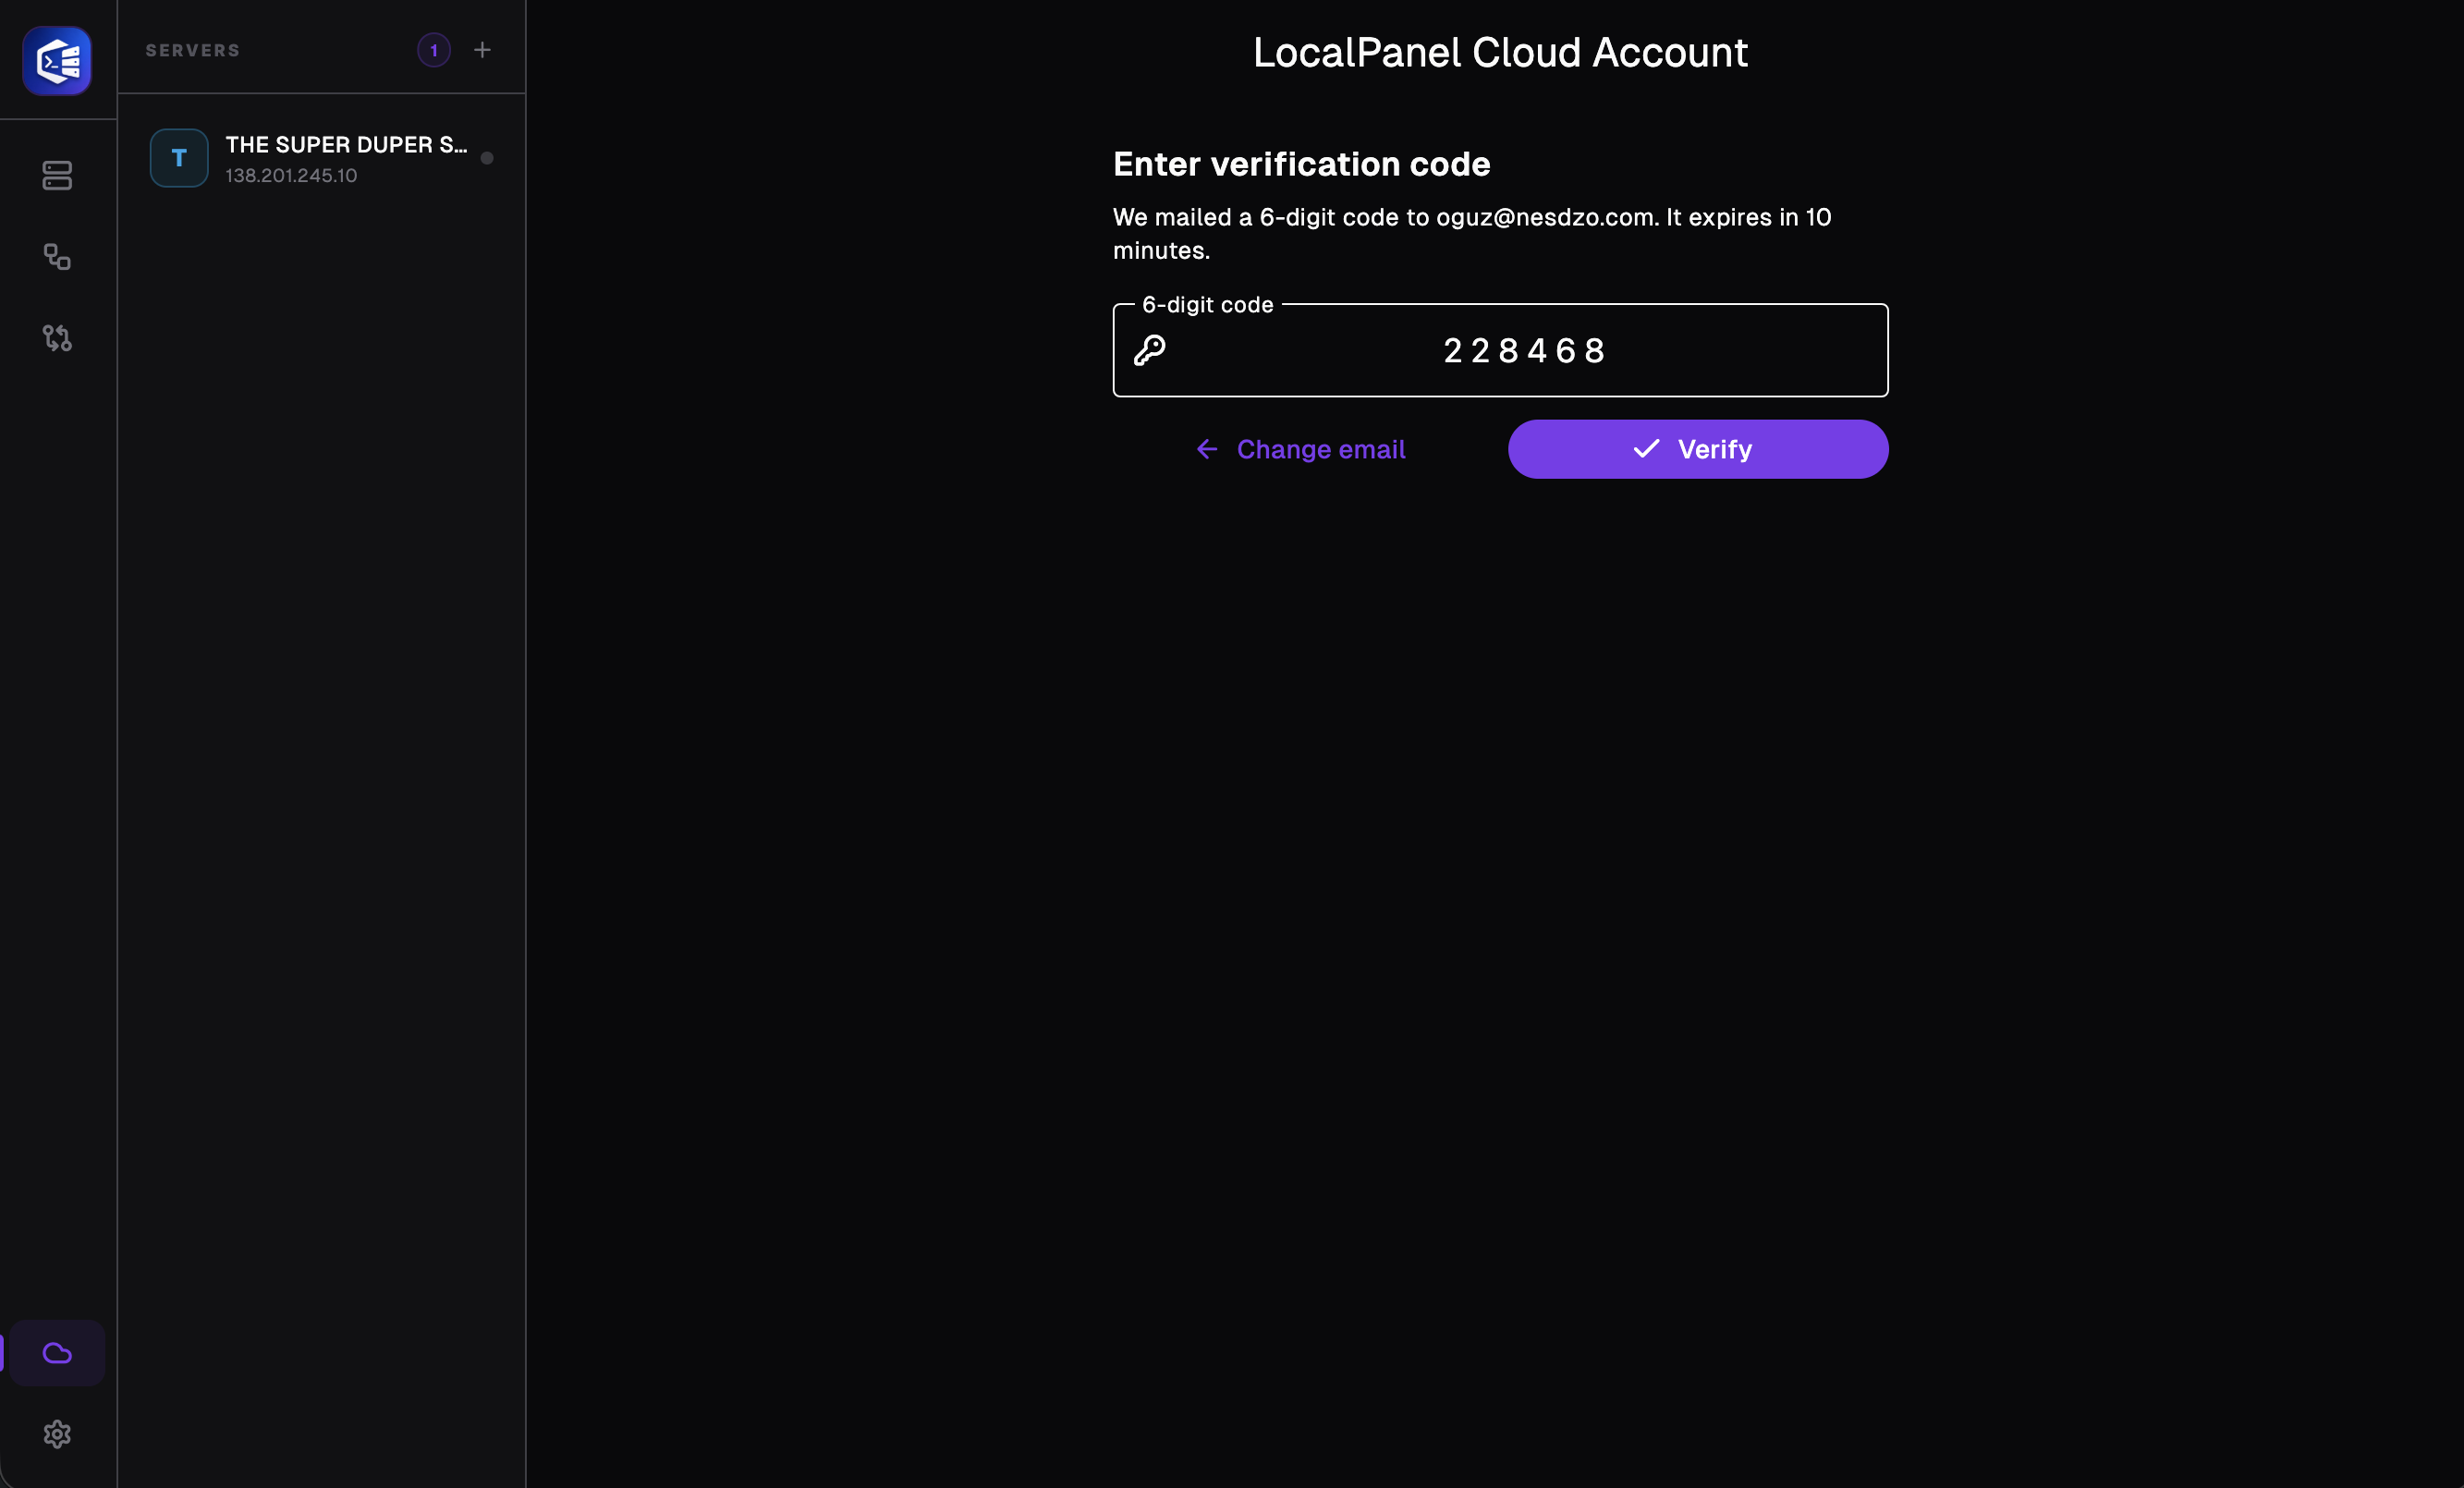
Enter the “code” and Verify your email address.
-
Successful Login
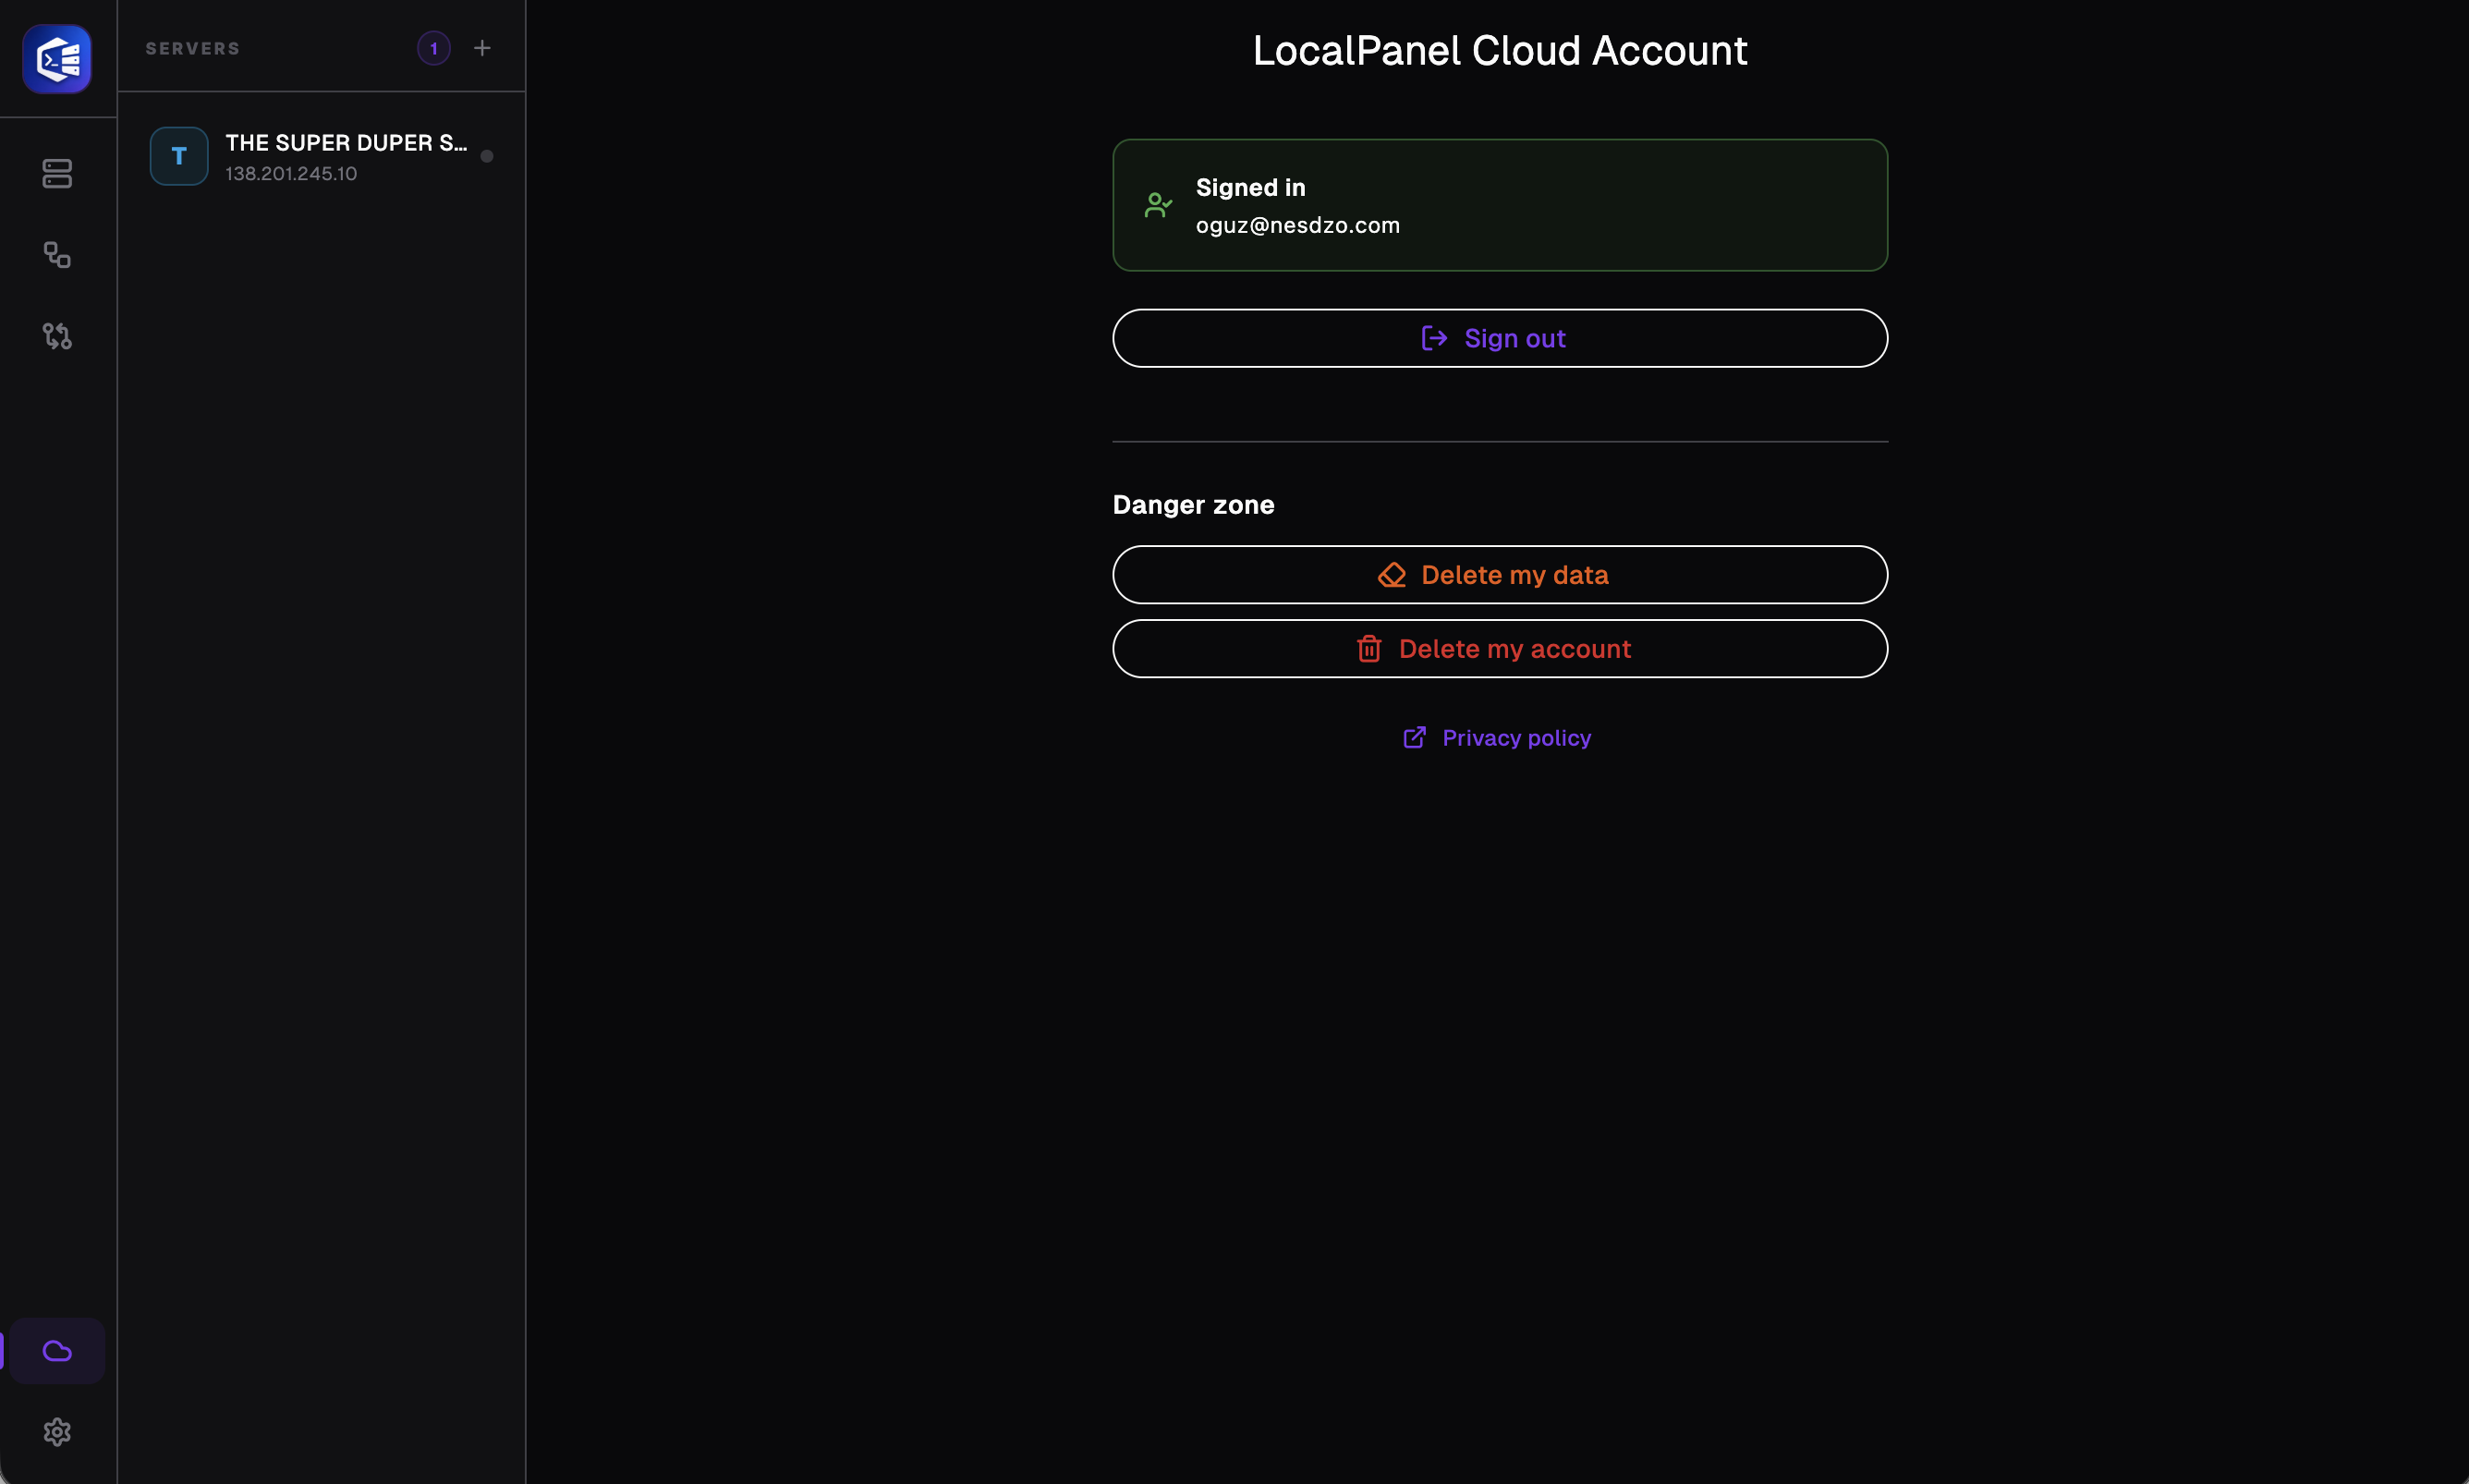
Once you have logged in successfully, you should see this screen.
-
Connect to the server
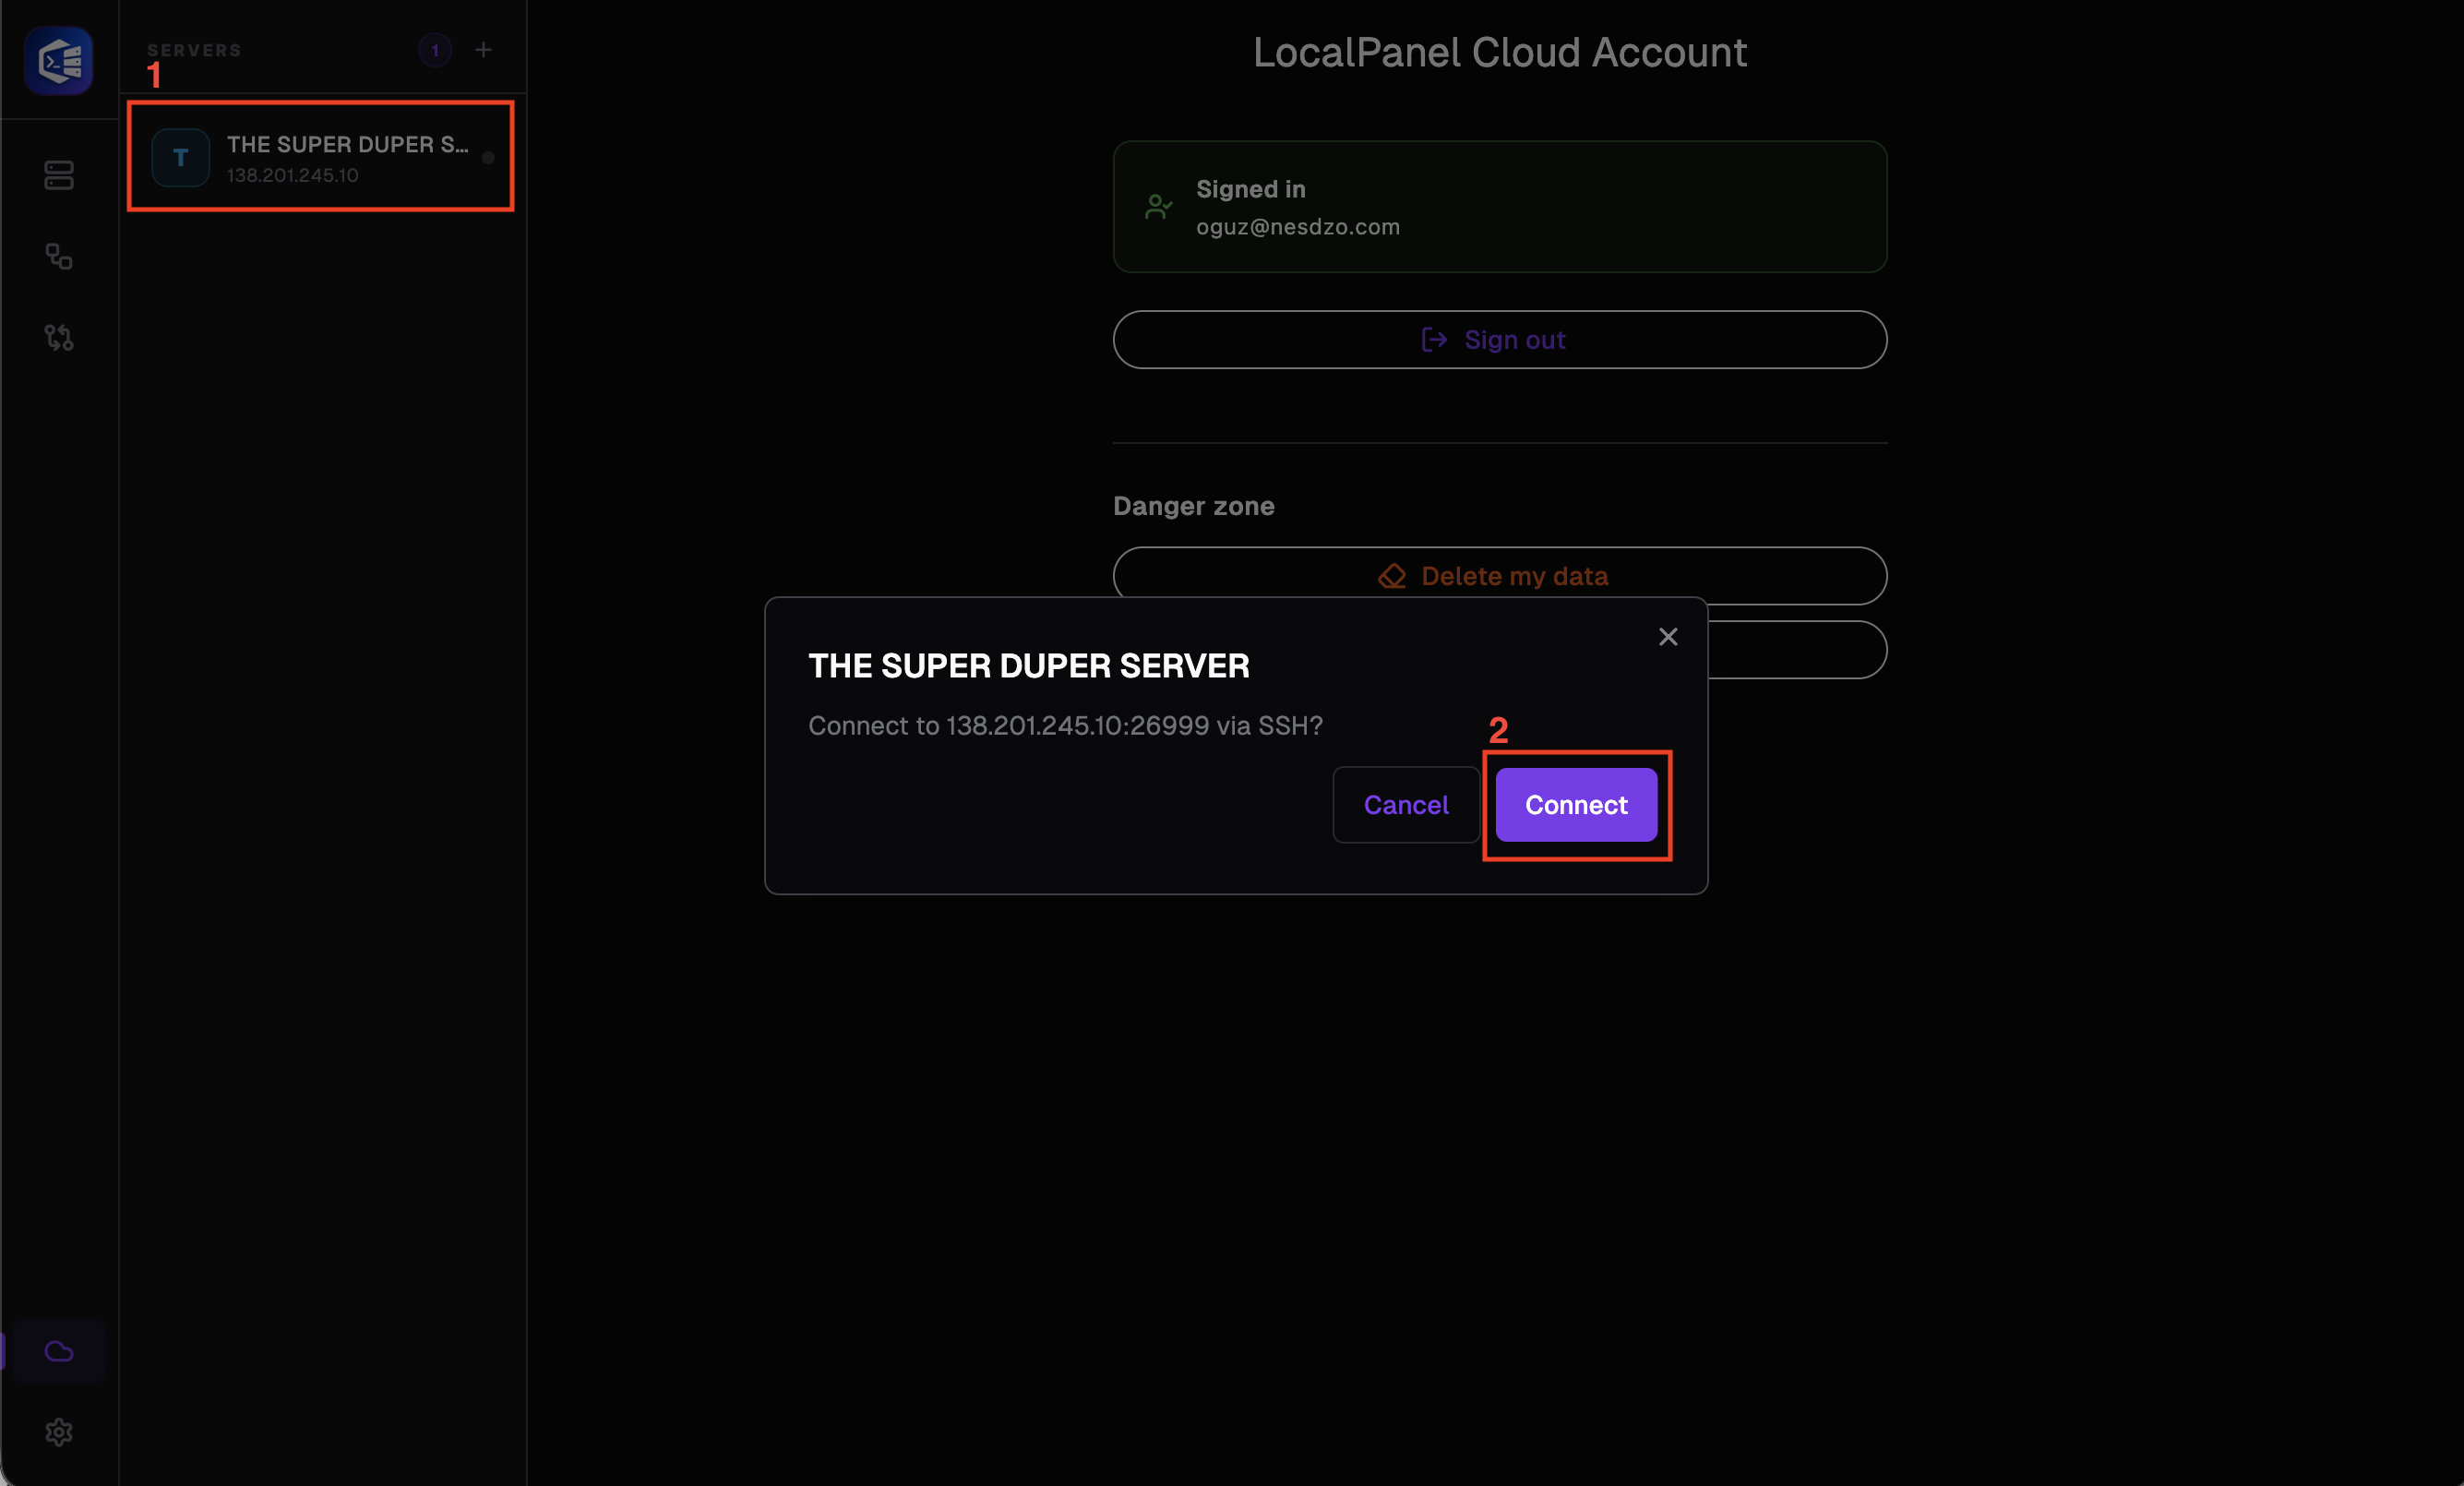
To use the Safe Share feature, select the server you wish to share via SSH and connect.
-
Go to “Safe Share” tab
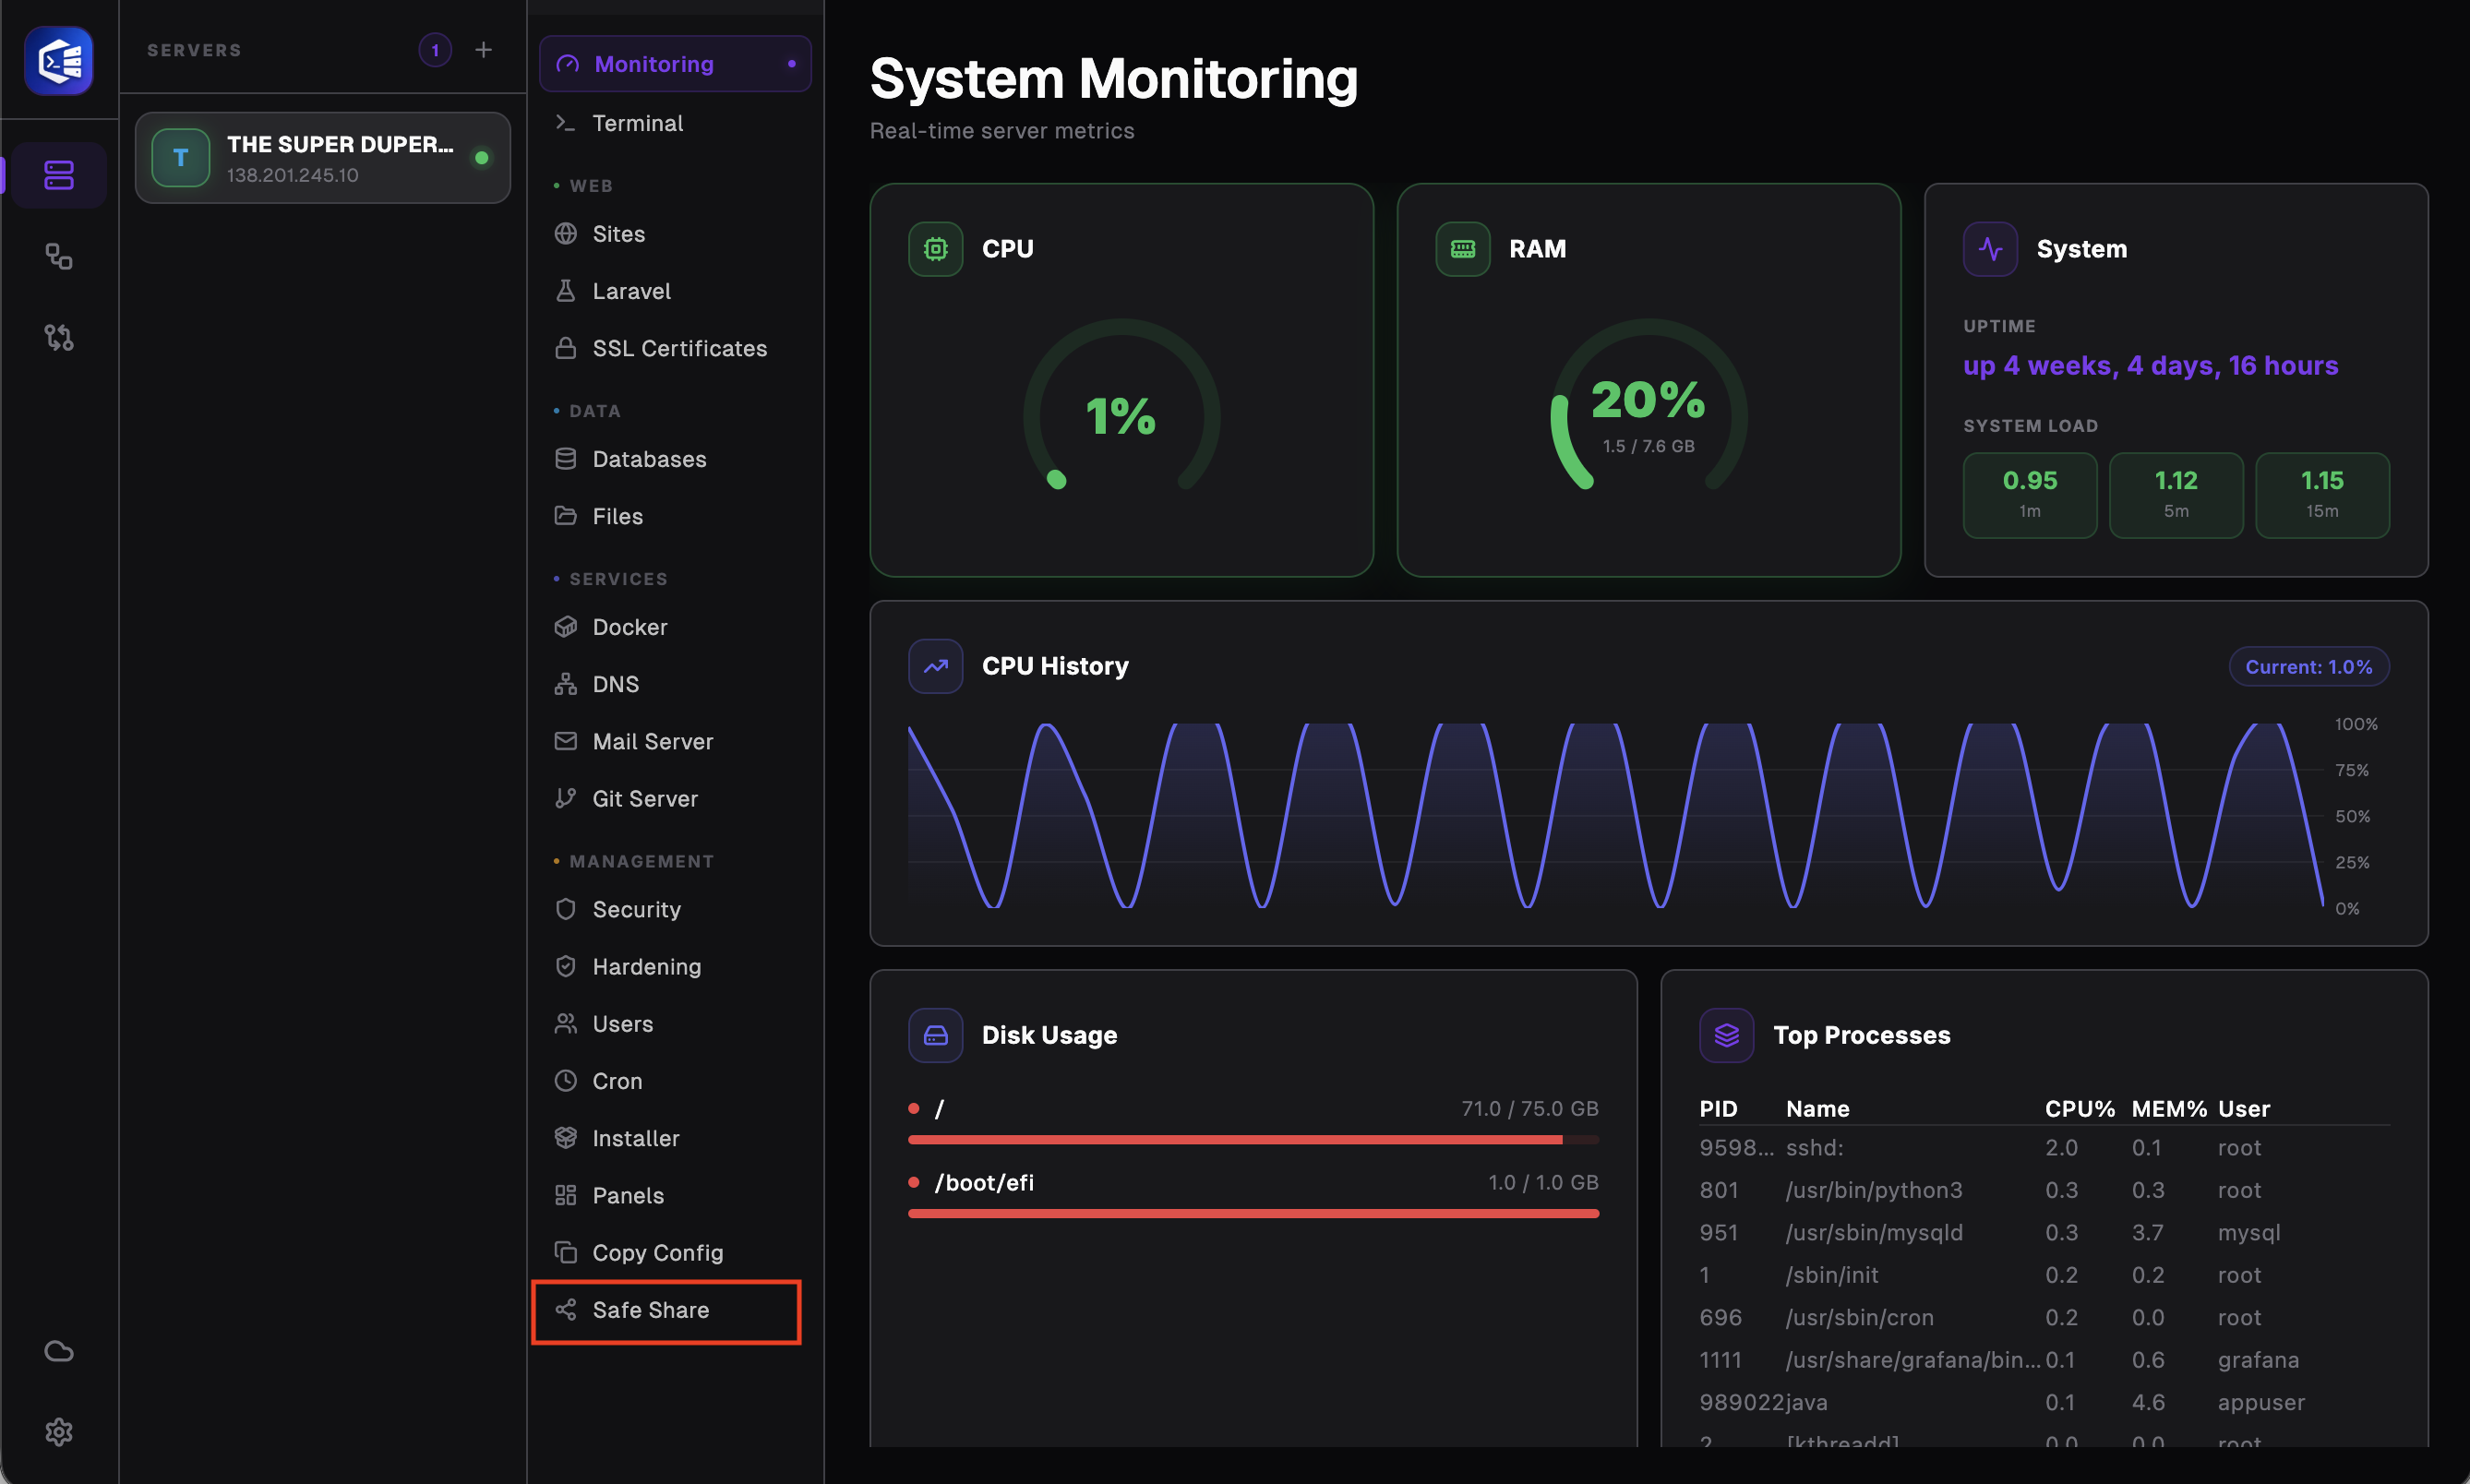
Click the ‘Safe Share’ button on the server navigation screen to go to the Safe Share tab.
-
Create Share button
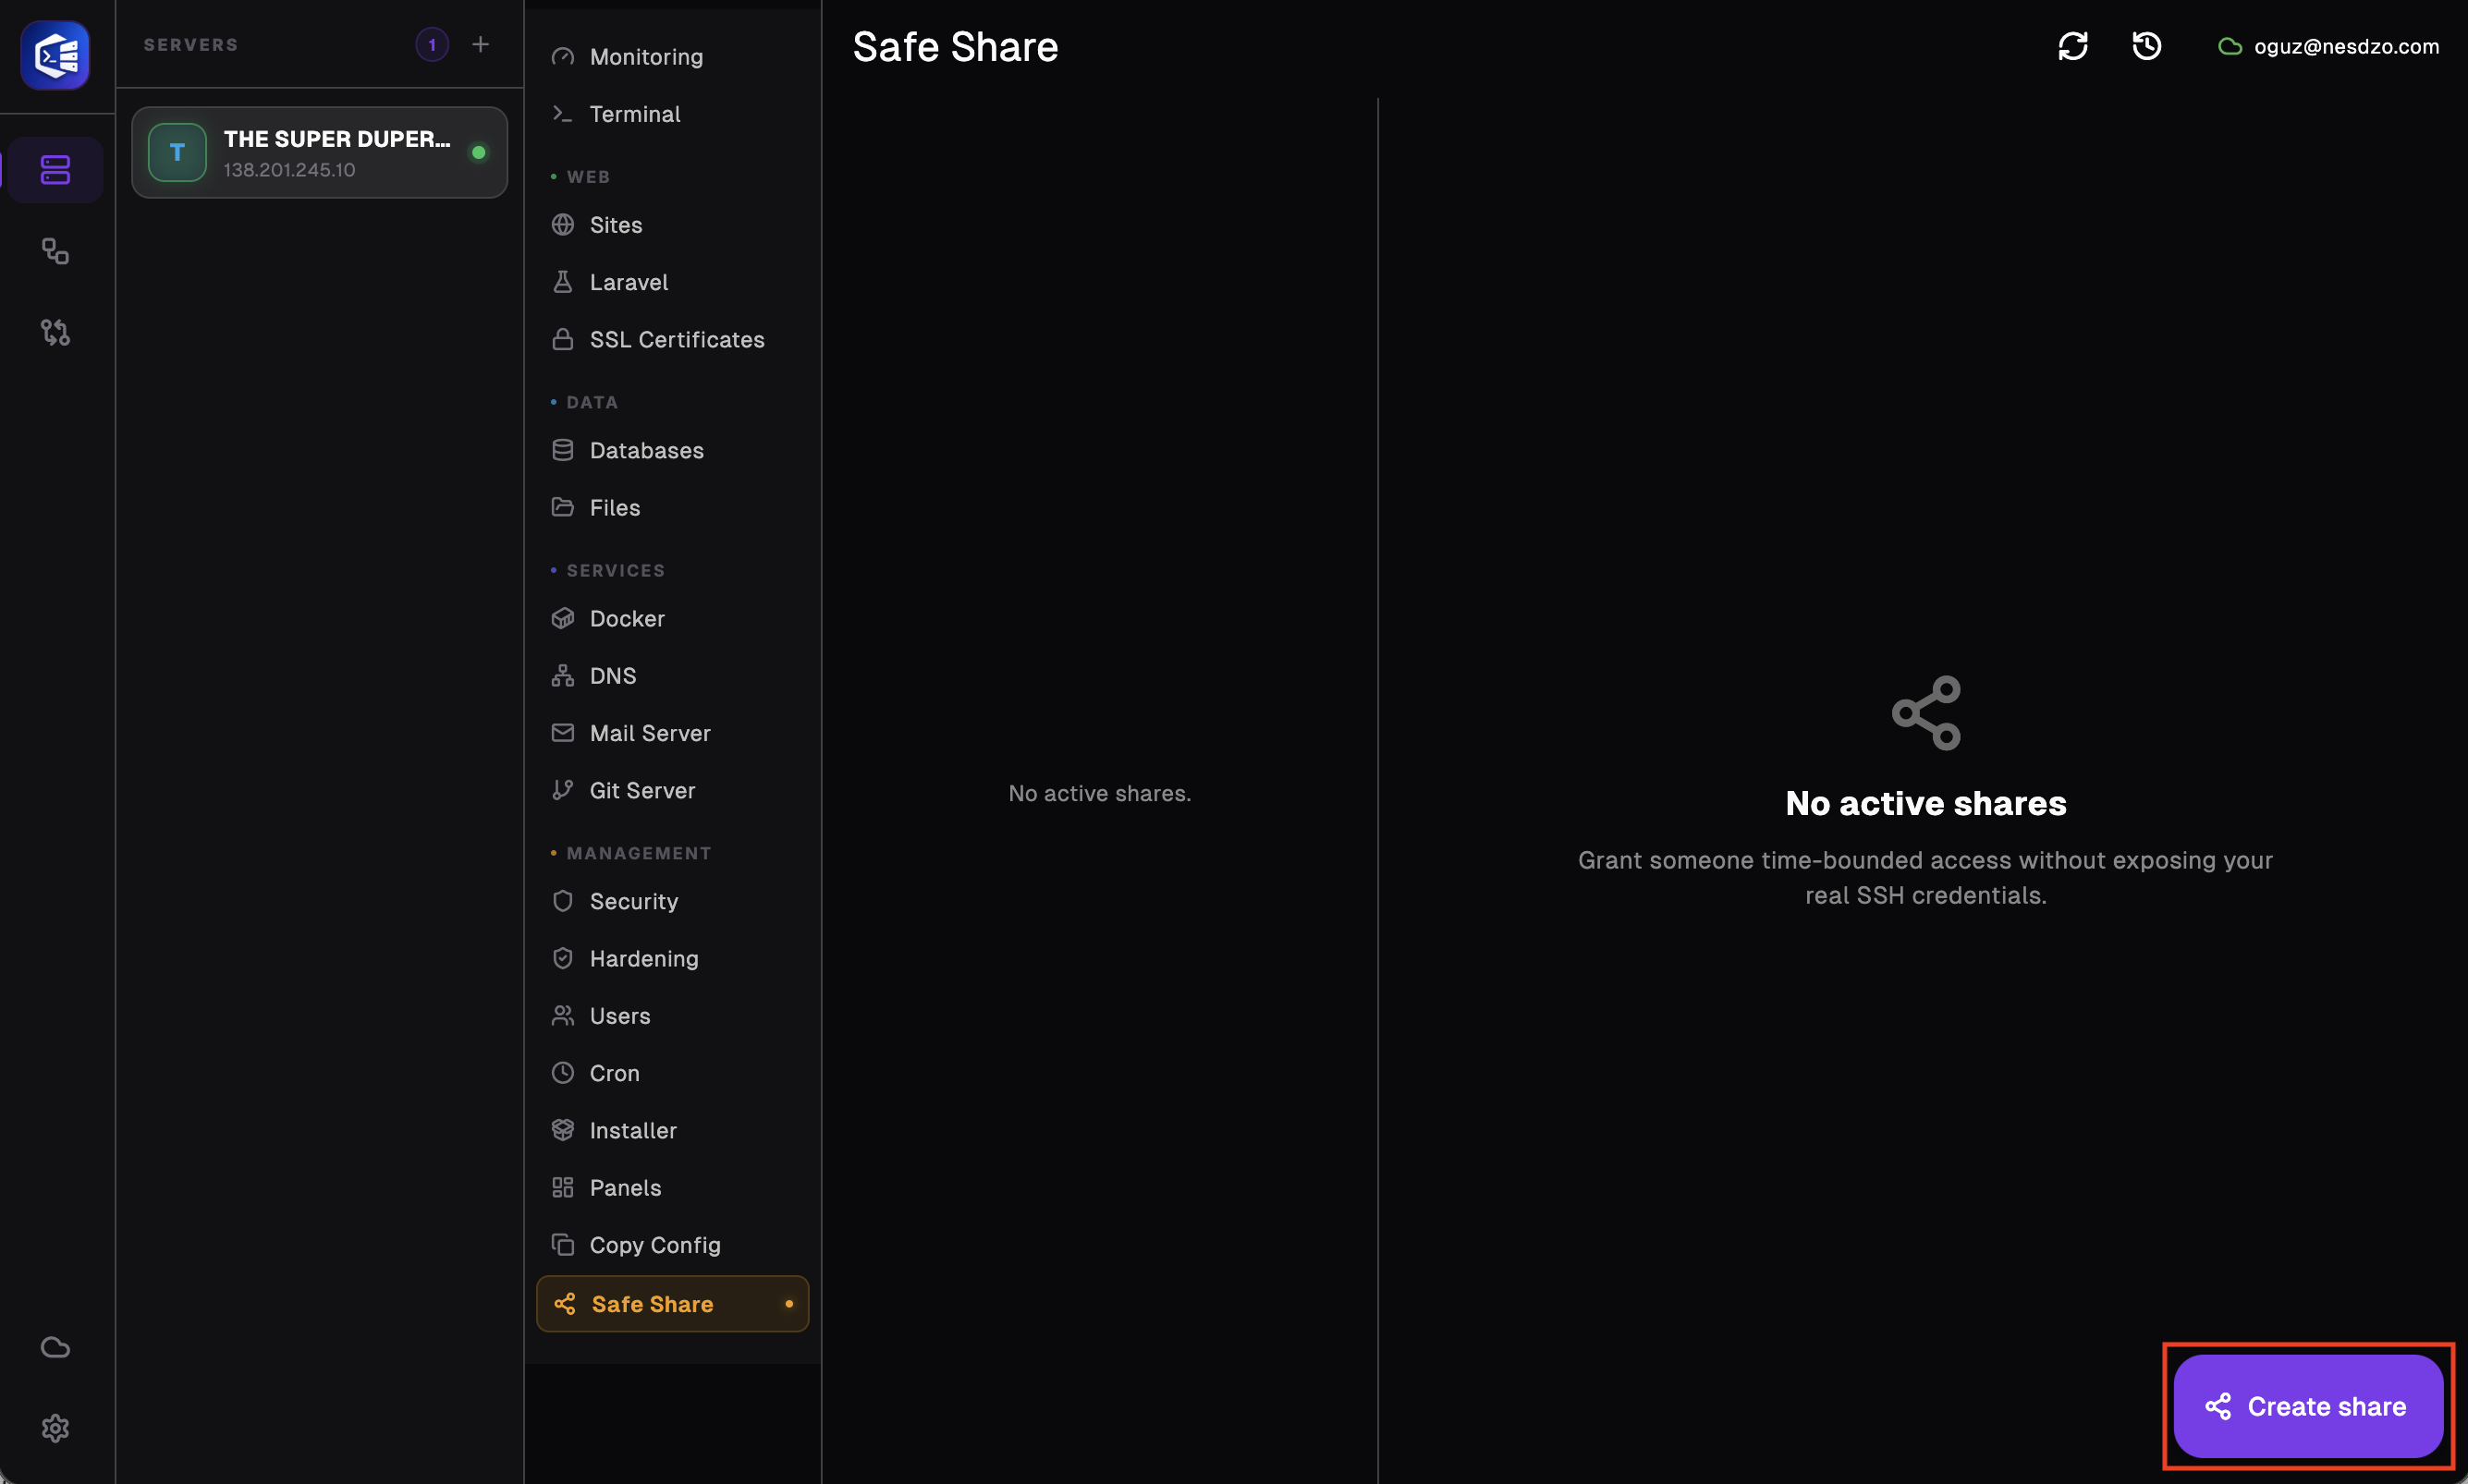
Please click the ‘Create Share’ button at the bottom right of your screen.
-
Web Terminal mode and Setting up
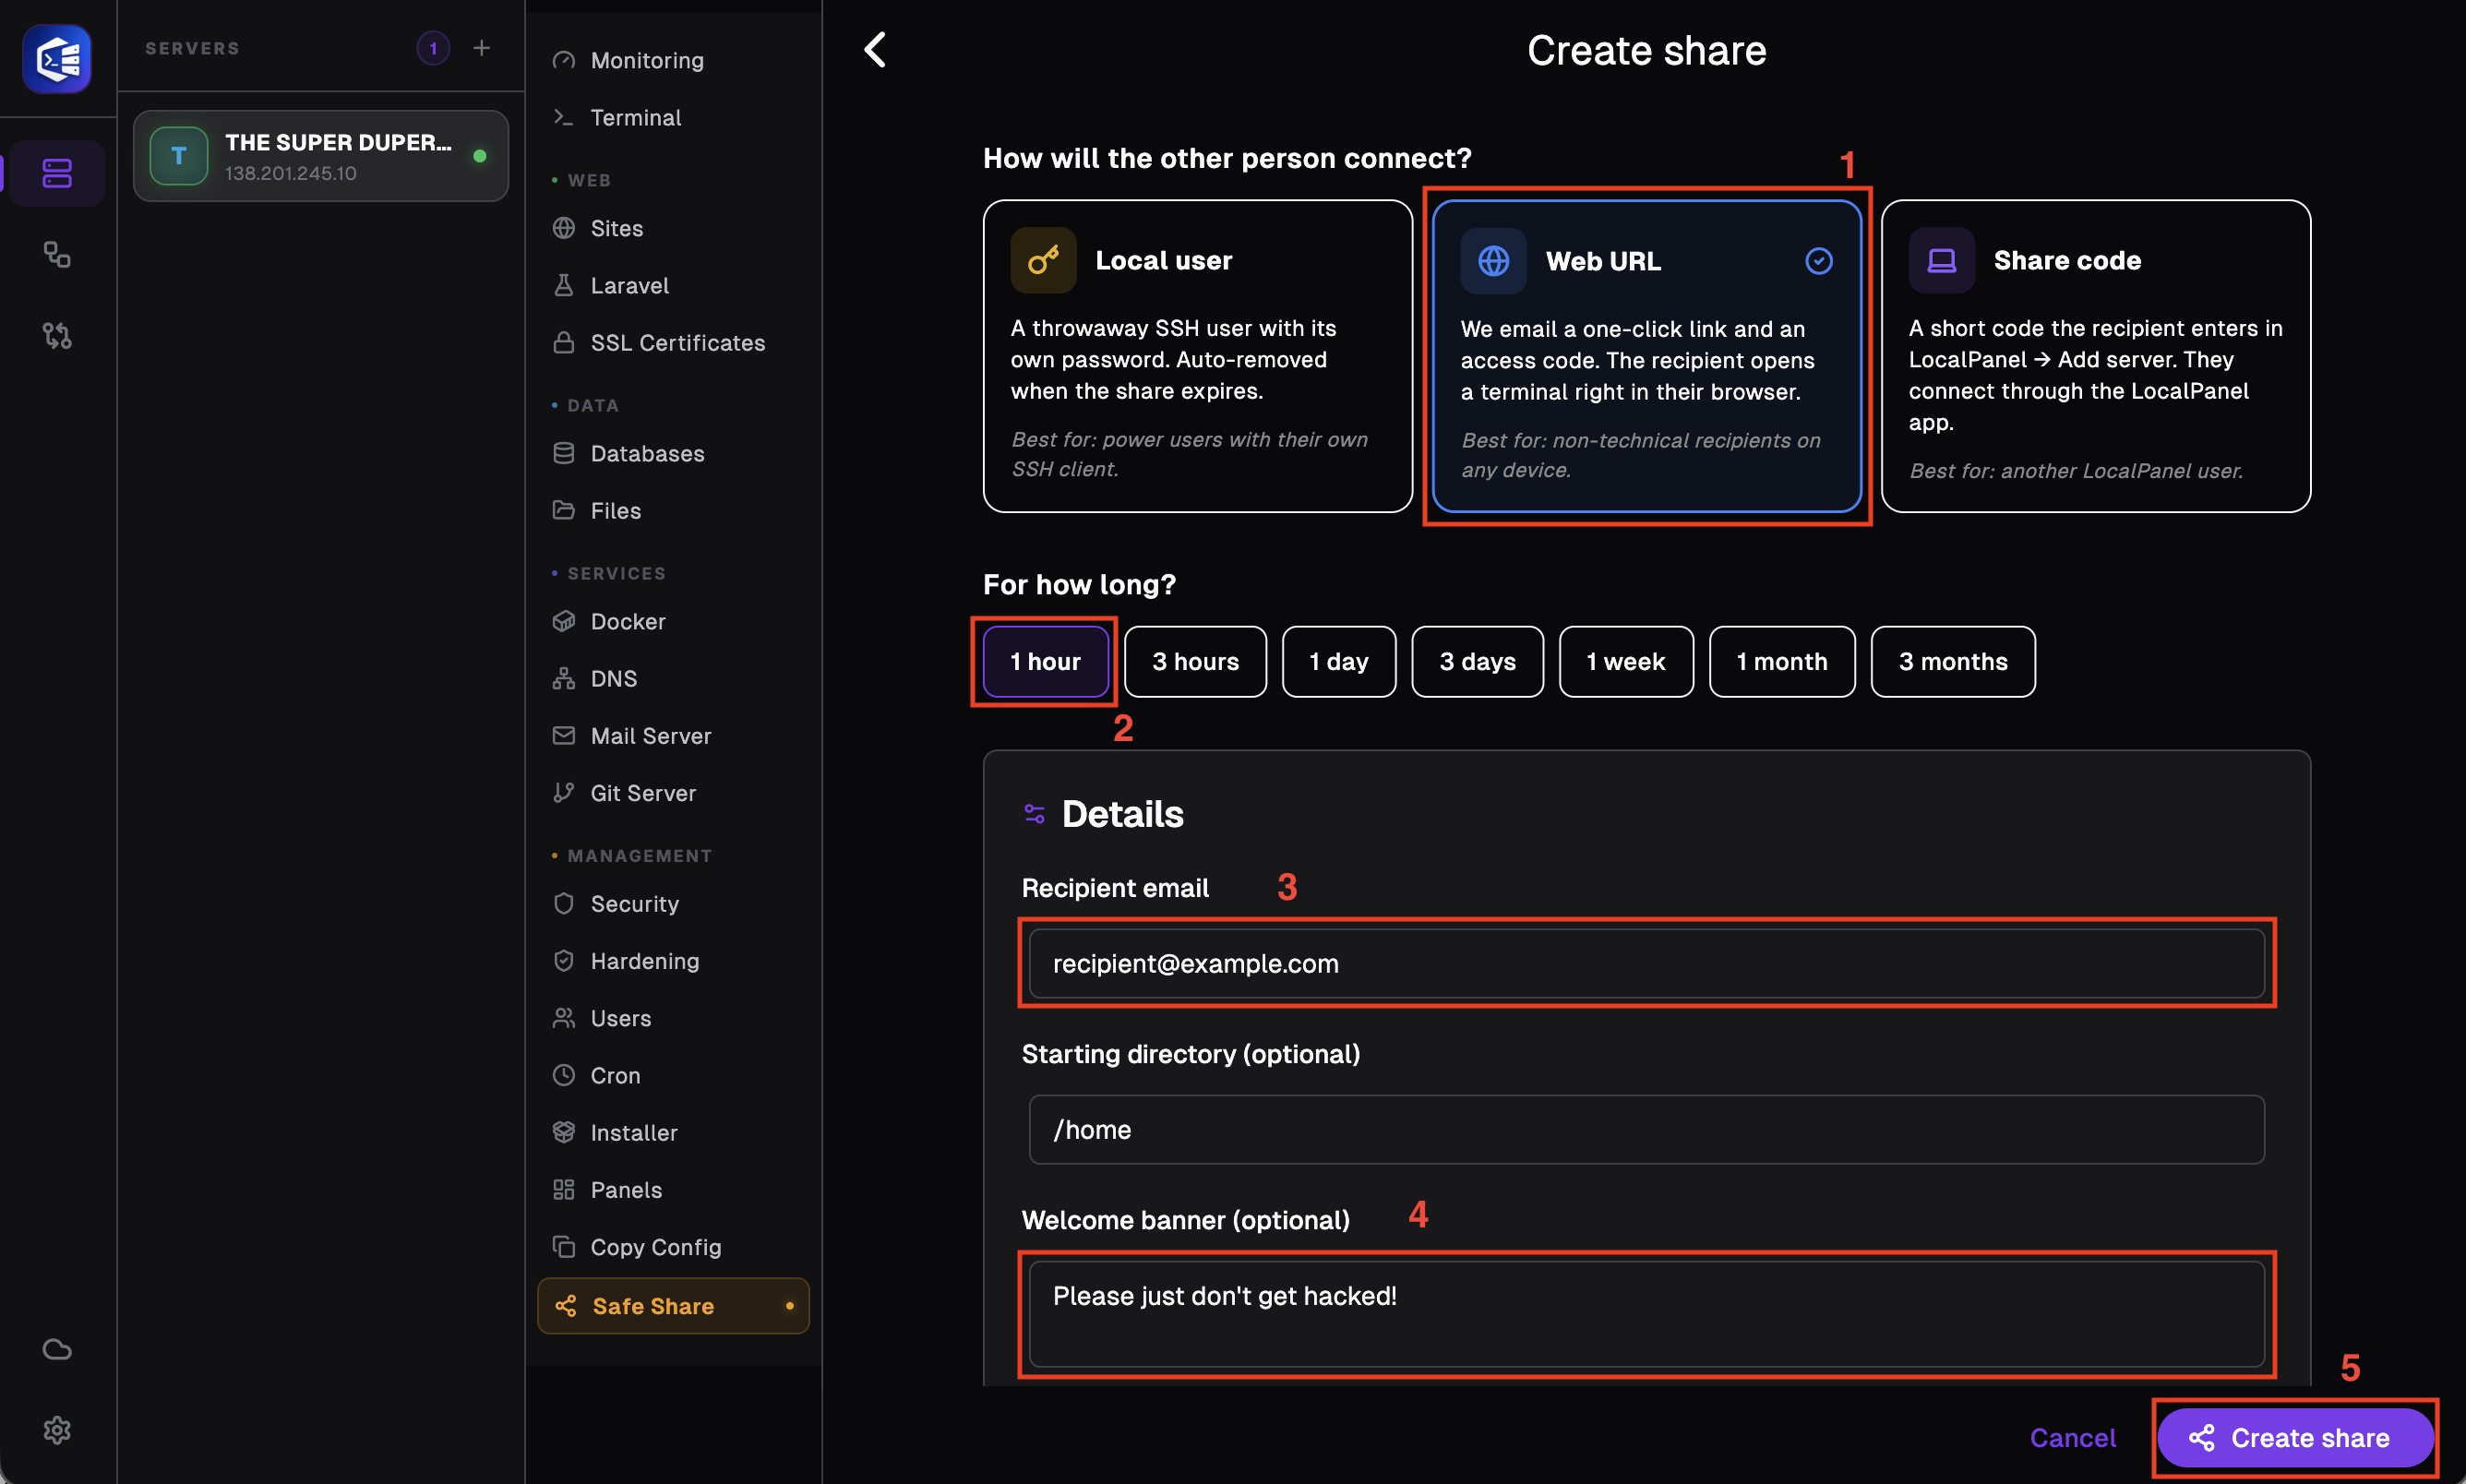
Select the ‘Web URL’ mode; the default 1-hour option is sufficient for us at the moment. Then enter the recipient’s email address and, if you wish, add a message to be displayed to the recipient every time they connect to the server. Once you have completed all these steps, click the ‘Create Share’ button at the bottom right of your screen.
-
Successful Share
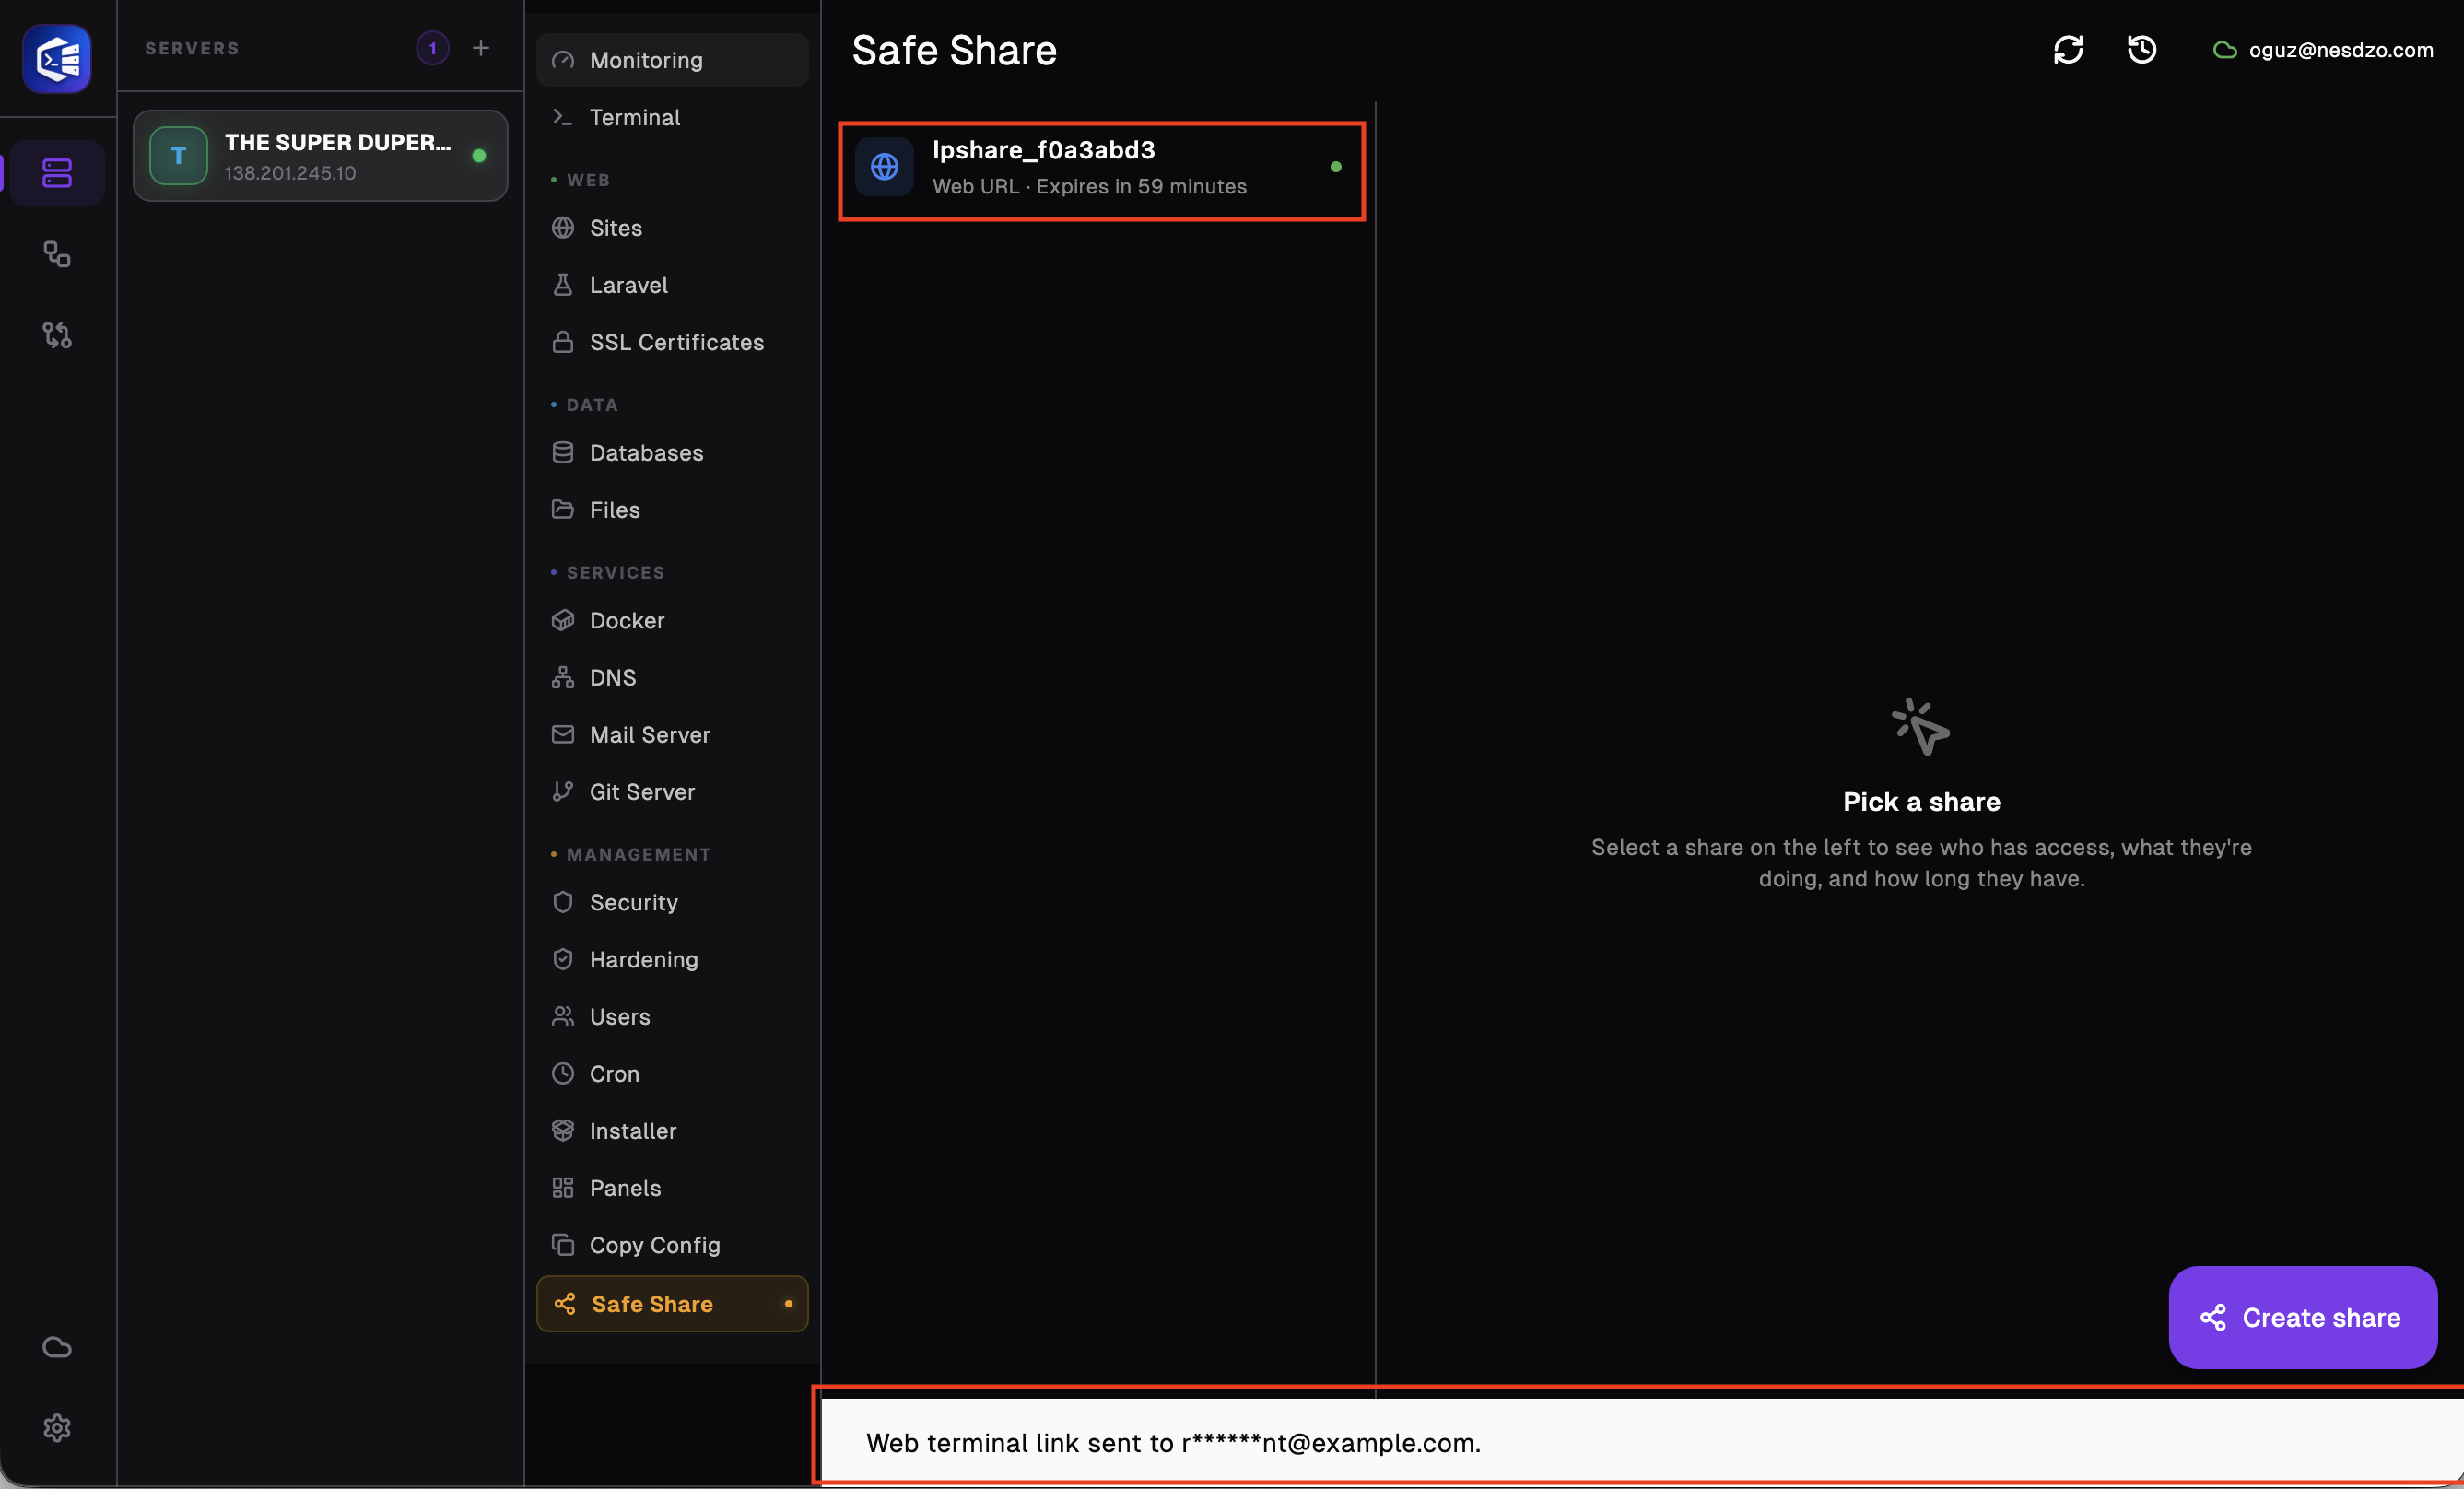
If the share is successful, you should receive a notification and see a user on the screen.
-
Recipient Email
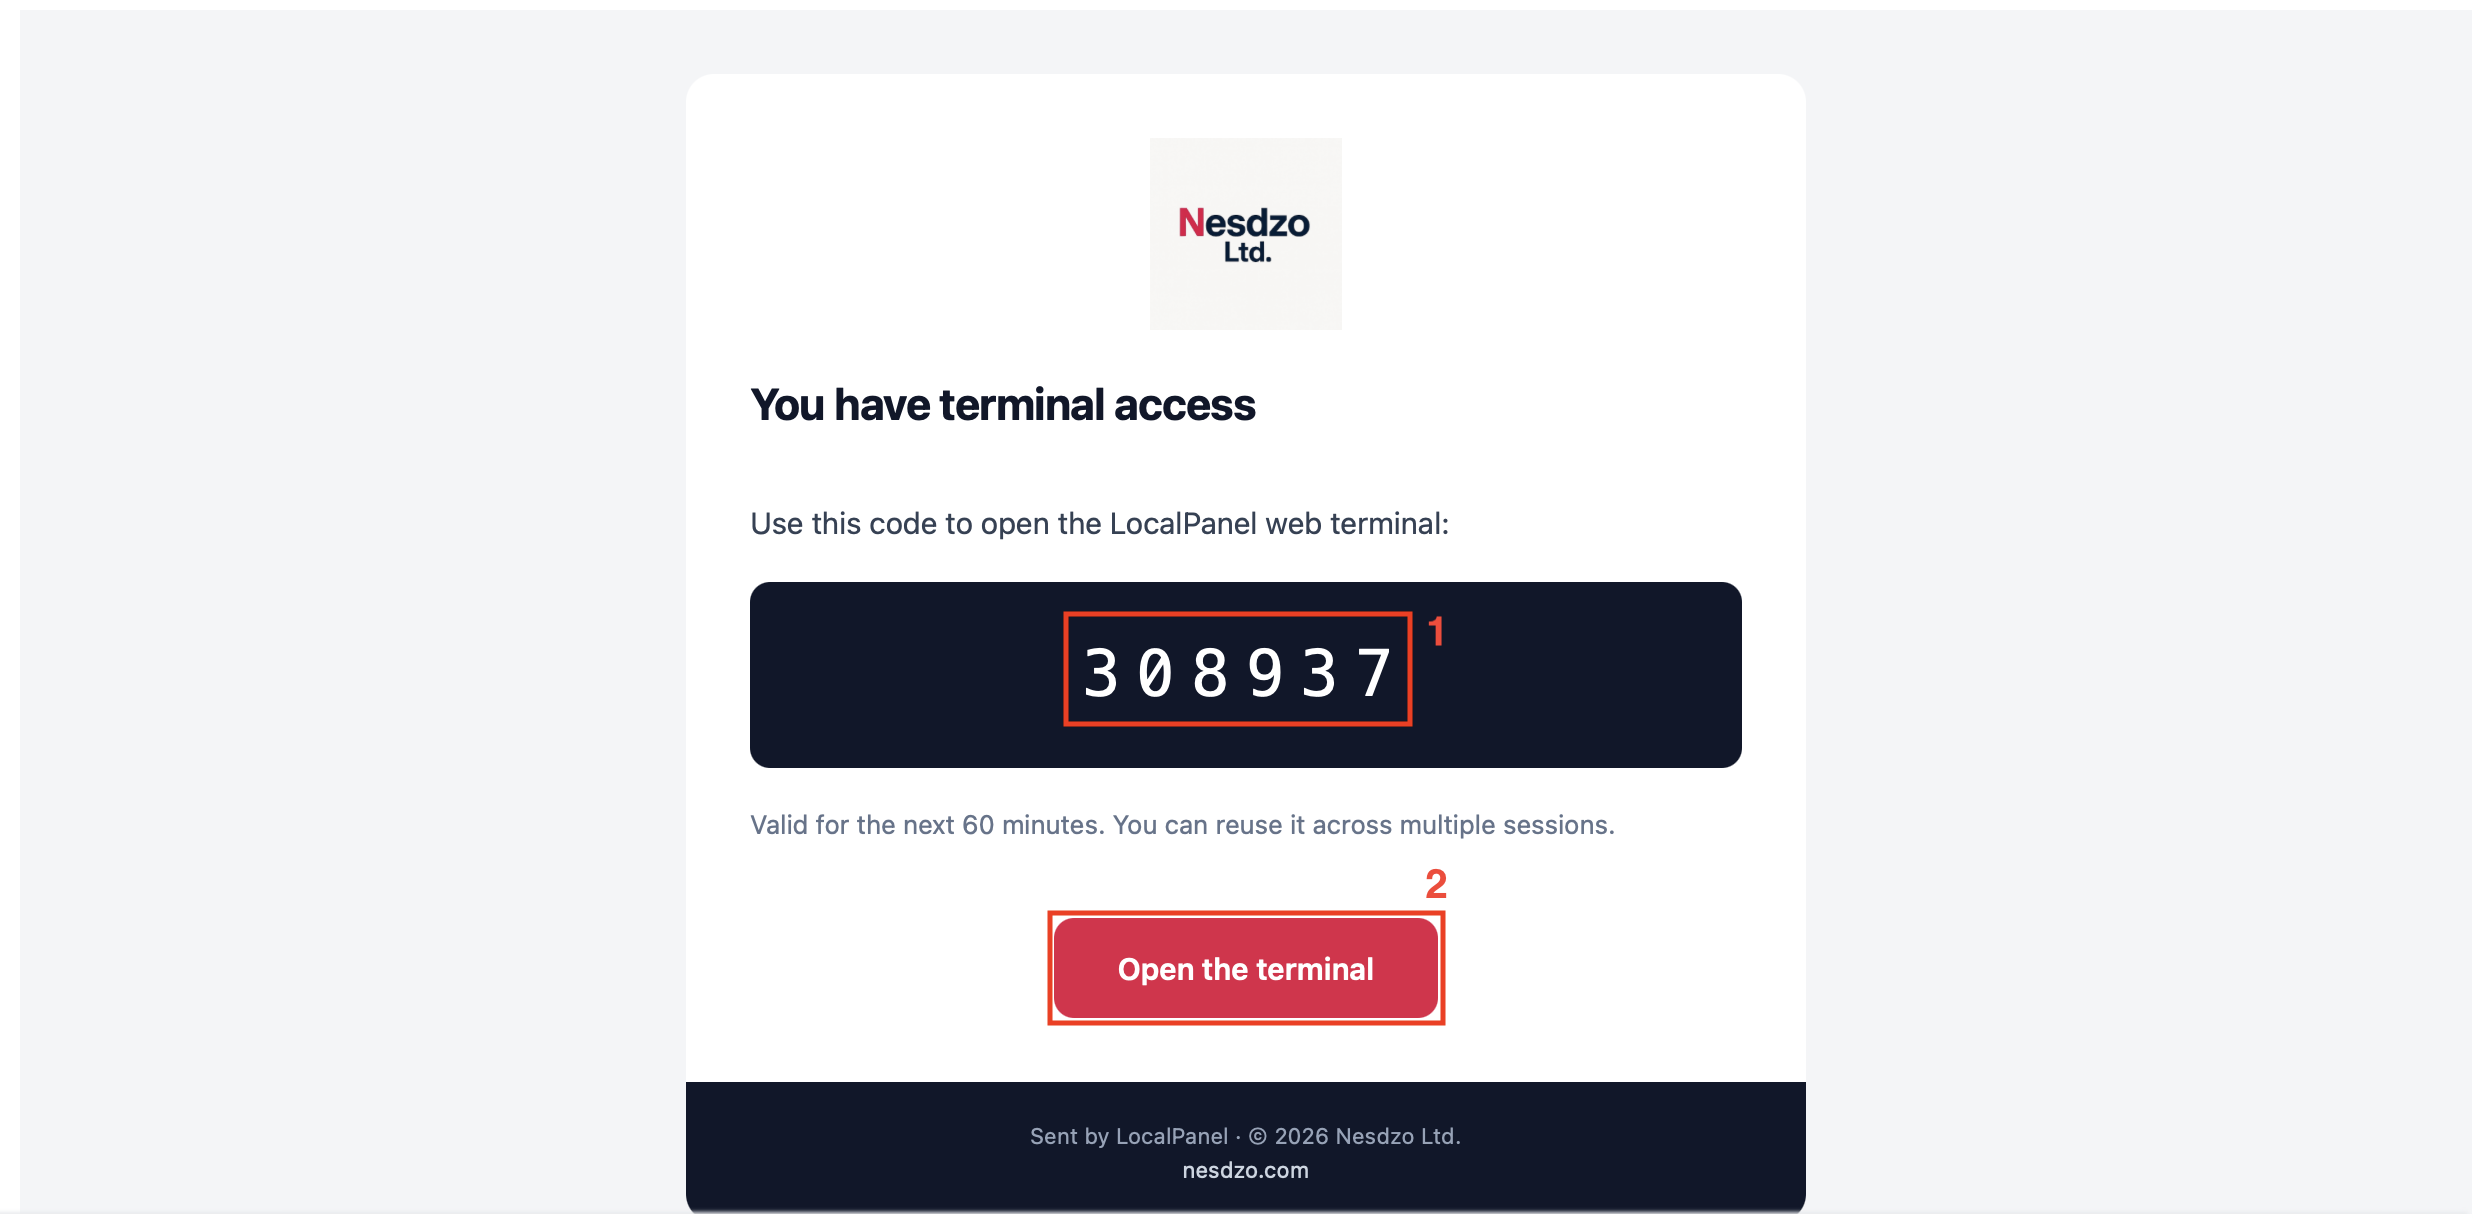
The recipient should receive an email similar to the one shown in the image. Once the recipient has copied the code, they should click the ‘Open the terminal’ button below.
-
Connect to web terminal
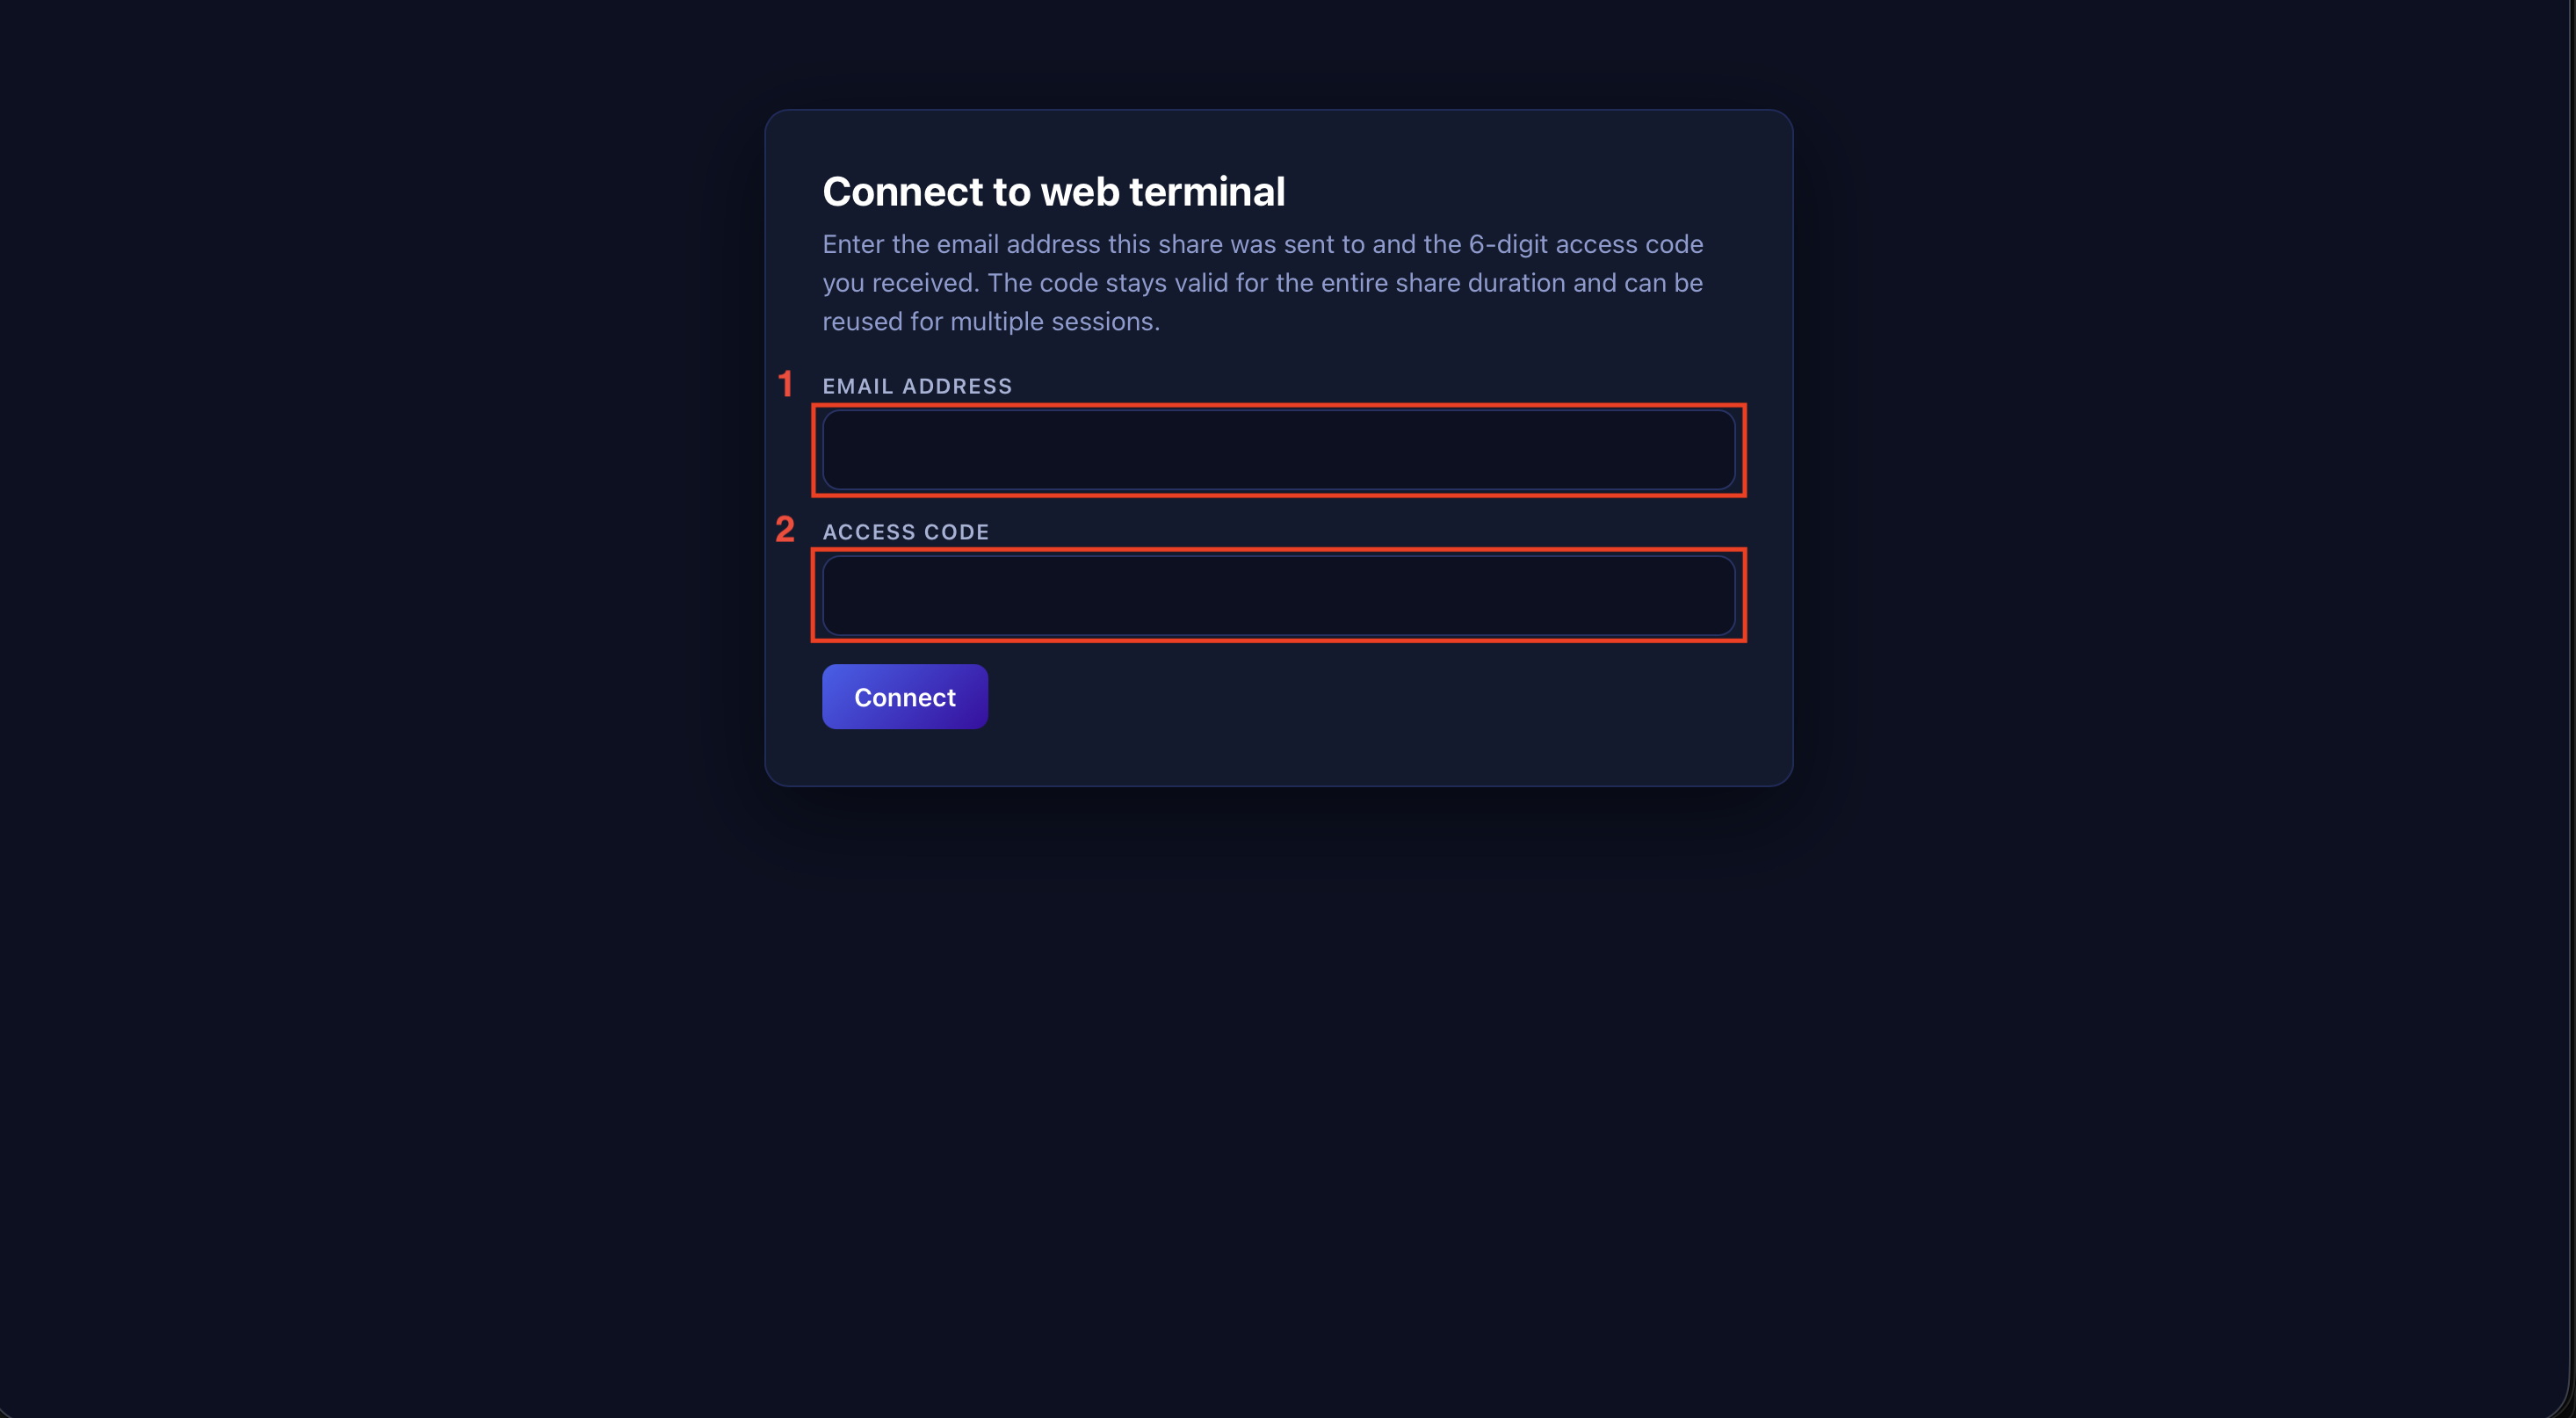
Your recipient should enter their email address in field 1, paste the code sent to their email address by Nesdzo (which they copied in the previous step) into field 2, and then click the Connect button
-
Successful connect and web terminal screen
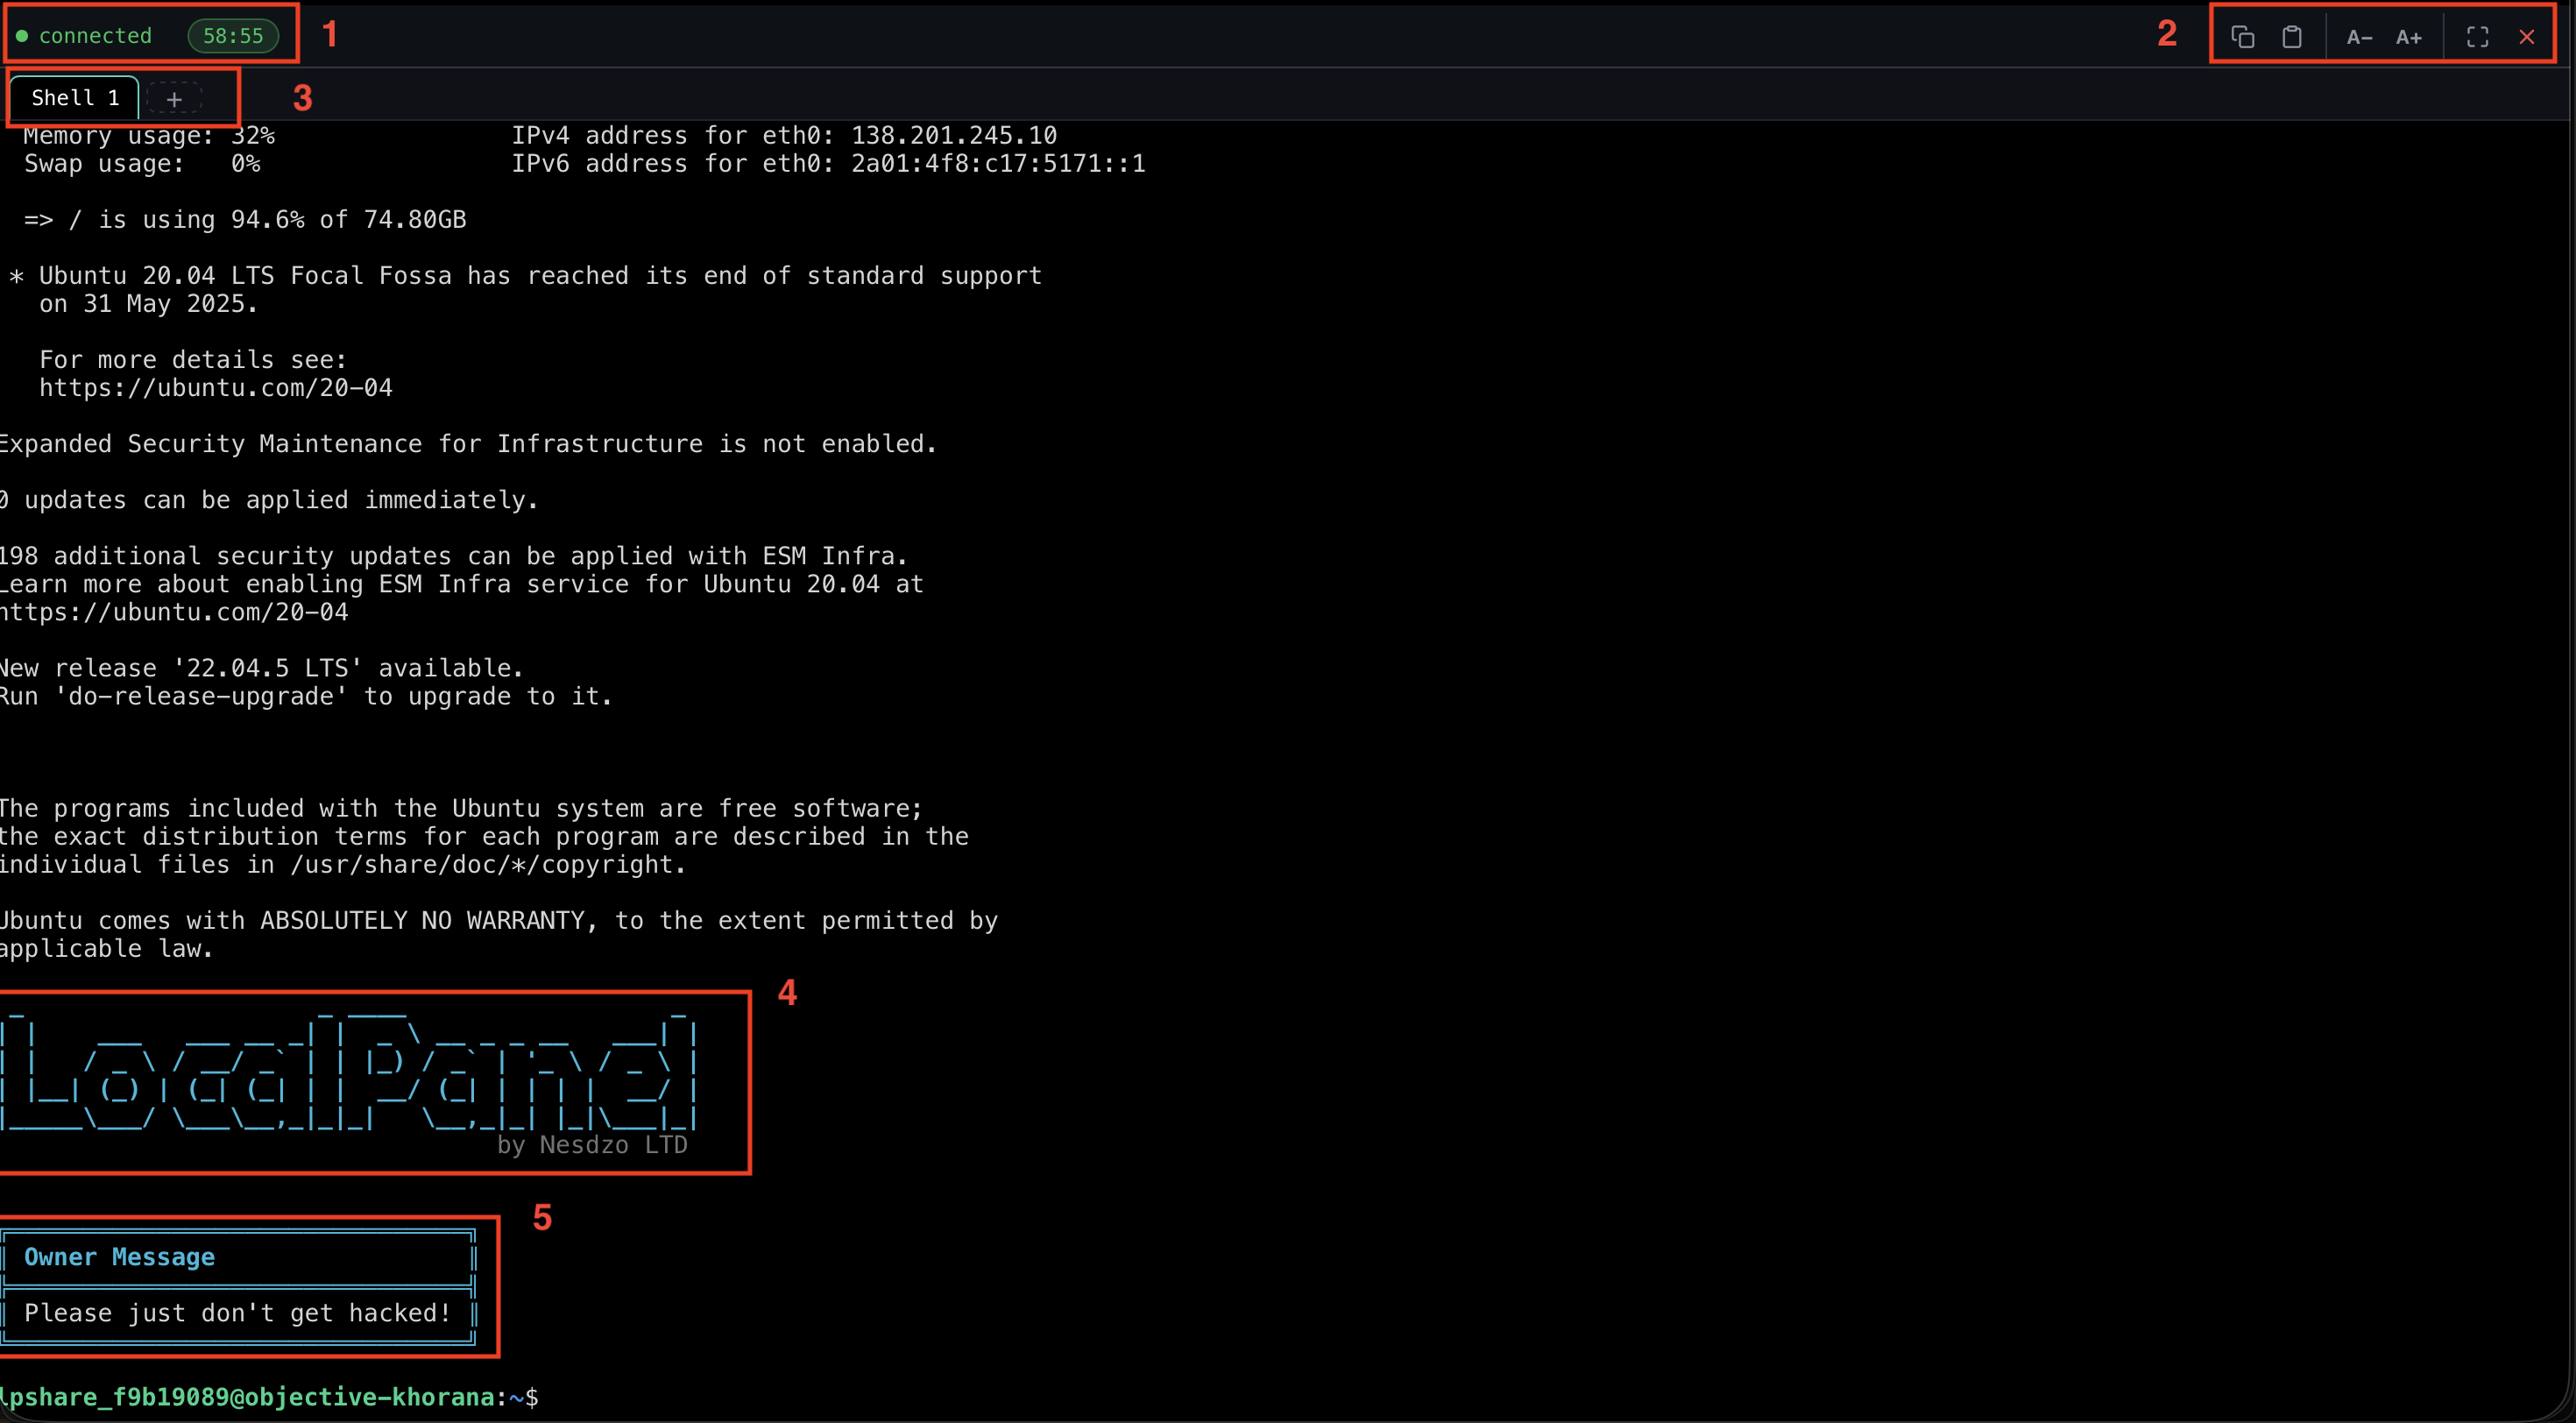
Once the connection is successful, you should see this screen.
Number 1: These are the UI elements showing the connection status and remaining time.
Number 2: This section contains various functions, in order: copy, paste, reduce font size, increase font size, full screen and disconnect.
Number 3: These are the shell tabs. A maximum of 4 shells are permitted per connection. You can organise your tasks into tabs, switch between tabs and close any tabs you no longer require.
Number 4: This is the Local Panel logo displayed on the terminal screen by the server upon logging in.
Number 5: This is the note you wish to send to the person you are sharing with when setting up a safe share. -
Revoke user and Kill session
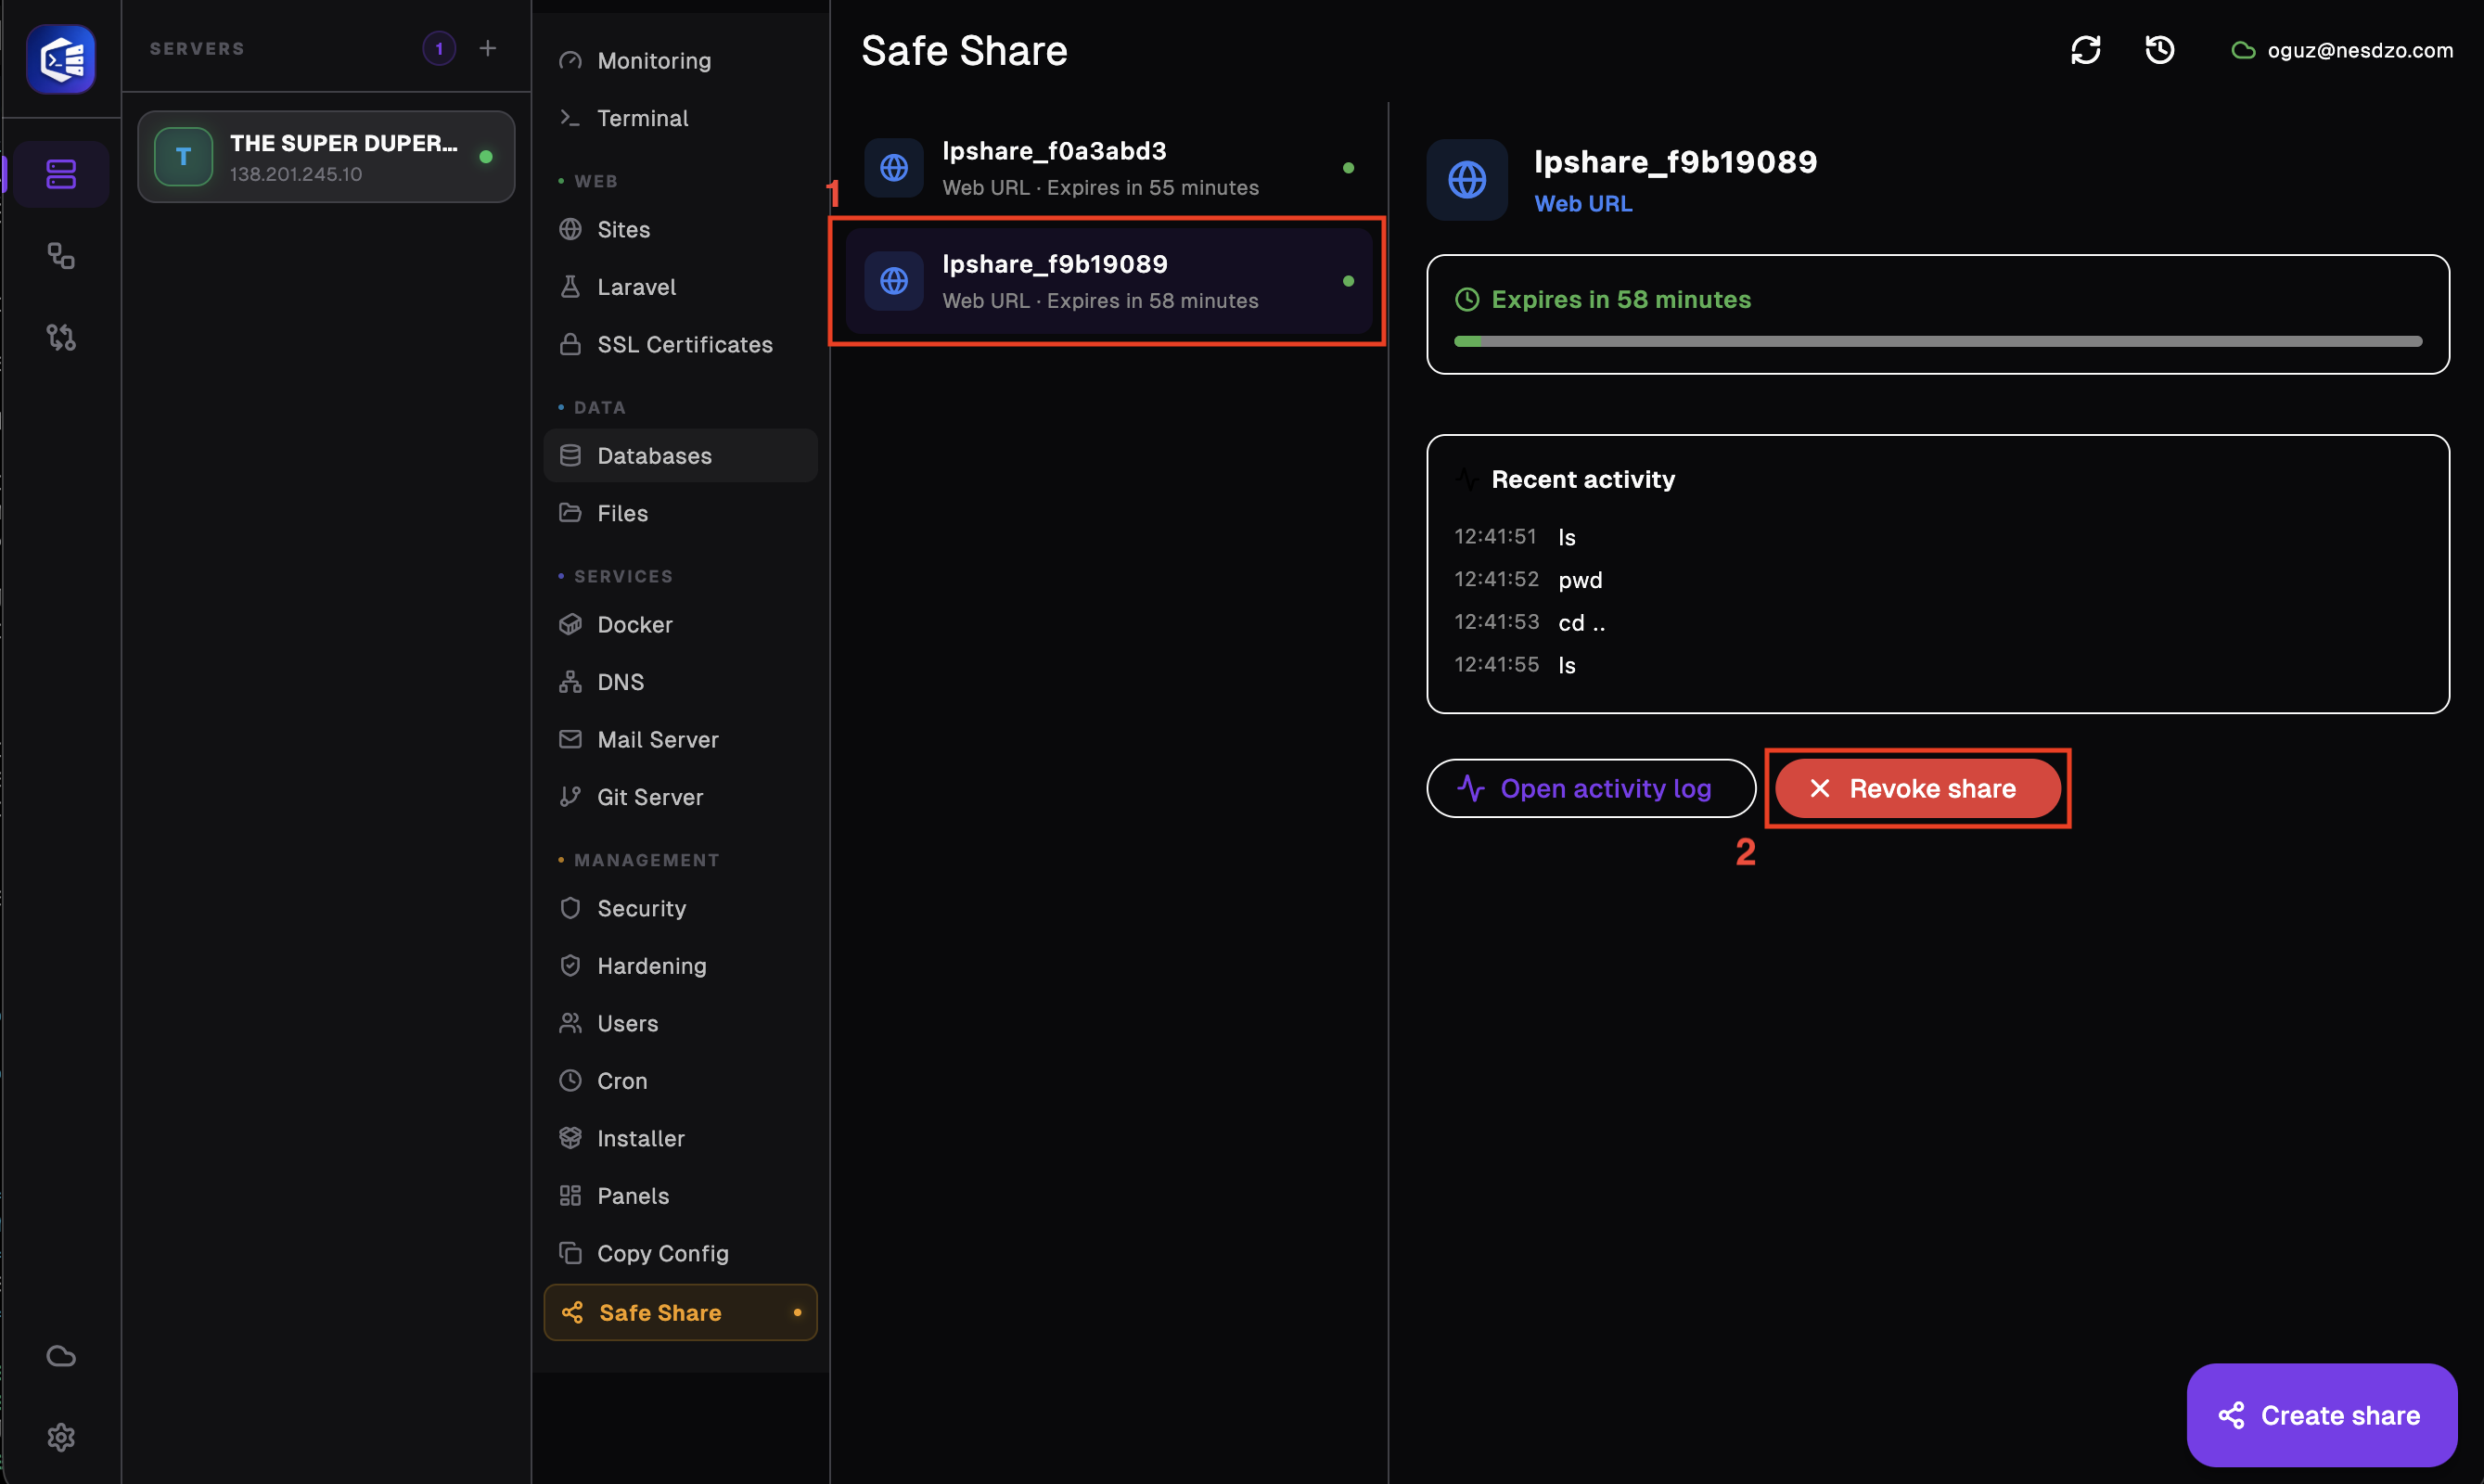
To delete a user and terminate all connections yourself before the expiry date, first select the user you wish to remove, then click the ‘Revoke share’ button. This action will immediately and automatically disconnect any users linked to this user from your server; this action cannot be undone.
-
Successful revoke and web terminal screen
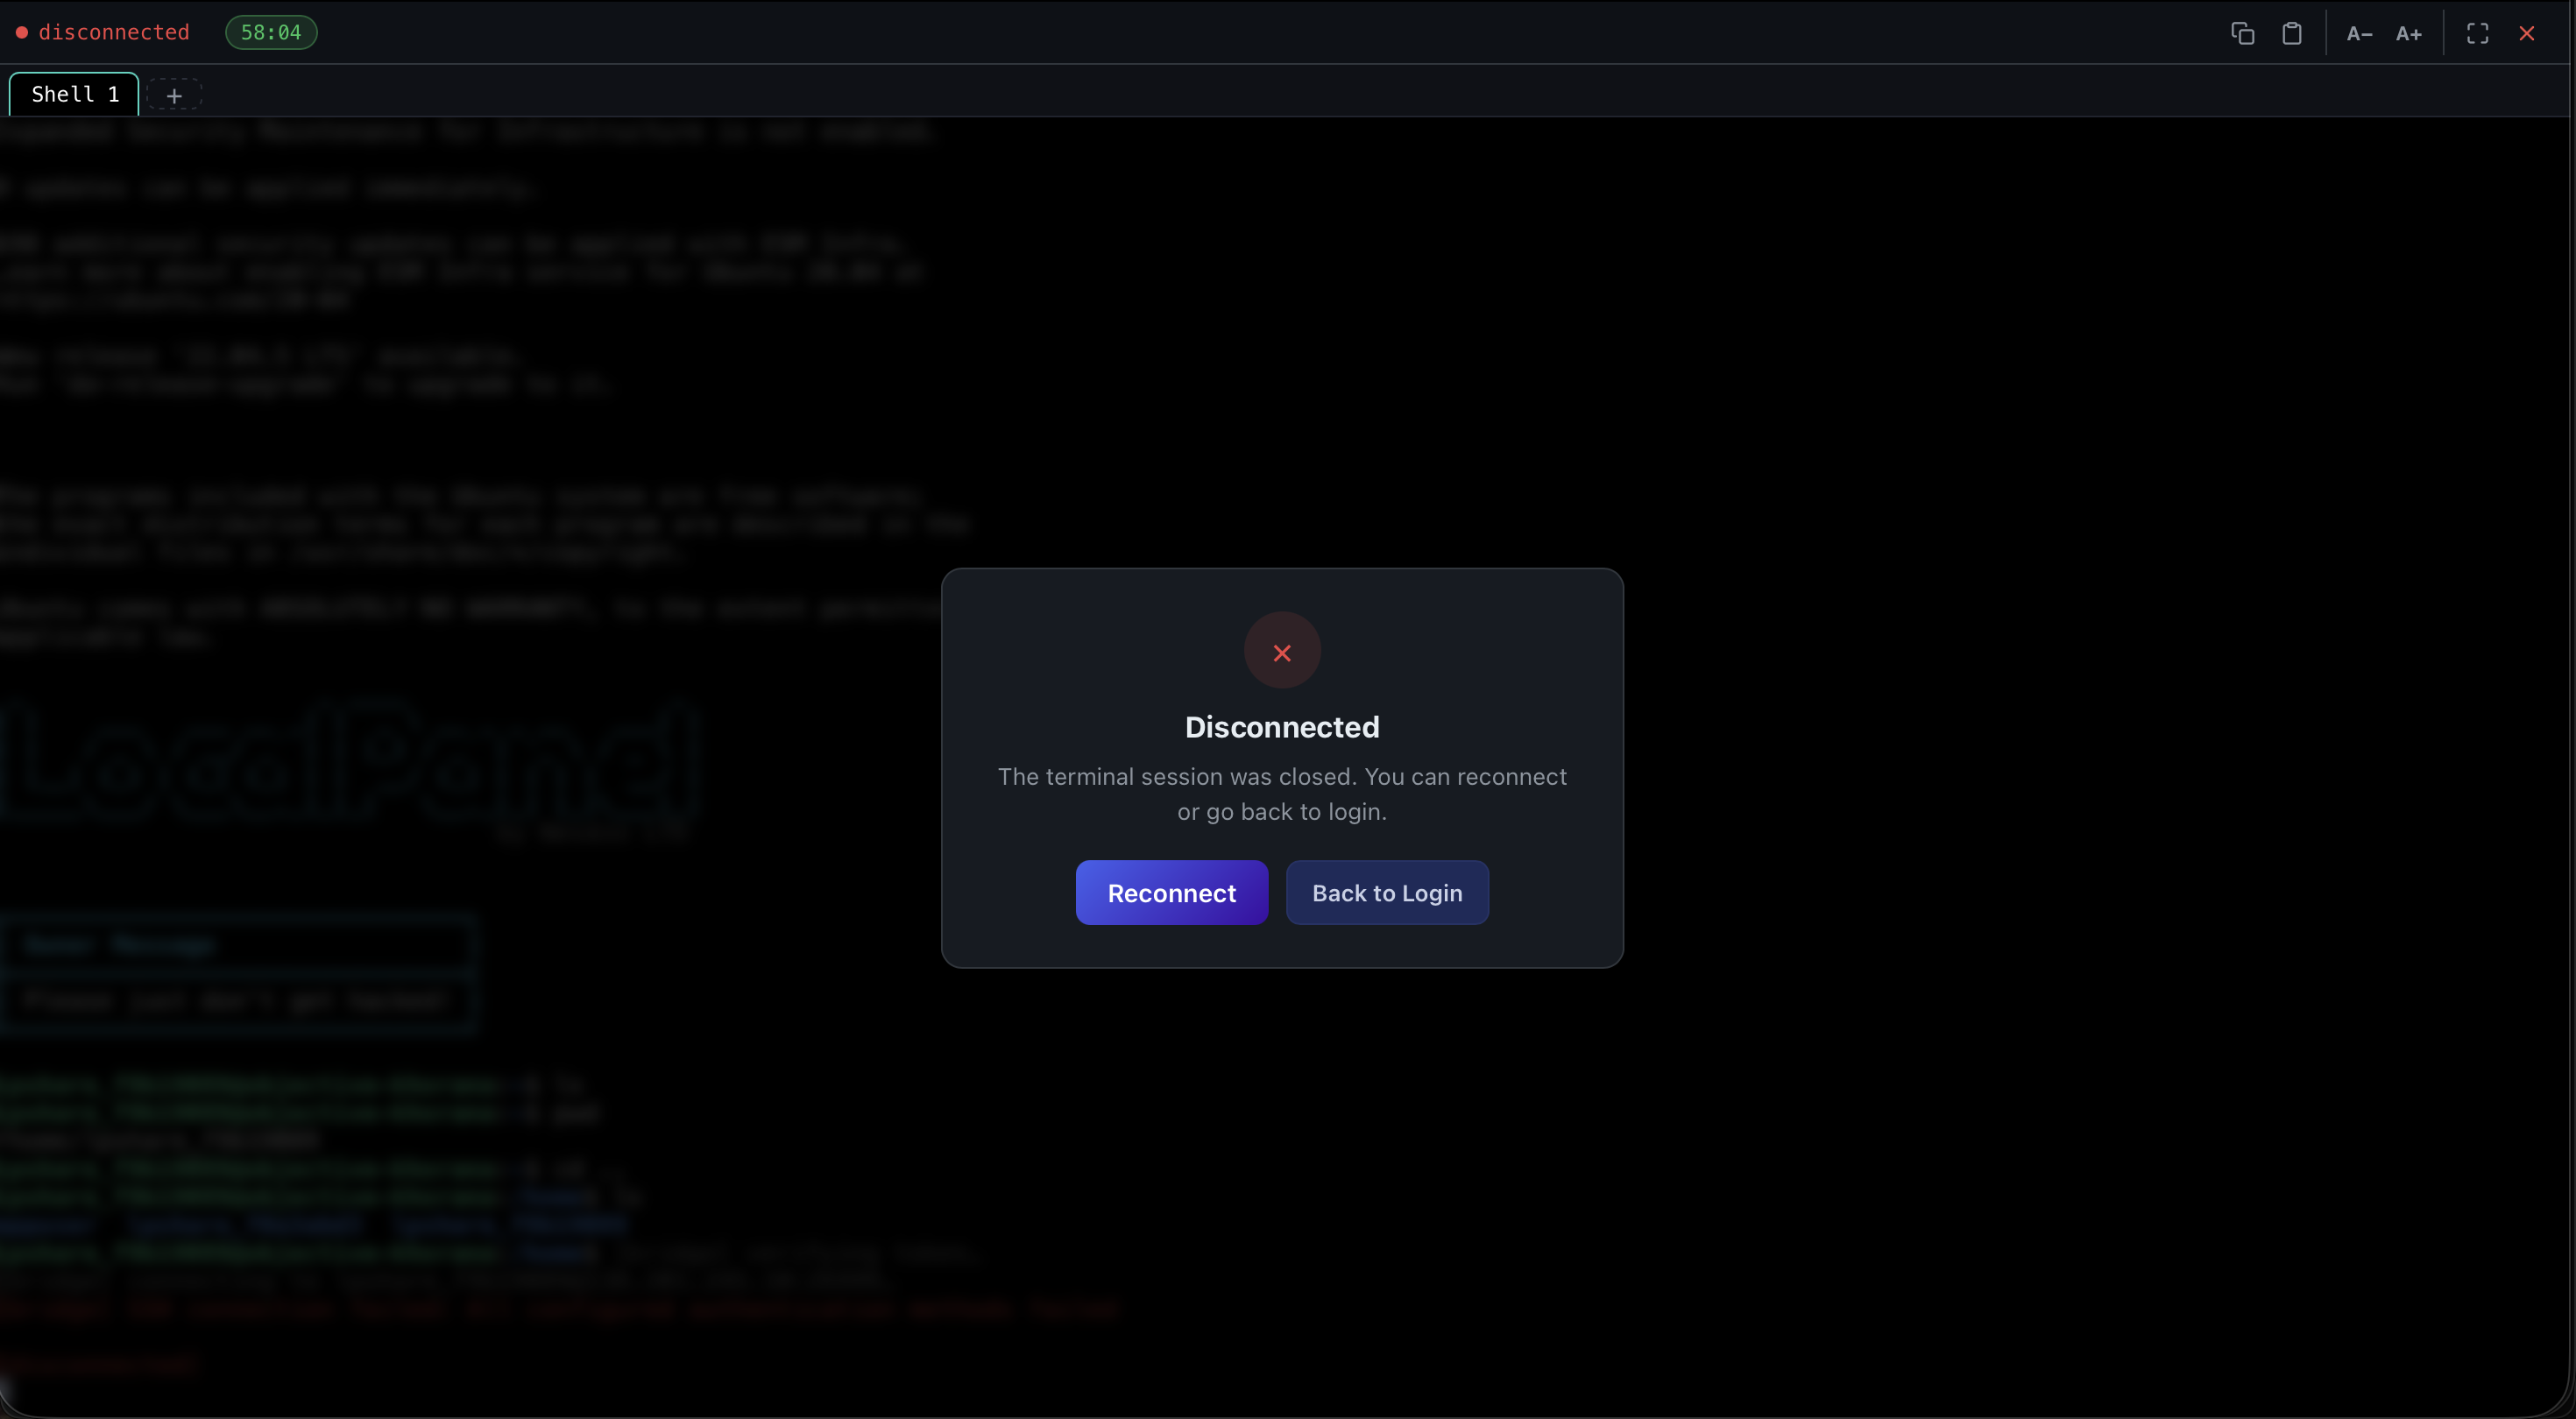
As you can see in the image, once you have successfully deleted a user, their connection is immediately terminated, regardless of how much time remains (in the example image, there are still 58 minutes left).
Still stuck? Email contact@nesdzo.co.uk — we're happy to help.