 Local Panel by Nesdzo
Add Server Screen
Let’s talk a bit about the server addition screen; we added a server together in the previous sections, so you may already be familiar with this.
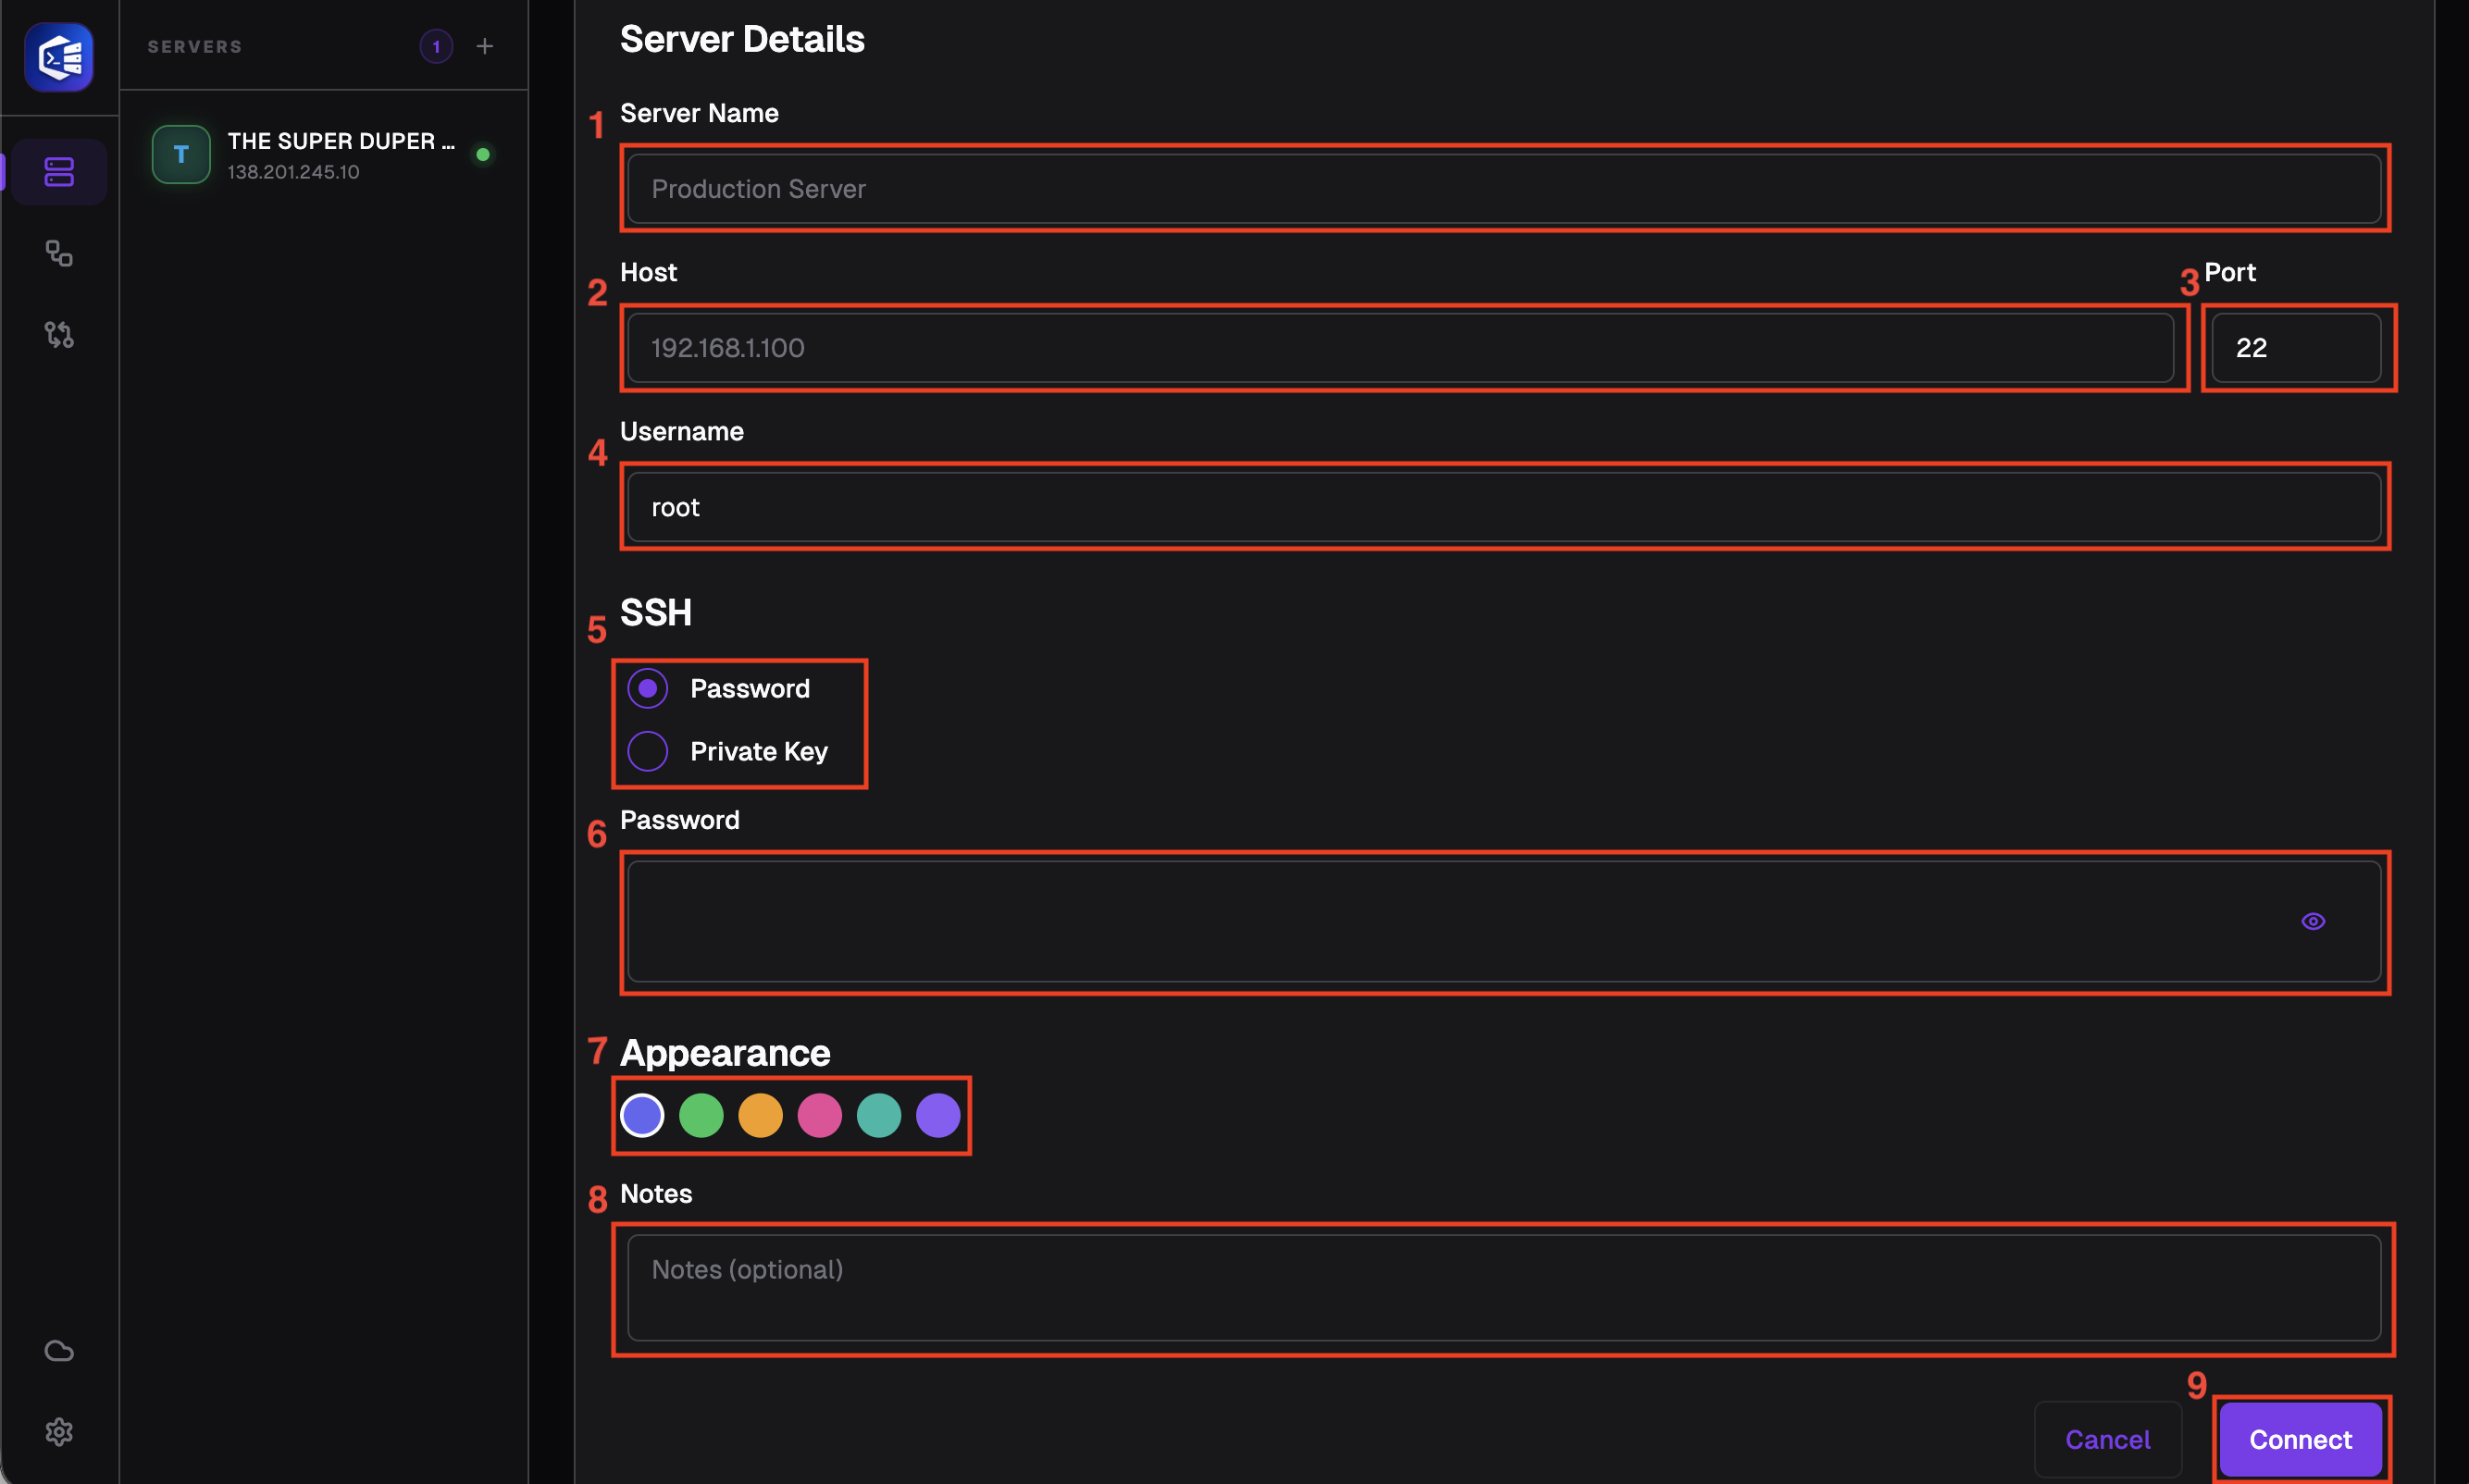
This is the screen where we need to enter information about our server in order to establish a connection.
Number 1: The name of the server we will display in the list in the Local Panel; if you are going to add a large number of servers, it would be in your best interest to enter names that make sense to you here.
Number 2: The IP address or the domain name pointing to that IP address, required to connect to your server.
Number 3: As the port on which SSH is active on your server is 22 by default, 22 is selected here by default as well.
Number 4: Your SSH username.
Number 5: You must select an authentication method to connect to your server.
Number 6: You will need to enter your password depending on the login method you have selected; as ‘password’ is currently selected, please enter your password in plain text.
Number 7: You can select the colour in which your server will be displayed in the Local Panel.
Number 8: A note field for this server that only you can see
Number 9: You need to click the button to test the connection and save it to the local panel.
Authentication method with Private Key
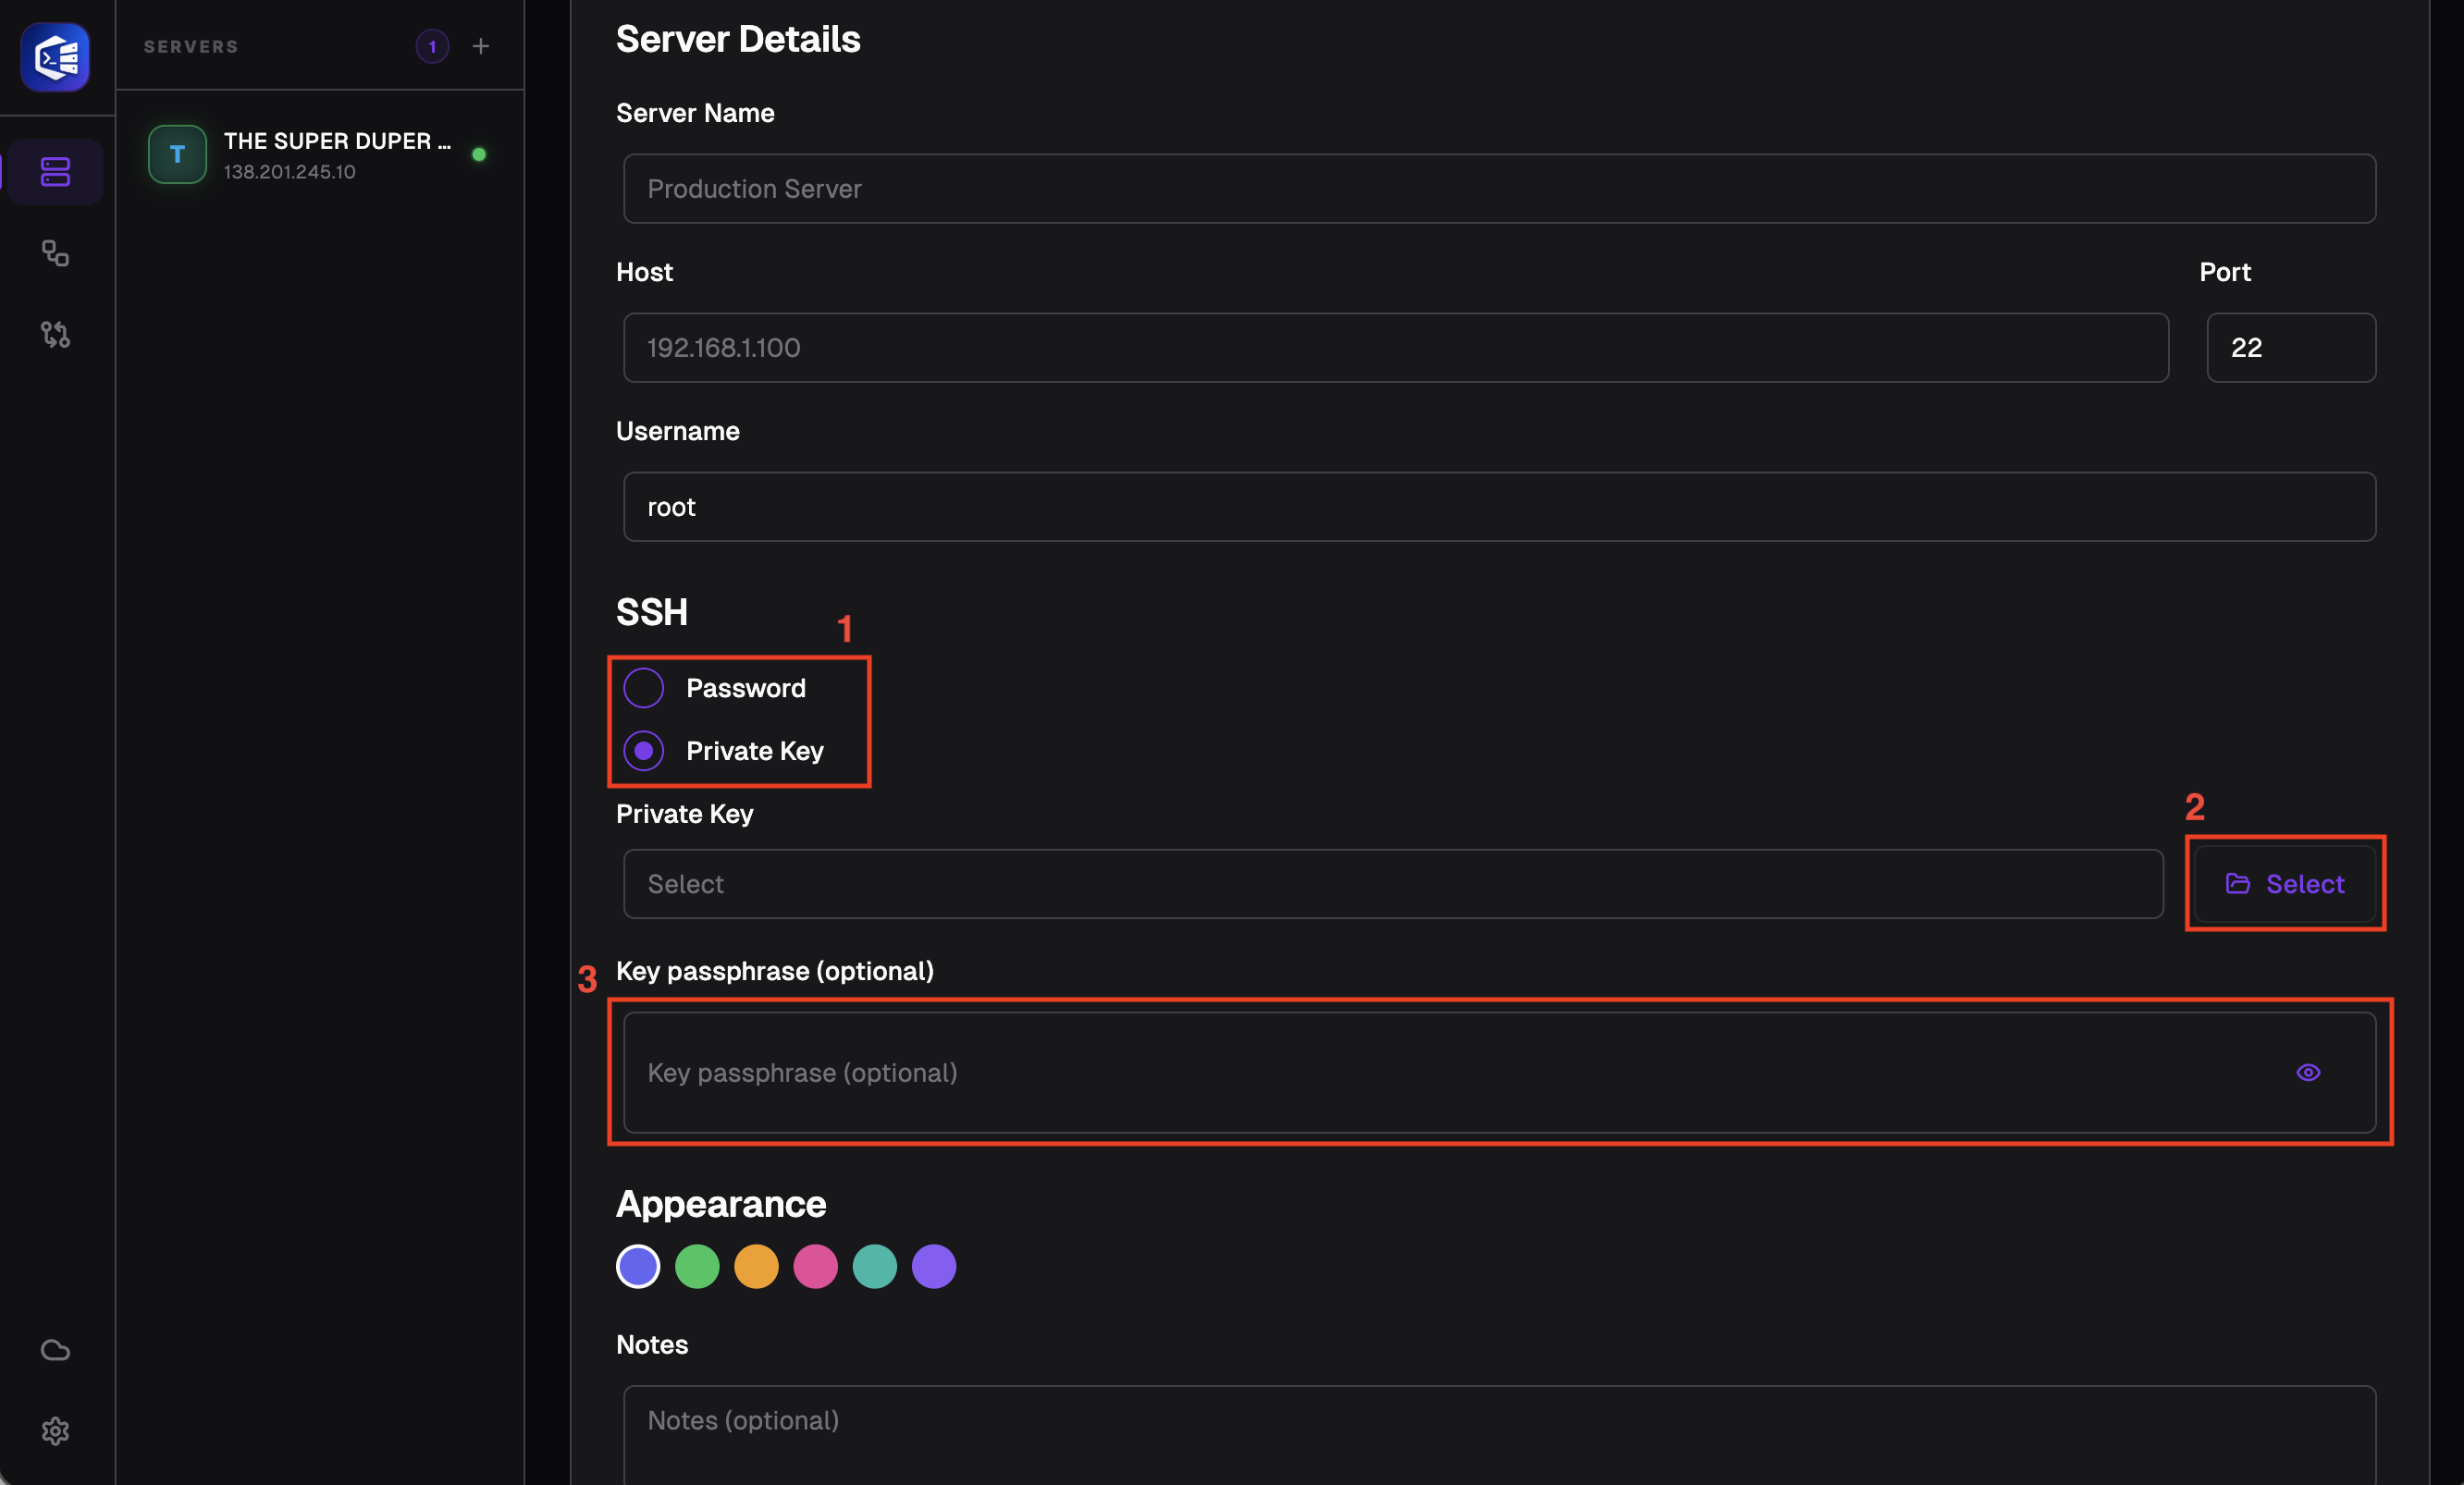
If you select ‘Private Key’ as the authentication method, the following fields will appear; let’s explain these fields.
Number 1: This is how it appears when the “Private Key” authentication method is selected.
Number 2: You can use this button to select your private key file.
Number 3: If you have a key passphrase, you can fill in this field; otherwise, leave it blank.
The remaining areas are as described above.
Still stuck? Email contact@nesdzo.co.uk — we're happy to help.